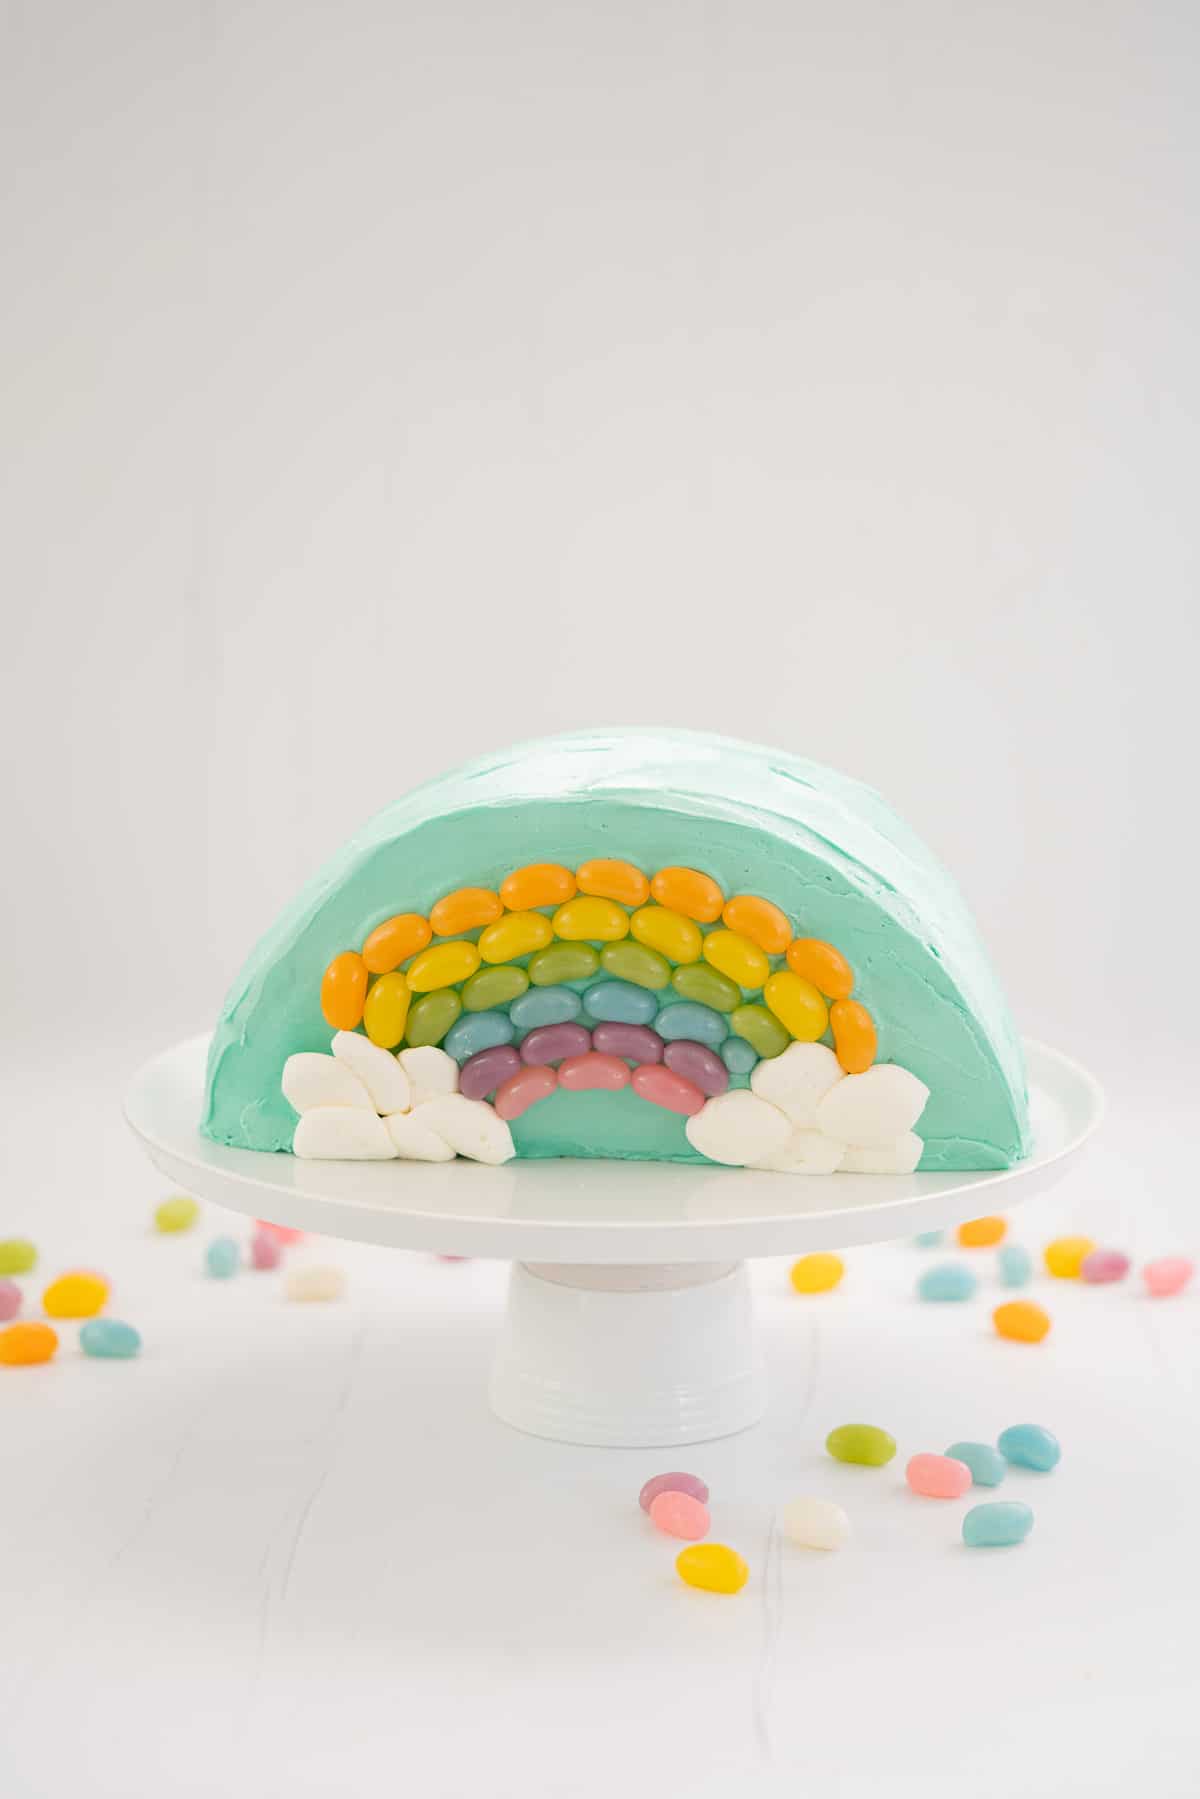
Rainbow Cake
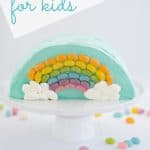
I absolutely love making birthday cakes for my kids, this rainbow cake is easy to make, looks great and was loved by my kids!

Why This Recipe Works
- Easy! No tricky steps or intricate decorating techniques needed.
- Bright and Colourful!
- Loaded with magic and fun!
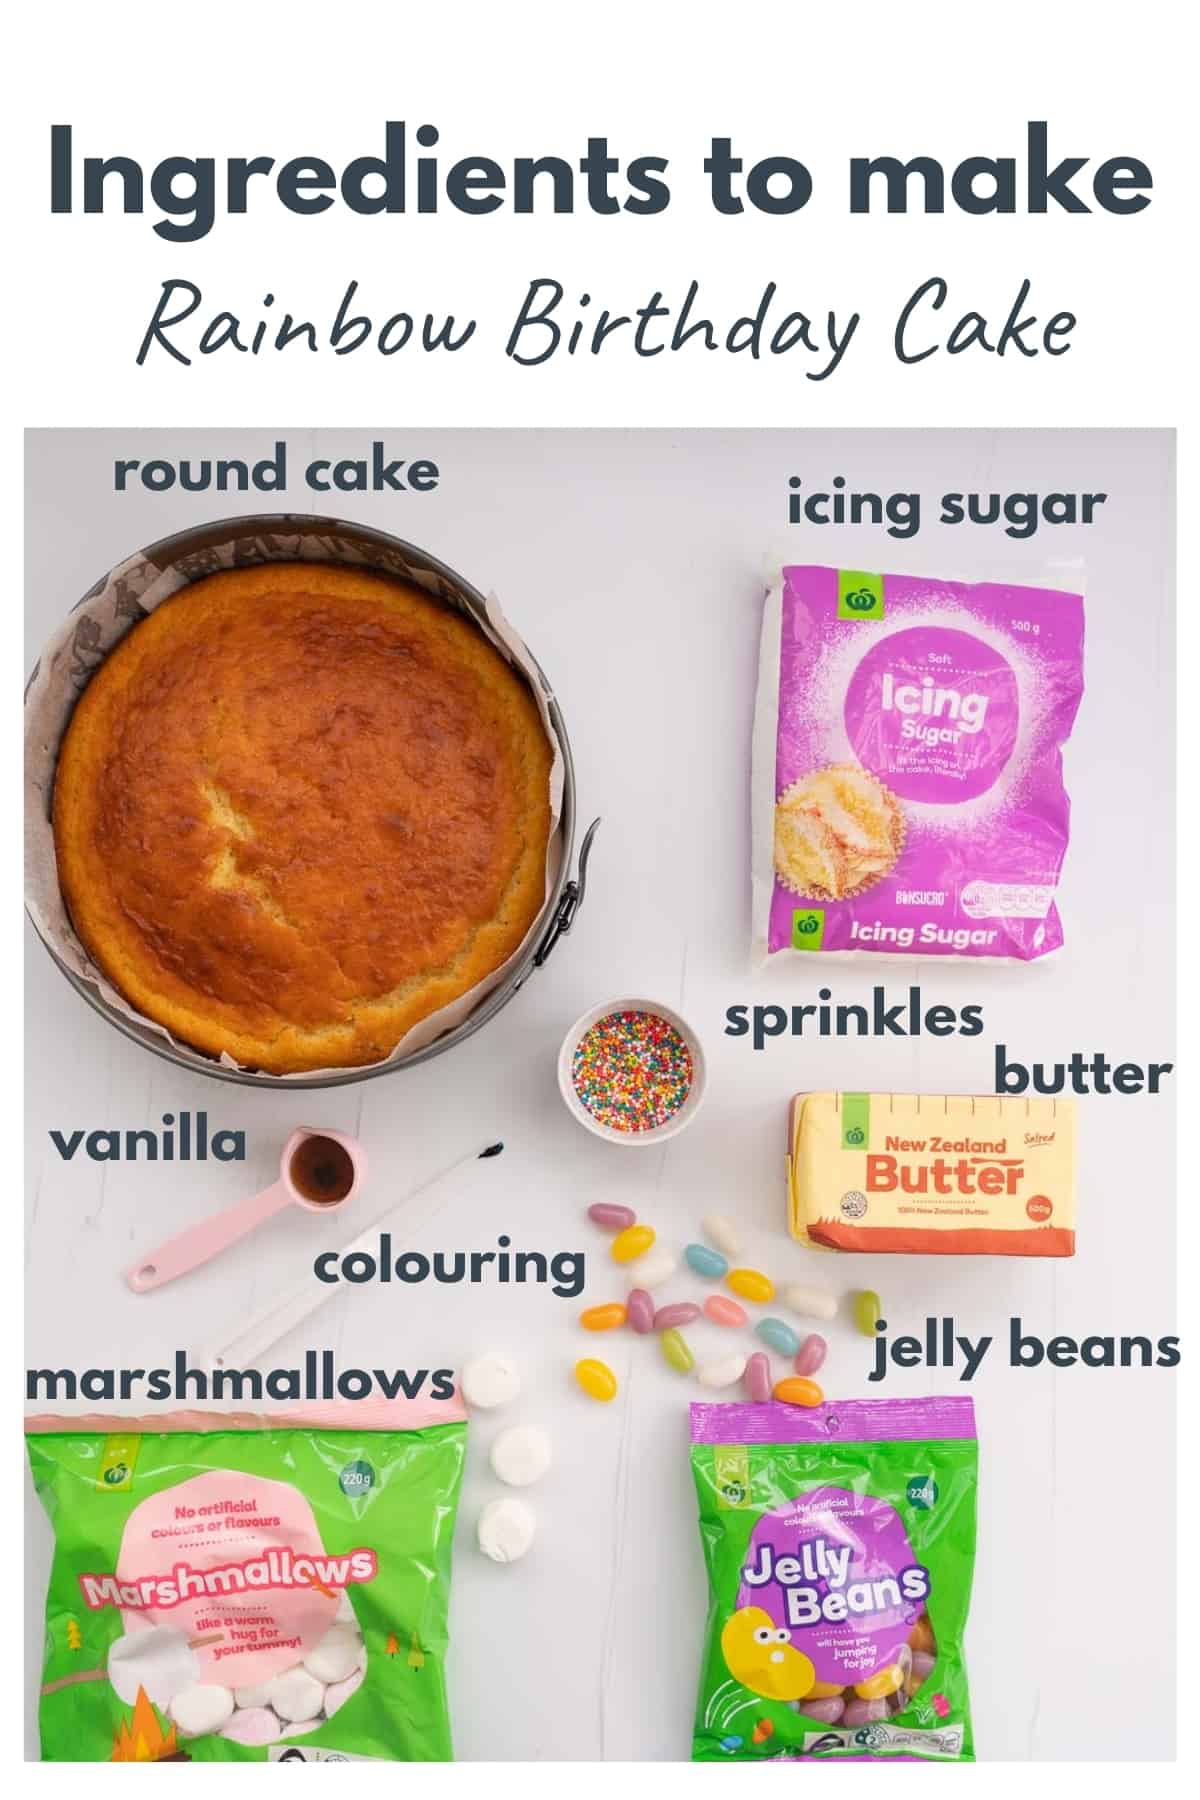
Ingredients you will need
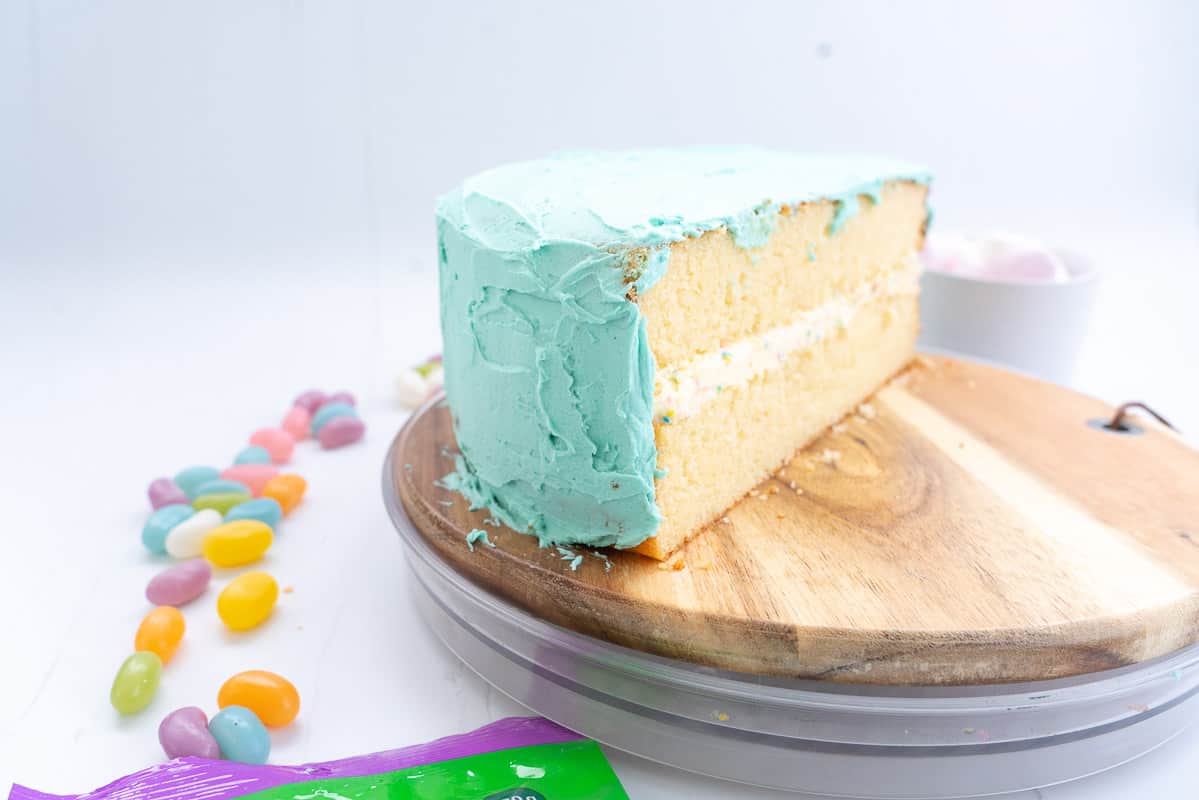
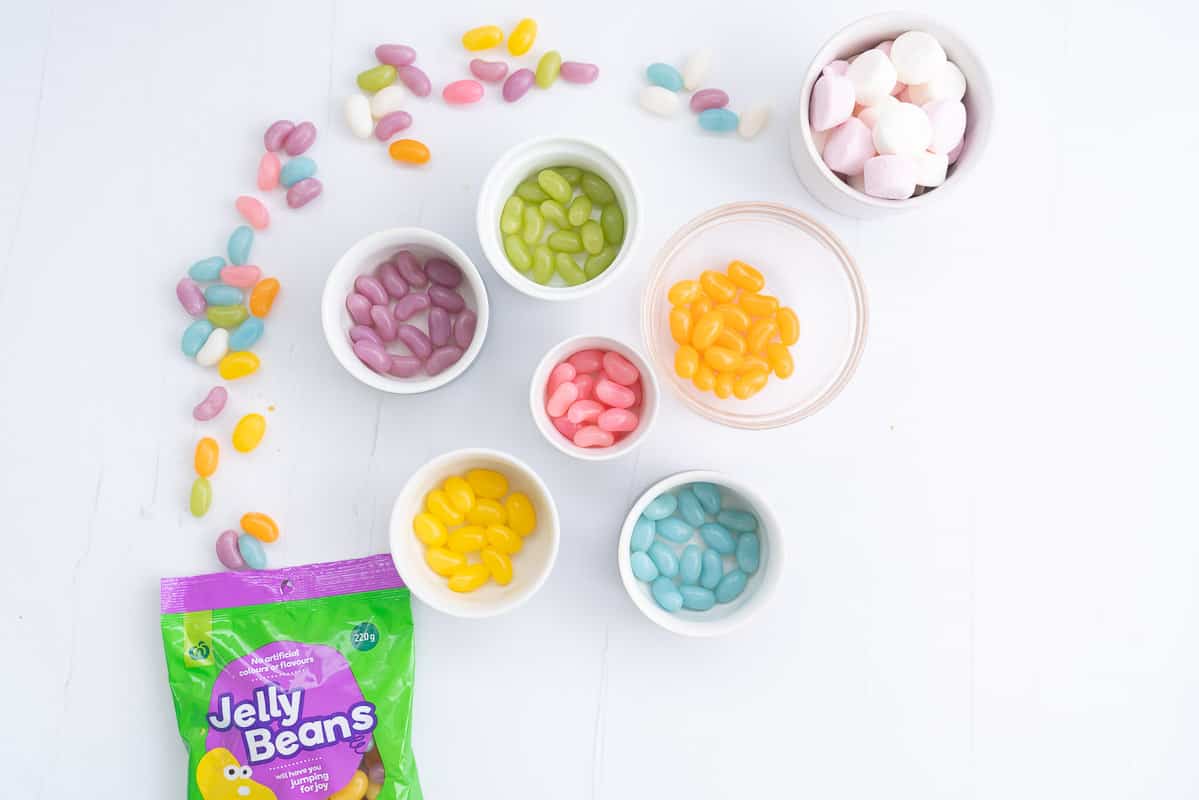
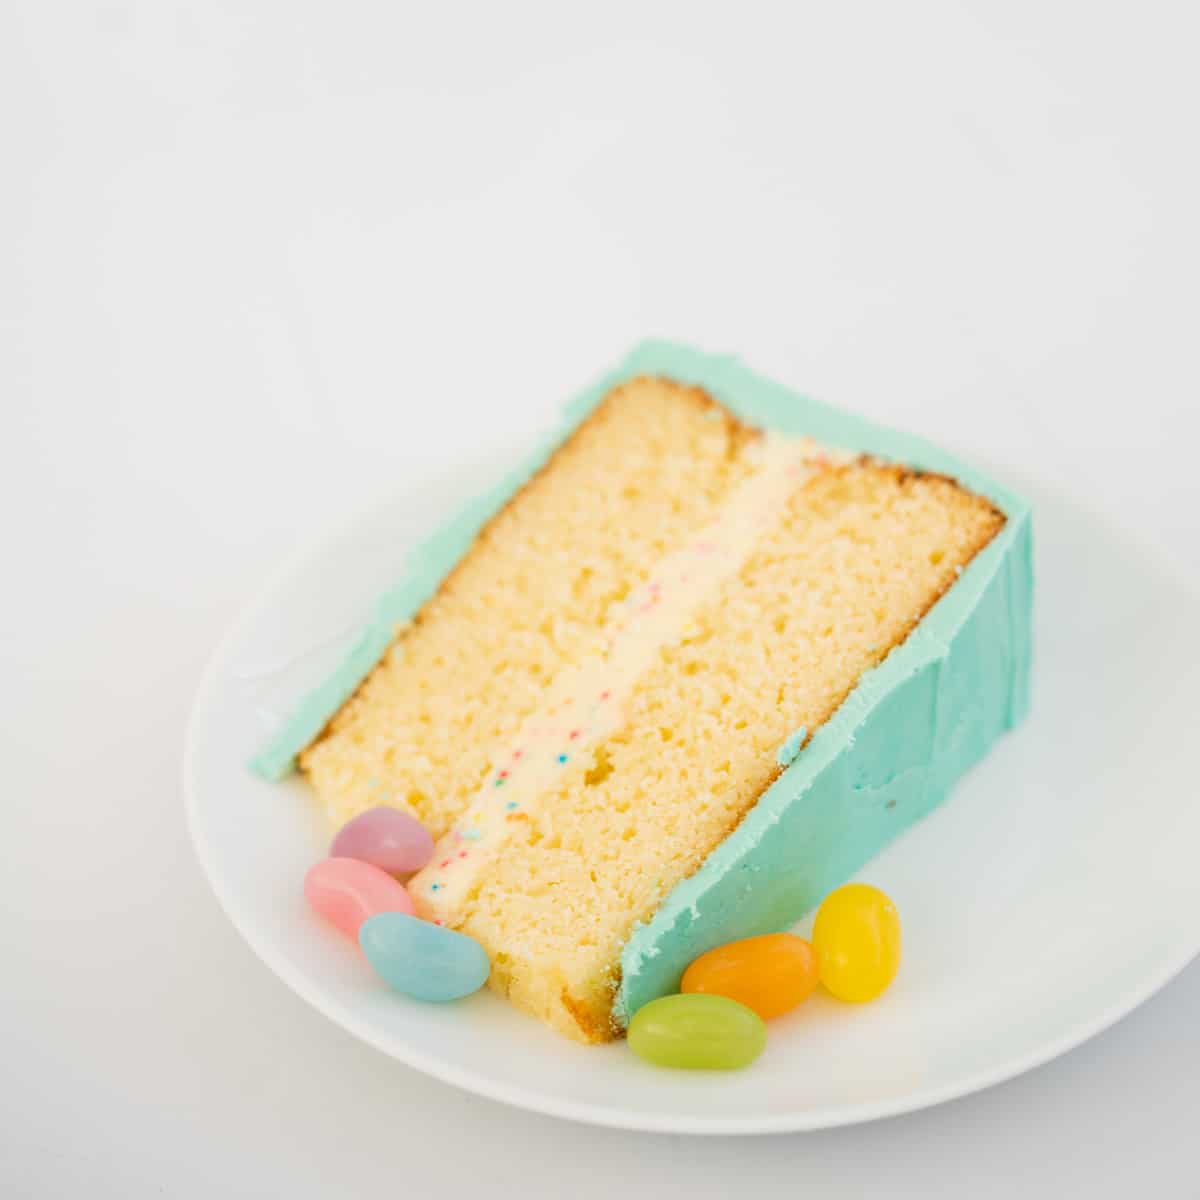
To make my rainbow cake you will need a round cake, my plain cake recipe is the perfect cake, but you can use any cake recipe. For the buttercream you will need blue food colouring, icing sugar, butter and vanilla. I use rainbow sprinkles to create a funfetti layer in the centre of the cake. To finish you will need colourful jellybeans to create the rainbow, and marshmallows to make the clouds.
This post was made possible by Countdown Supermarkets, I stock my pantry with their own brand products as they offer such great quality!
Countdown butter makes the best buttercream, NZ made, I love that the butter is locally made.
The Countdown jelly beans I used to make the rainbow cake contain no artificial colours or flavours, and make such a stunning rainbow my kids loved!
Ingredient Substituions
- Vanilla cake: You can use any round cake that your family loves.
- Jelly beans: These can be substituted for pebbles or m&ms.
- Butter: A full-fat vegan margarine such as Nuttalex can be used in place of butter. I have a recipe for vegan frosting which could be useful
- Sprinkles: These aren't essential and can be left out of the recipe.
Step by step instructions
Below are illustrated step-by-step instructions to make a rainbow cake, if you prefer just the written instructions then head straight to the recipe card. Or check out the step-by-step recipe video.
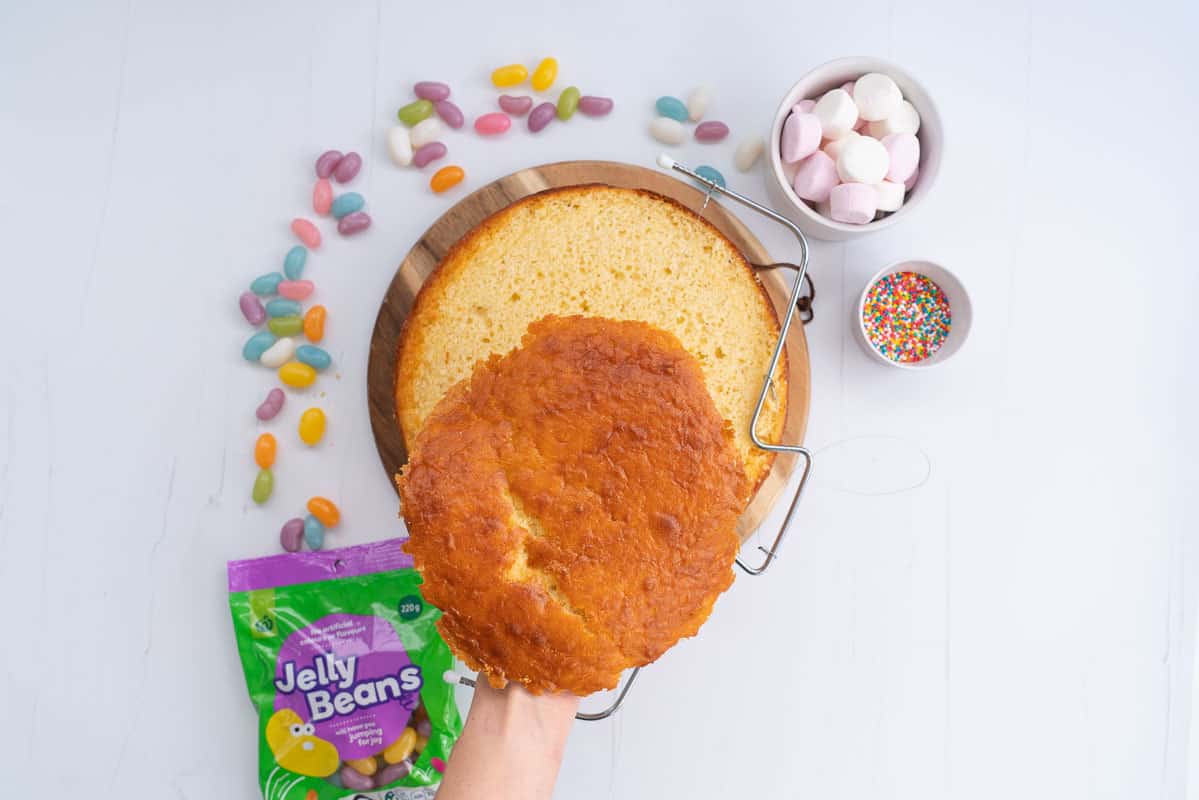
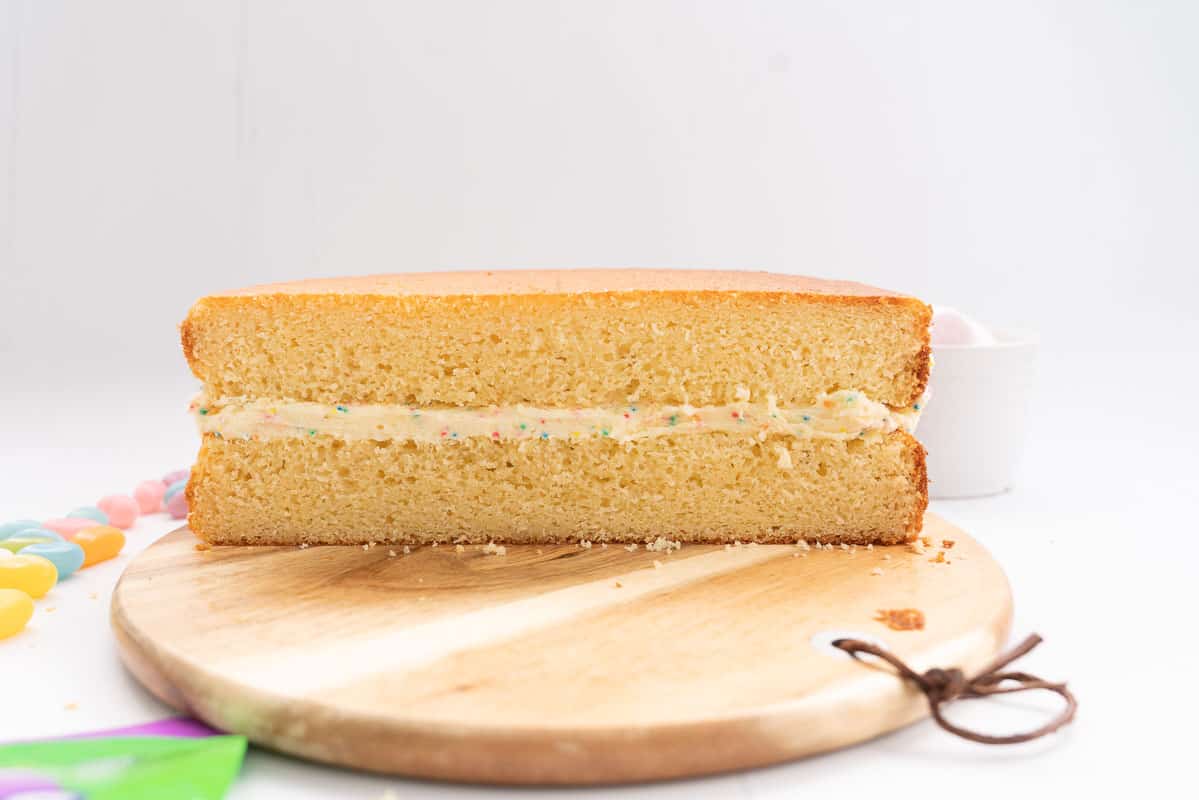
Step one: Prep the cake. Start with a round cake, approx. 25 cm in diameter. I used my plain cake recipe scaled by 1.5 times. Use a knife or cake leveler to level the cake.
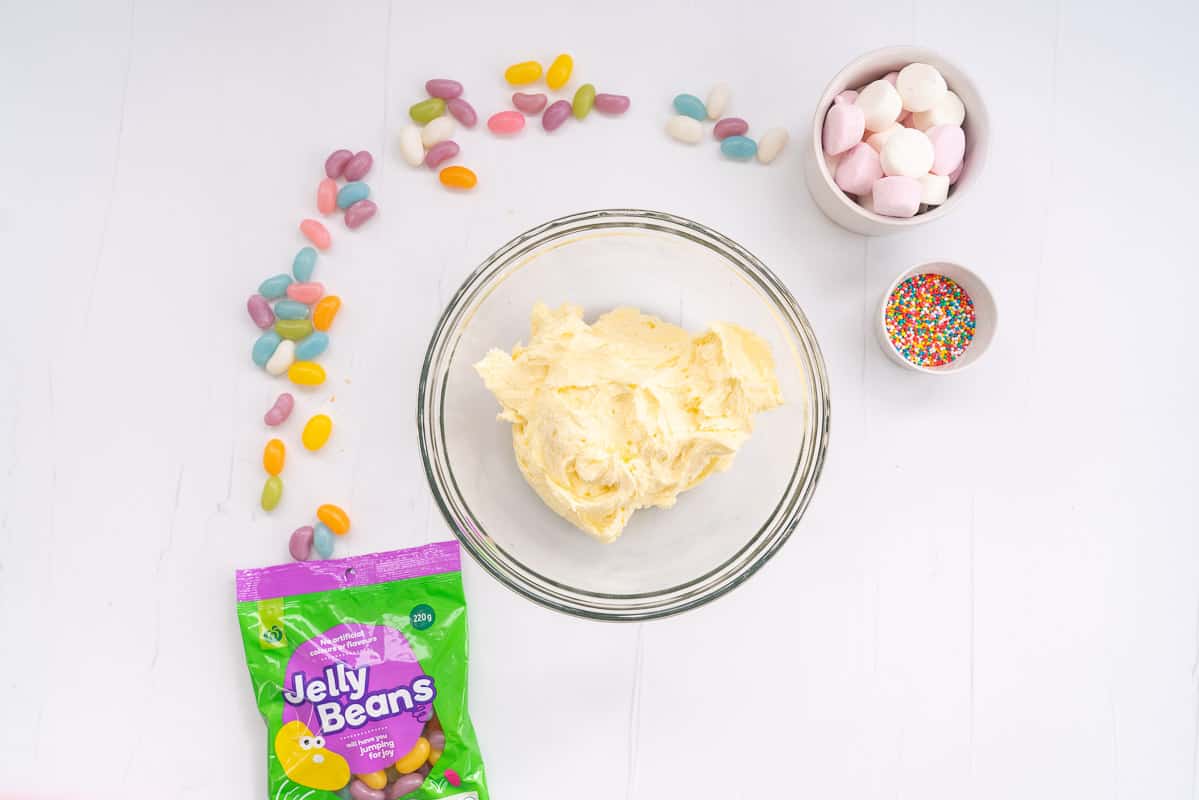
Step two: Make the buttercream. Beat the butter until as white as possible, add the vanilla, and one-half of the icing sugar. Beat until well combined. Add one-half of the milk. Beat. Add the remaining icing sugar and beat until combined. Add the remaining milk and beat. You should have a nice soft consistency buttercream.
Save This Recipe!
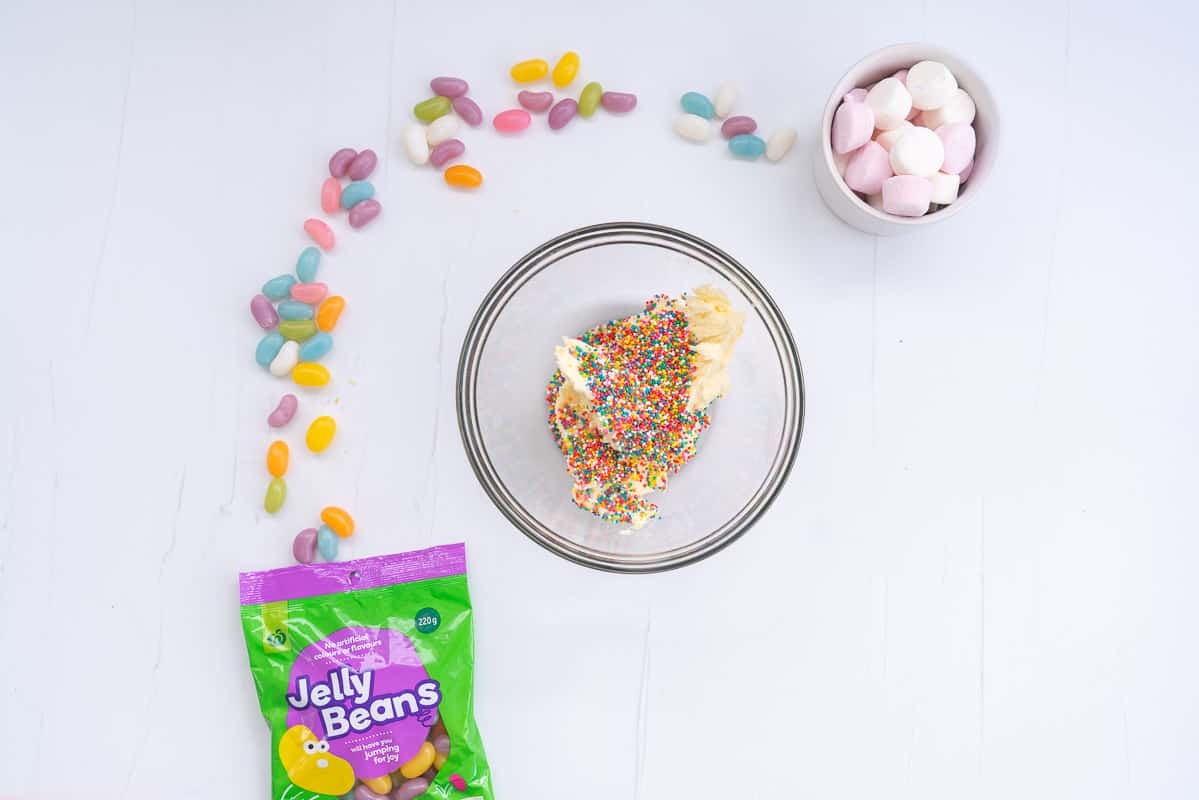
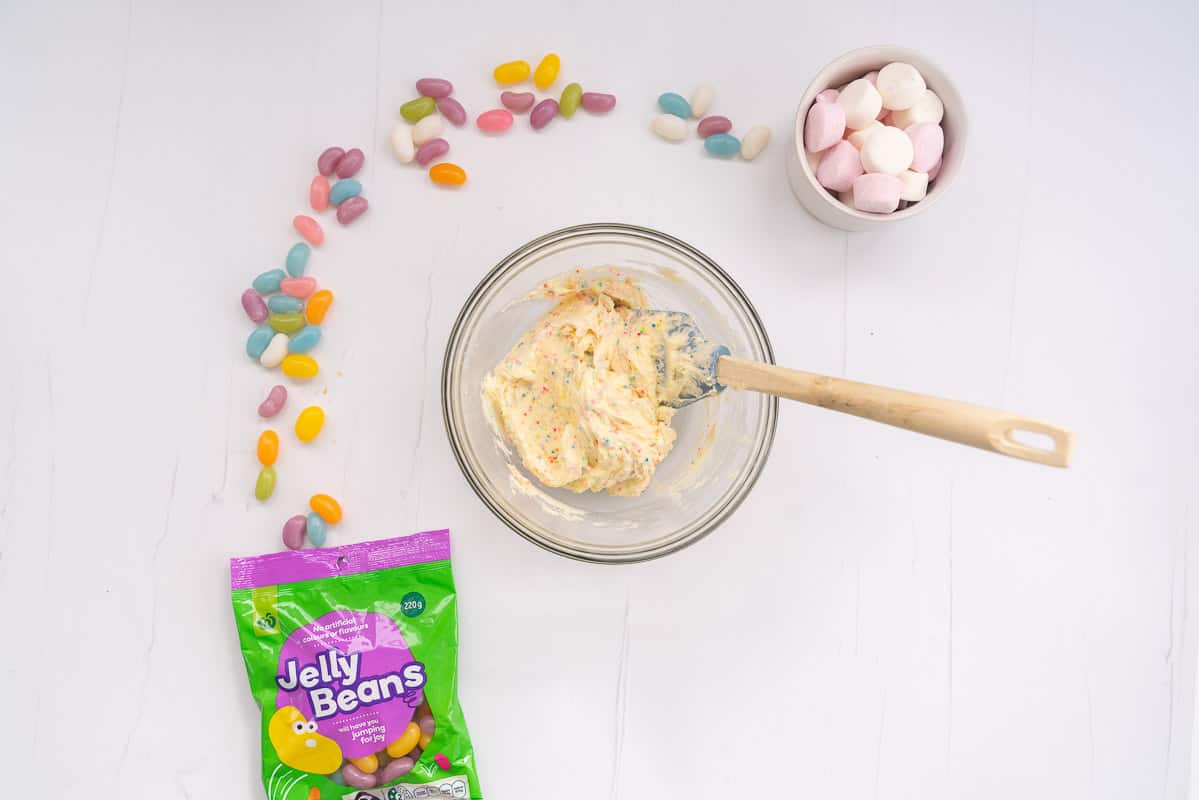
Step three: Funfetti buttercream. Take one-third of the buttercream and put it into a separate bowl, stir through the sprinkles so that you end up with funfetti butter cream.
Step four: Fill and stack the cake. Cut the levelled cake in half, so that you end up with 2 half round pieces. Spread the funfetti buttercream on one half, stack the second half on top so you have a nice thick half round-shaped cake.
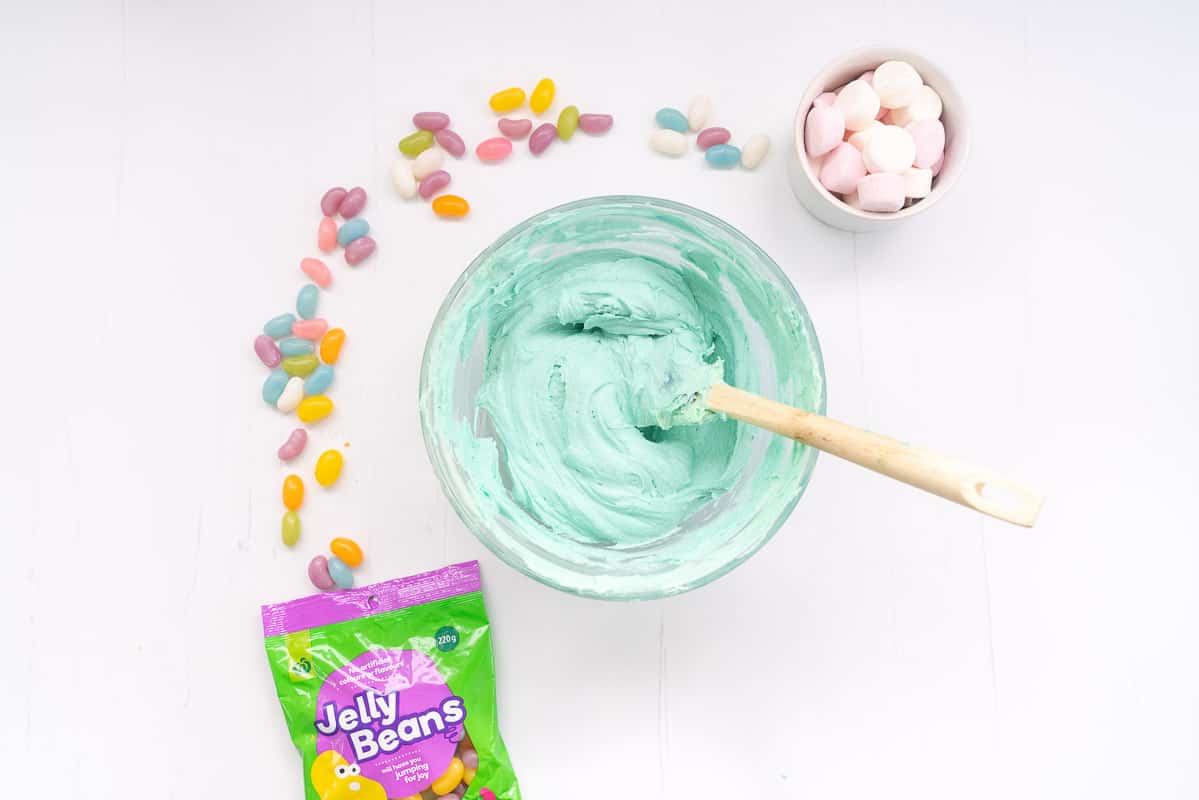
Step five: Ice the cake. Colour the remaining buttercream and add blue food colouring until you achieve a sky blue colour. Ice the cake, I like to do a 2 stage process. I roughly ice the cake (crumb coat) and then pop in the fridge to chill for a little while. I then add a second layer of buttercream so that I can get a nice even finish with no crumbs. Save a some of the blue buttercream to ice the backside of the cake, which will be visible when you stand it up on the serving plate.
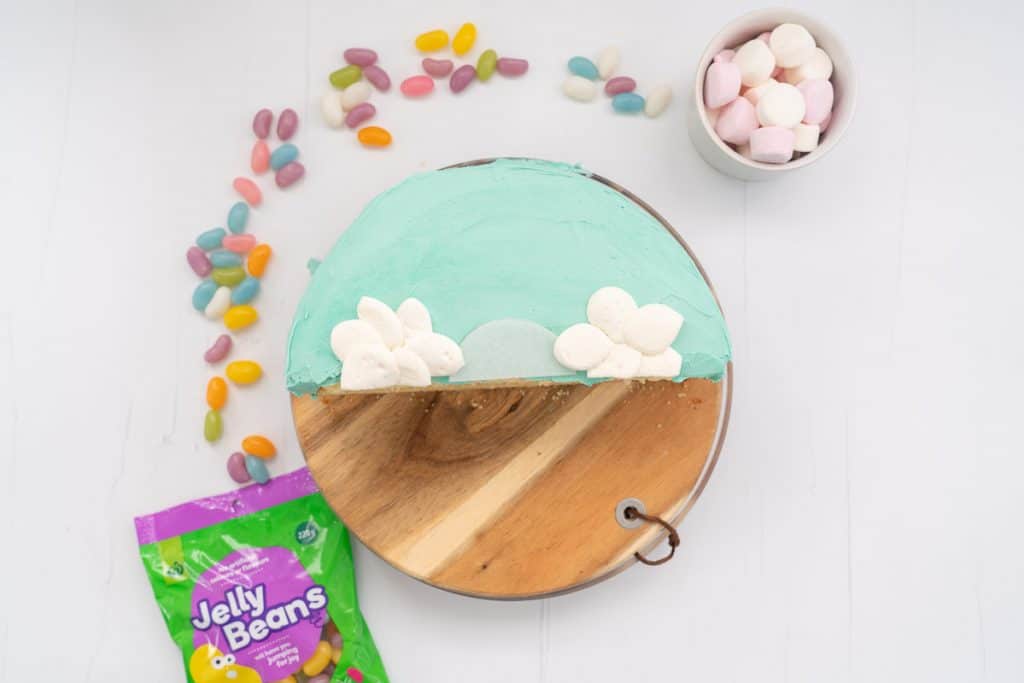
Step six: Prep the decorations. Trace a small circle onto a piece of baking paper. Mine had a diameter of 6cm. Cut the circle out and fold in half, this will be your guide for making the jelly bean rainbow.
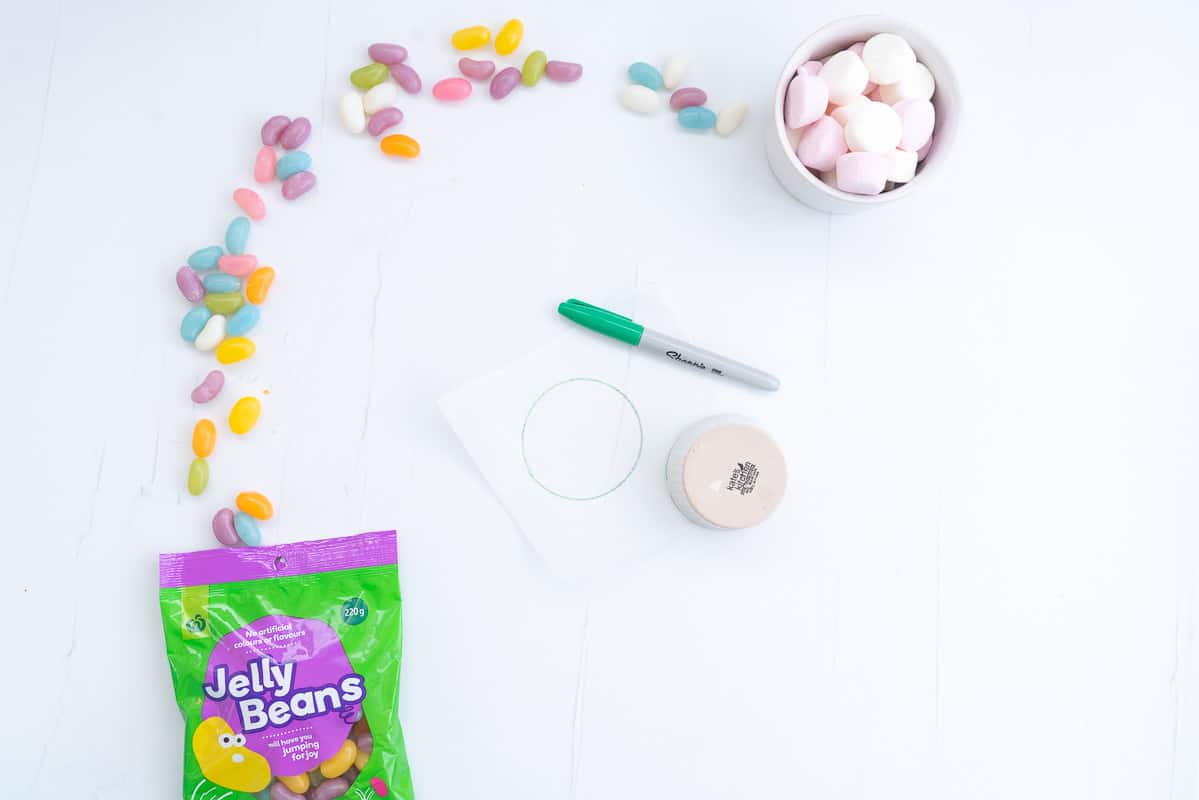
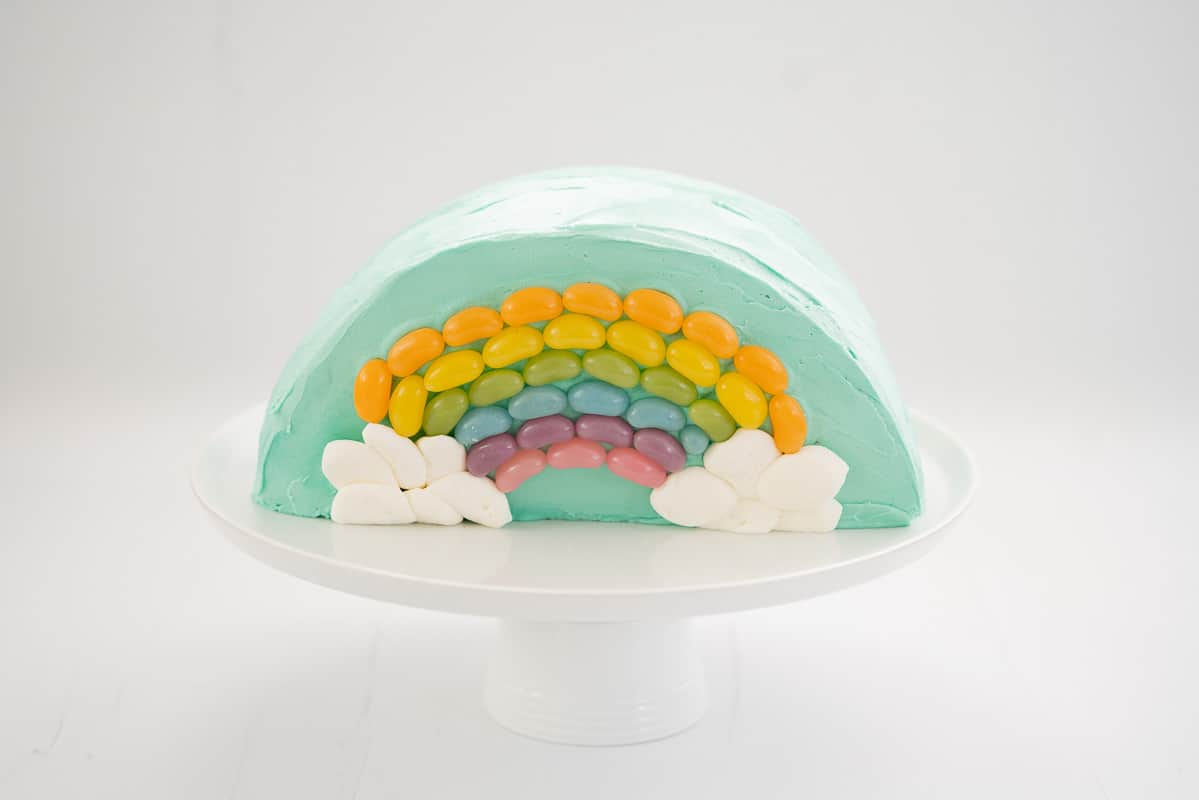
Step seven: Sort the jellybeans by colour. I used 6 colours to form my rainbow. Orange, Yellow, Green, Blue, Purple and Pink.
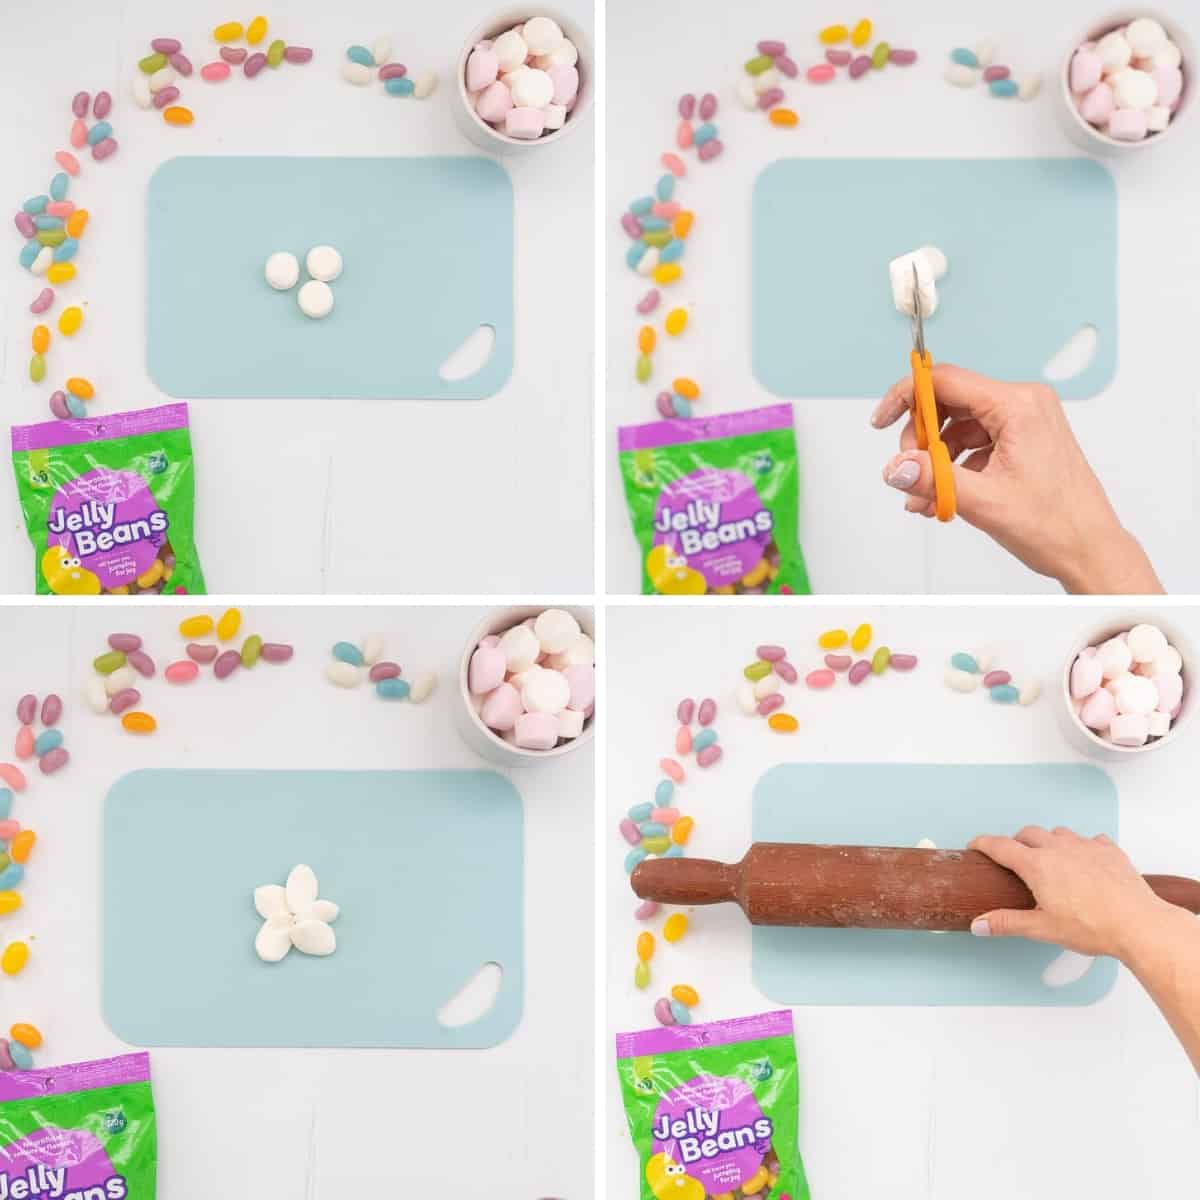
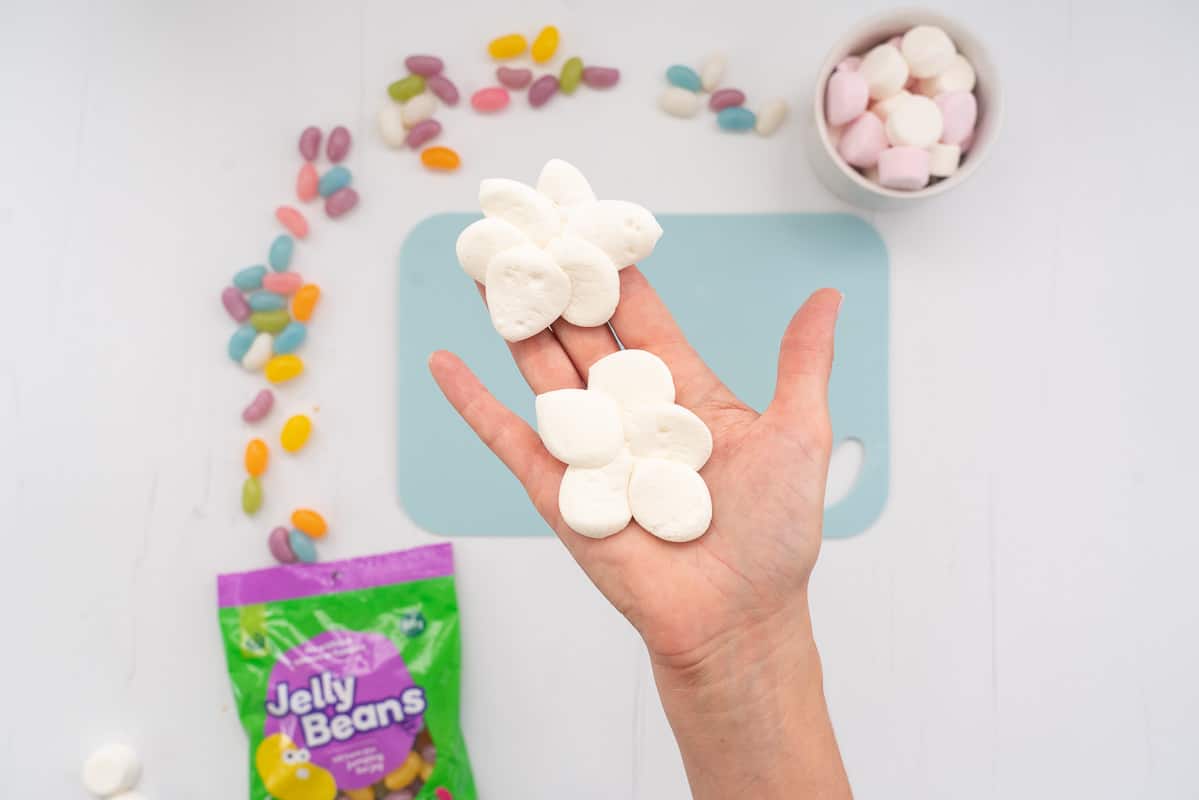
Step eight: Make the marshmallow clouds. Using scissors or a sharp knife cut the marshmallows in half. I use white 3 marshmallows per cloud. Arrange the marshmallow halves into a cloud shape, have the sticky cut overlap them a little and roll with a rolling pin. They should stick together like clouds.
Step nine: Decorate the rainbow cake. Smooth off the buttercream with a hot knife or spatula. Place the half round piece of baking paper in the centre of the cake along the flat edge. Use this as a guide for placing the marshmallow clouds and the jelly bean rainbow. Remove the piece of baking paper when complete

Step ten: Finish the cake. Carefully transfer the cake onto a serving plate, stand the cake so that it sits up on the serving plate. Ice the backside of the cake with blue buttercream. Store in the fridge for up to 48 hours before serving. It's best to remove it from the fridge for 1-2 hours before serving so that the buttercream softens again.
Top Tips
Here is how you can make this rainbow cake recipe perfectly every time!
- When you are decorating and shaping cakes it can be easier if you work with a frozen cake. I often make my cake in advance, ice, and decorate it when frozen, then it's perfect to serve later in the day.
- Using the crumb cake method when icing a cake with buttercream can really make it easier to get a nice finish. Ice your cake with a thin layer of buttercream, refrigerate and then add a final layer of buttercream, it's easy to get a lovely finish this way.
I absolutely love making birthday cakes for my kids, I have a wee collection now on my website, my layered pj masks cake can easily be adapted to almost any cartoon your kids enjoy, my elsa cake and mermaid cake are easy versions of the dolly varden princess cakes.
A First birthday cake can be over thought sometimes, I've got you covered my cute number one fruit decorated cake. Butterfly cupcakes are a traditional recipe perfect for any party.
For a huge collection of ideas be sure to check out my 45 Easy Birthday Cakes for Kids.
For a rainbow themed birthday add a colourful fruit platter and some rainbow sushi.

Rainbow Cake
RATE THIS RECIPE
Save This Recipe!
Ingredients
- 1 22-25cm Plain Round Vanilla Cake I used 1.5 times my plain cake recipe in a 25 cm cake pan.
- 250 g salted butter
- 3 cups icing sugar 375g
- 4 tablespoon milk 60 ml
- 3 teaspoon vanilla essence 15 ml
- ¼ cup rainbow cake sprinkles
- blue food colouring
- 6 white marshmallows
- 34 jelly beans 3 x pink, 4 x purple, 5 x blue, 6 x green, 7 x yellow, 9 x orange.
Instructions
- Prep the cake. Start with a round cake, approx. 25 cm in diameter. I used my plain cake recipe scaled by 1.5 times. Use a knife or cake leveler to level the cake.
- Make the buttercream. Beat the butter until as white as possible, add the vanilla, and one-half of the icing sugar. Beat until well combined. Add one-half of the milk. Beat. Add the remaining icing sugar and beat until combined. Add the remaining milk and beat. You should have a nice soft consistency buttercream.
- Funfetti buttercream. Take one-third of the buttercream and put it into a separate bowl, stir through the sprinkles so that you end up with funfetti butter cream.
- Ice the cake. Colour the remaining buttercream and add blue food colouring until you achieve a sky blue colour. Ice the cake, I like to do a 2 stage process. I roughly ice the cake (crumb coat) and then pop in the fridge to chill for a little while. I then add a second layer of buttercream so that I can get a nice even finish with no crumbs. Save some of the blue buttercream to ice the backside of the cake, which will be visible when you stand it up on the serving plate.
- Prep the decorations. Trace a small circle onto a piece of baking paper. Mine had a diameter of 6cm. Cut the circle out and fold in half, this will be your guide for making the jelly bean rainbow.
- Sort the jellybeans by colour. I used 6 colours to form my rainbow. Orange, Yellow, Green, Blue, Purple and Pink.
- Make the marshmallow clouds. Using scissors or a sharp knife cut the marshmallows in half. I use white 3 marshmallows per cloud. Arrange the marshmallow halves into a cloud shape, have the sticky cut overlap them a little and roll with a rolling pin. They should stick together like clouds.
- Decorate the rainbow cake. Smooth off the buttercream with a hot knife or spatula. Place the half round piece of baking paper in the centre of the cake along the flat edge. Use this as a guide for placing the marshmallow clouds and the jelly bean rainbow. Remove the piece of baking paper when complete
- Finish the cake. Carefully transfer the cake onto a serving plate, stand the cake so that it sits up on the serving plate. Ice the backside of the cake with blue buttercream. Store in the fridge for up to 48 hours before serving. It's best to remove it from the fridge for 1-2 hours before serving so that the buttercream softens again.
Notes
Tips
- When you are decorating and shaping cakes it can be easier if you work with a frozen cake. I often make my cake in advance, ice, and decorate it when frozen, then it's perfect to serve later in the day.
- Using the crumb cake method when icing a cake with buttercream can really make it easier to get a nice finish. Ice your cake with a thin layer of buttercream, refrigerate and then add a final layer of buttercream, it's easy to get a lovely finish this way.
Ingredient Substitutions
- Vanilla cake: You can use any round cake that your family loves.
- Jelly beans: These can be substituted for pebbles or m&ms.
- Butter: A full-fat vegan margarine such as Nuttalex can be used in place of butter. I have a recipe for vegan frosting which could be useful
- Sprinkles: These aren’t essential and can be left out of the recipe.
Nutrition
Quick Start Guide To BLW
Baby led weaning doesn’t need to be complicated, grab my quick start guide to begin your little ones food journey.
Incredibly easy to follow and totally took the stress out of cake making
Thankyou Stacey!
I'm so glad this recipe helped you out!
Such an easy way to make an impressive looking cake!