PJ Masks Cake

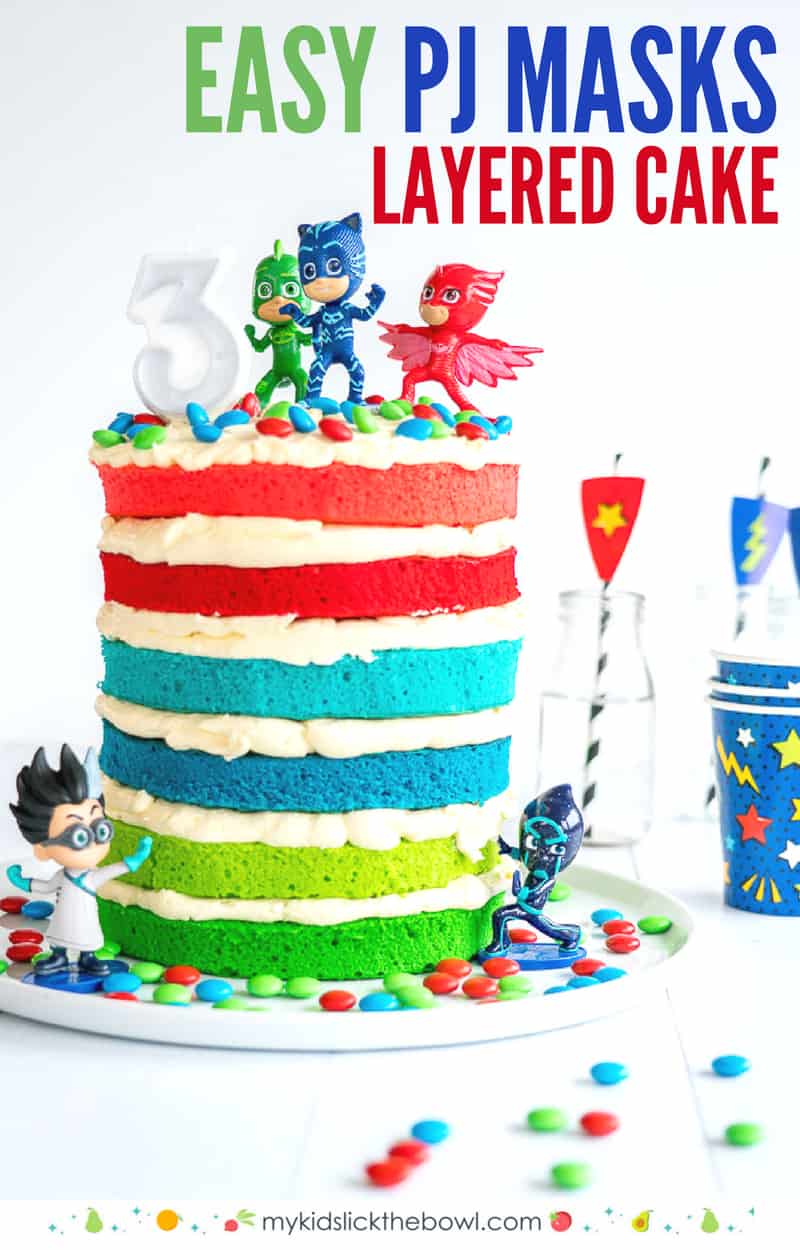
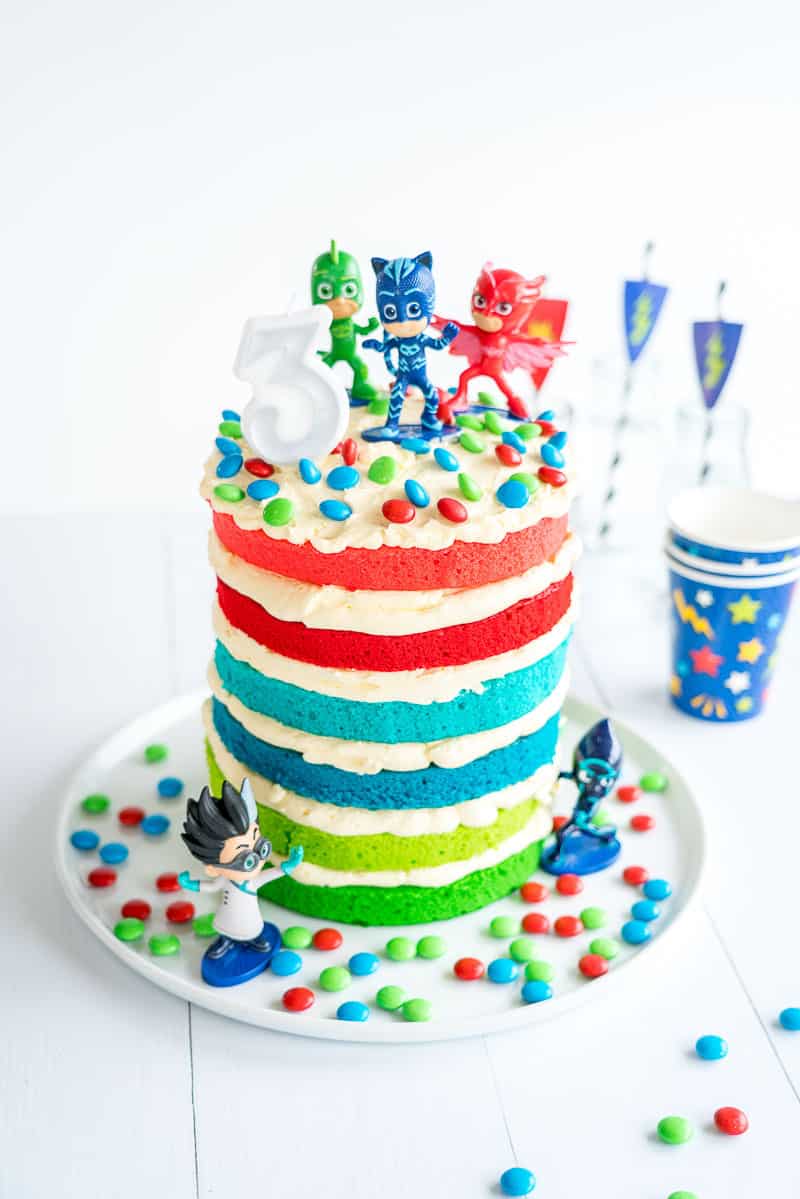
At our house, we love homemade birthday cakes. My 3-year-old requested a PJ Masks Cake for her birthday and this is what I came up with a PJ Masks Layered Birthday Cake filled with buttercream.
To be honest, I am pretty chuffed with the end result, I think this PJ Masks Cake looks quite impressive, but to be honest it has actually been one of the easiest birthday cakes I've done.
So please please please don't be put off by thinking this cake potentially looks complicated, it really isn't and I'll happily take you through it step by step.
How to make a pj mask cake
I found some fairly complicated pj mask cake ideas online. Cakes where I had to make pj mask figures out of fondant, which all seemed a bit hard to me.
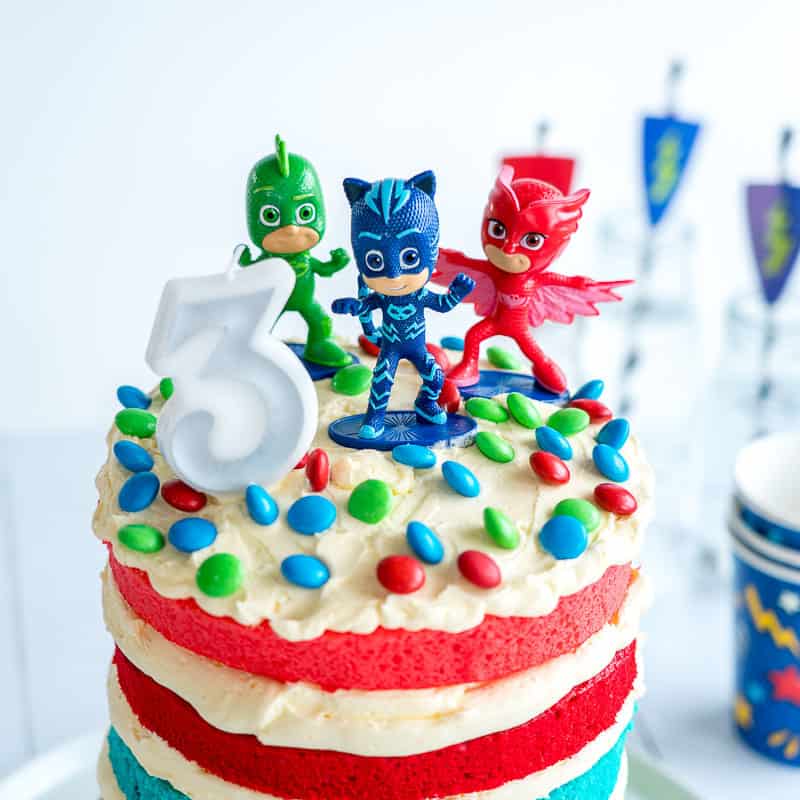
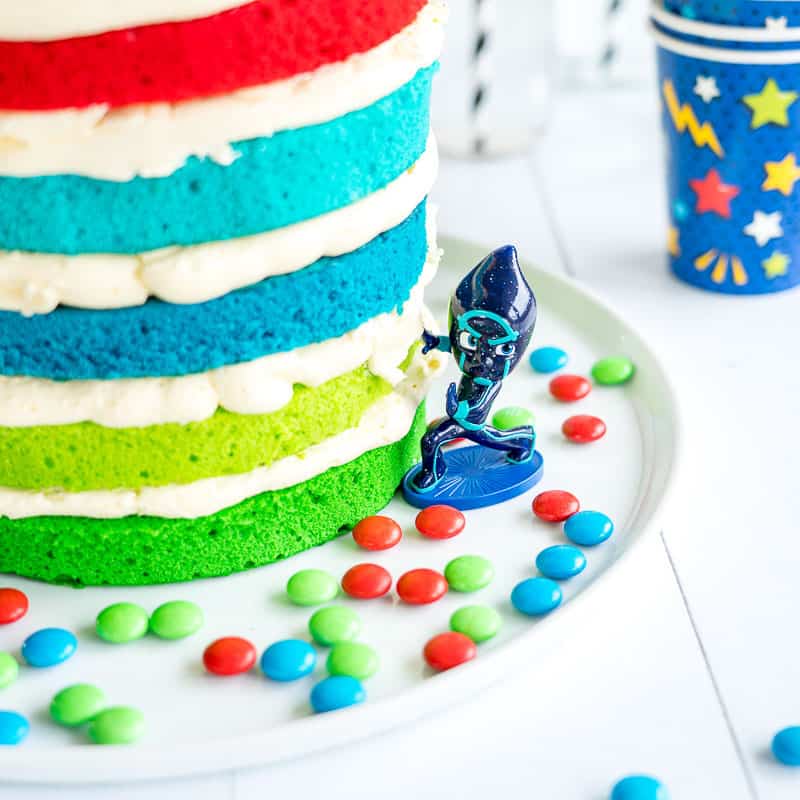
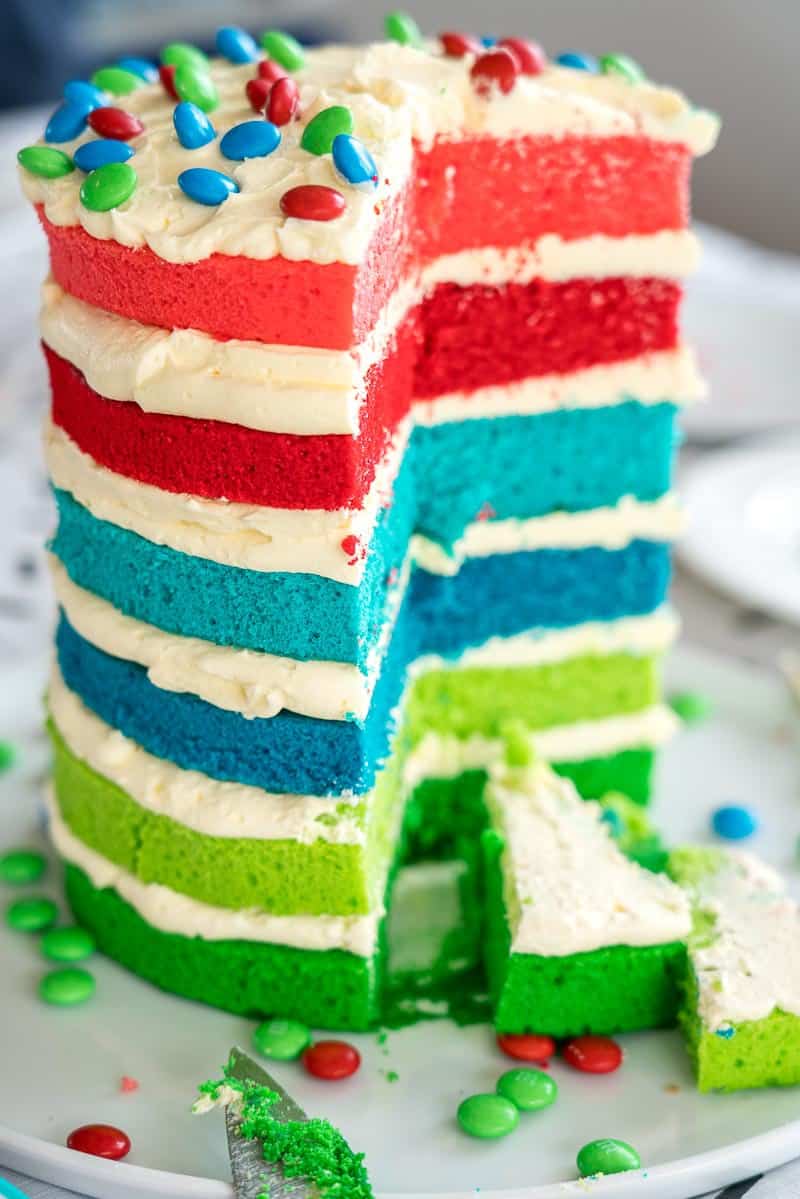
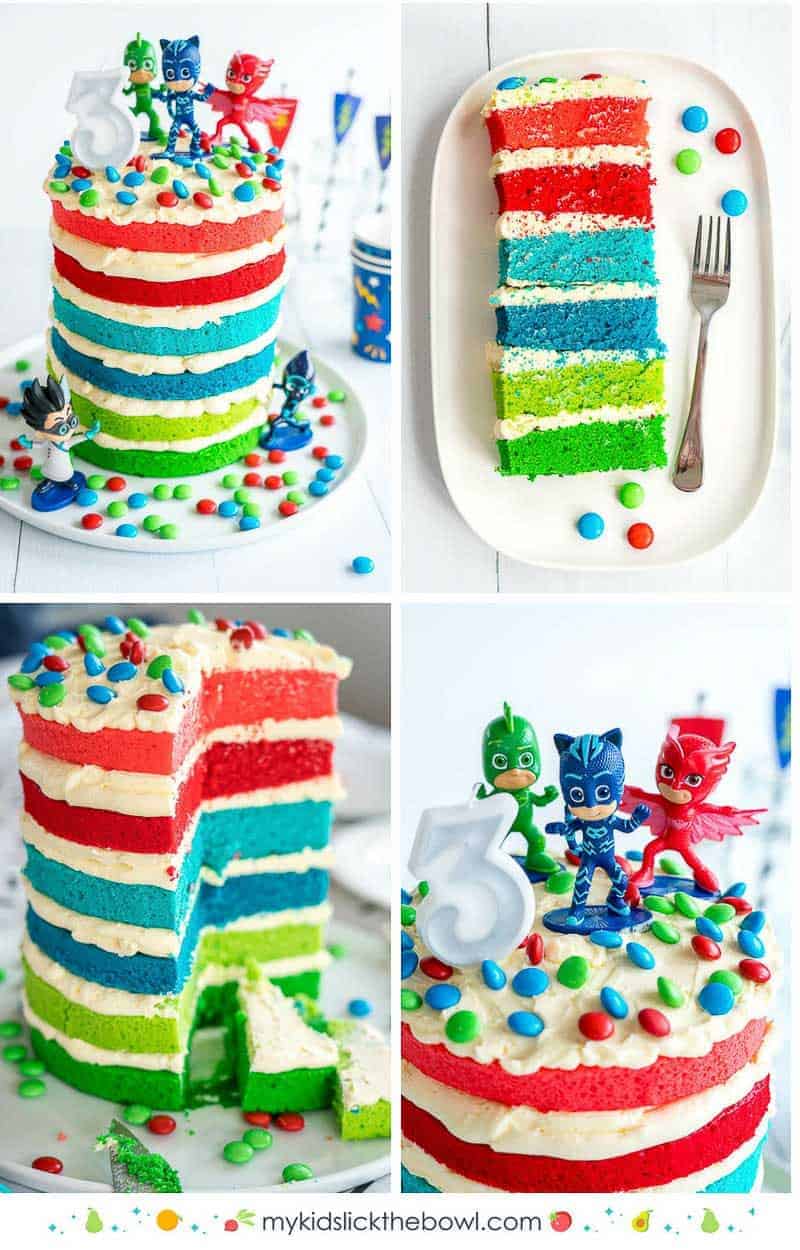
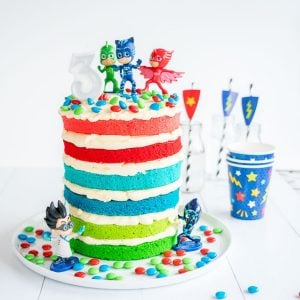
So what I decided to do instead was just to make a rainbow cake (I substituted the traditional rainbow colours for the colours of the pj masks characters and popped store-bought pj mask figurines on top,
The most complicated part of this cake is the baking of the layers, (but even that is not too bad), You can bake the layers in advance, and freeze them so that on the day all you have to do is assemble the cake.
To be honest I simplified the baking process even further by using a store-bought vanilla cake mix. Essentially I mixed up 2 packs of vanilla cake mix and split this into 6 bowls. I found the easiest way to do this was to use scales
I then coloured the cake mix in each of the 6 bowls a colour from the pj masks figurines
I baked the cakes in round cake tins all the same size, so that I could easily stack them later. I froze the 6 layers, then assembled the tower of cake with butter cream between each layer on the day.
Save This Recipe!
PJ Masks Cake
RATE THIS RECIPE
Save This Recipe!
Ingredients
- Cake
- 2 x 340g vanilla cake mix
- 6 x eggs
- 160 g butter
- 1.5 cups milk
- Icing
- 625 g butter
- 7.5 Cups icing sugar
- 200 ml milk
- 2 x 180g packs m & ms
Instructions
- In addition to the edible ingredients, you will also need: 20 cm round cake tin (2 cake tins are even better) Cake mixer or Electric beater, Baking paper, 3 x bamboo skewers, piping bag with large nozzel, PJ masks figurines
- Preheat your oven to 160 degrees Celsius (or the temperature recommended on the packet directions of your cake mix, if you have a double oven and 2 cake tins that are the same size then heat 2 ovens, as this will reduce total baking time if you can bake 2 layers at a time
- Prepare the vanilla cake as per packet directions, I combine the 2 packs to make a double batch. The number of eggs and amount of butter and milk I have listed were what was required for the cake mix I used, yours may differ slightly. The first quantities of butter and milk listed are for the cakes, the second quantities are for the buttercream icing
- Once you have a double batch of cake mix made, divide this into 6 small/medium mixing bowls (I didn't have enough, but my soup/cereal bowls were fine for the job. I used scales to divide the mix, and found I needed to weigh out approximately 250 g of batter per bowl, this should give you 6 pretty even quantities. If you don't have scales I found it was around 1 and ¼ to 1 and ½ cups of batter per bowl
- Use the food colouring to colour the six layers, you will want: Dark blue, light blue, dark green, light green, red and pink (I used blue gel colouring for the 2 blue layers, Green gel colouring for the dark green layer and a combo of green and yellow colouring for the light green layer. I used red gel colouring for the red and pink layers. I found the cakes bake to about the same colour as the batter, so colour your batter to what you want the final colour to be.
- Grease and line the cake tins, pour one colour into a tin, bake in the oven for 15-20 minutes, I found 18 minutes was perfect. I checked readiness with a toothpick. I was abe to bake 2 layers at a time as I had 2 tins
- Allow the cake to cool in the tin for 5 minutes, before turning out onto a cooling rack. I left the baking paper on the base of the cakes. I found this made moving them around for assembly easier with the baking paper on
- Wash the cake tins, and repeat until you have all the 6 layers completed. The cake baking can be done in advance, so at this stage you could freeze the cake layers ready for assembly on another day
- This step is optional but does give the cake a little more wow factor. Trim the edges of your cake. You can either use a round cake cutter (it's a bit like a cookie cutter but much larger) or take a bread and butter plate that is just slightly smaller than your 20cm cakes. Place the plate on top of the cake and use the plate-edge as a guide to trim the cakes with a knife.
- Prepare the buttercream icing. The butter must be at room temperature and soft, but you do not want it melted either
- Cube the softened butter and beat until it is as white as possible
- While the butter is beating, sift the icing sugar and bring the milk out of the fridge so it comes up to room temperature
- Add approximately ⅓ of the sifted icing sugar to the butter, beat. Then add approximately ⅓ of the milk and beat
- Alternate adding the sugar and milk until it has all been added
- Check the consistency of the buttercream, you can add a little more milk if you feel it needs to be softer to work with
- Find a large plate or cake board (the plate or board you plan on presenting the cake on
- Place a little buttercream in the center of the plate/board and lie the dark green layer on top, the buttercream at the bottom will help to make the cake more stable
- Fill a piping bag with a large nozzle with buttercream. Use the piping bag to pipe a spiral of buttercream on top of the dark green layer, you want the entire layer to have an even spread of buttercream. You could use a spatula if you prefer to add an even/thick layer of buttercream
- Place the light green layer of cake on top, and again completely and evenly cover the top of the light green cake. Repeat in the following order: Dark Blue, Light Blue, Red, Pink. Before you add the final buttercream layer to the top of the cake, take 3 bamboo skewers and insert them into the cake from the top down, this will help hold the cake together.
- Decorate the top of the cake with blue, red and green m & ms and the PJ mask figurines, scatter any leftover m & ms around the cake
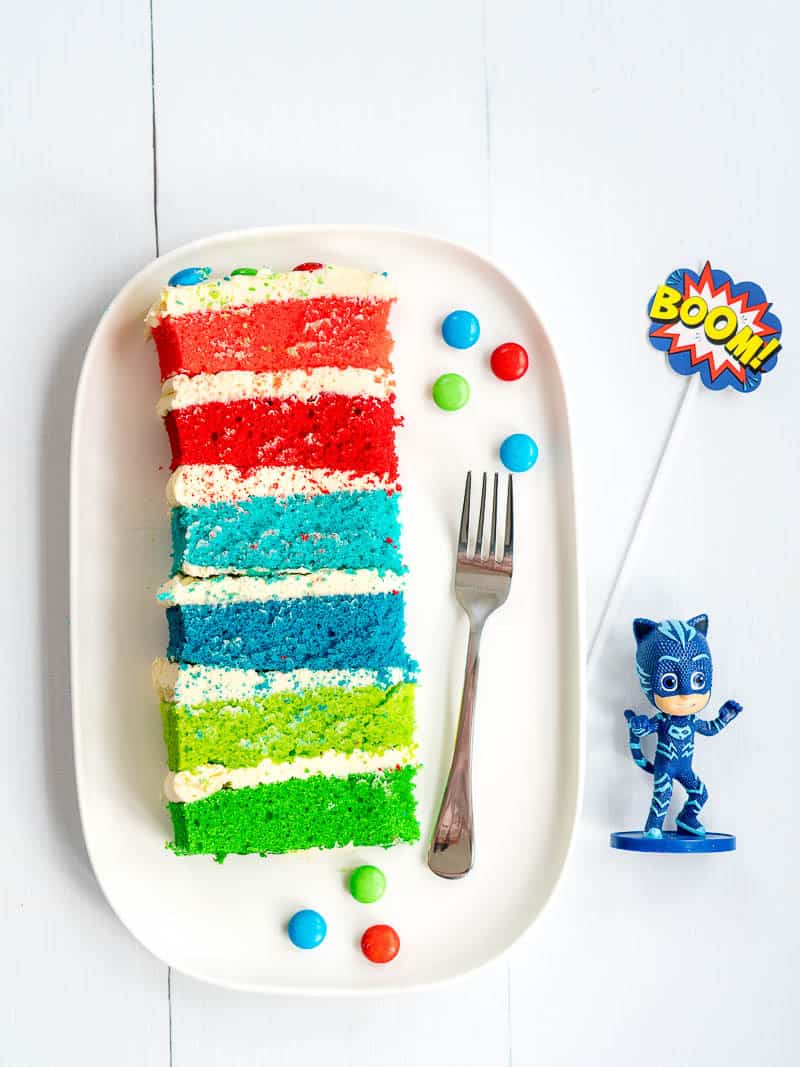
- Serve the cake. Don't be nervous about slicing it. I find the easiest way is to tdo a slice from top to bottom. But then slide your knife between layers to pop them apart and lift out on to plates
Notes
- I use gel food colouring as I find the colours more vibrant, and you need less
- Buttercream ratios are 125g butter : 1 ½ Cup icing sugar : 40 mls milk (I needed 5 quantities of buttercream, but there was some left over, so you may get away with 4, depending on how thick you apply it)
- Icing sugar is also known as confectioners sugar or powdered sugar
- 340g cake mix is a 1 pound cake mix
- I used Betty Crocker Vanilla Cake Mix
Nutrition
Quick Start Guide To BLW
Baby led weaning doesn’t need to be complicated, grab my quick start guide to begin your little ones food journey.
THANKS for sharing this! Just made it for my daughter 3rd bday and everyone enjoyed it! Looked not as perfect as yours but for my first time worth layered cake i’m quite satisfied with the end result. I just added strawberries and used chantilly cream. Perfect!
Oh I'm so glad it was a success!