Gluten Free Peanut Butter Sandwich Cookies (Dark Chocolate Filling)

These Gluten Free Peanut Butter Sandwich Cookies are everything you want in a cookie—crisp edges, chewy centers, and a rich, creamy filling—without any of the extras you don’t. Made with just a handful of pantry ingredients, they’re naturally gluten-free, dairy-free (when made with dark chocolate), and free from refined flours.
Perfect for lunchboxes, after-school snacks, or sweet cravings, these sandwich cookies are simple to make and even easier to love. No complicated steps, no unusual ingredients—just classic cookie goodness with a satisfying peanut butter and chocolate twist

Why This Recipe
- Easy, gluten-free peanut butter cookies made with pantry staples
- Dark chocolate filling sets firm— no refrigeration needed
- Easy to make, kid-friendly, and ideal for storing or gifting
Ingredients You Will Need
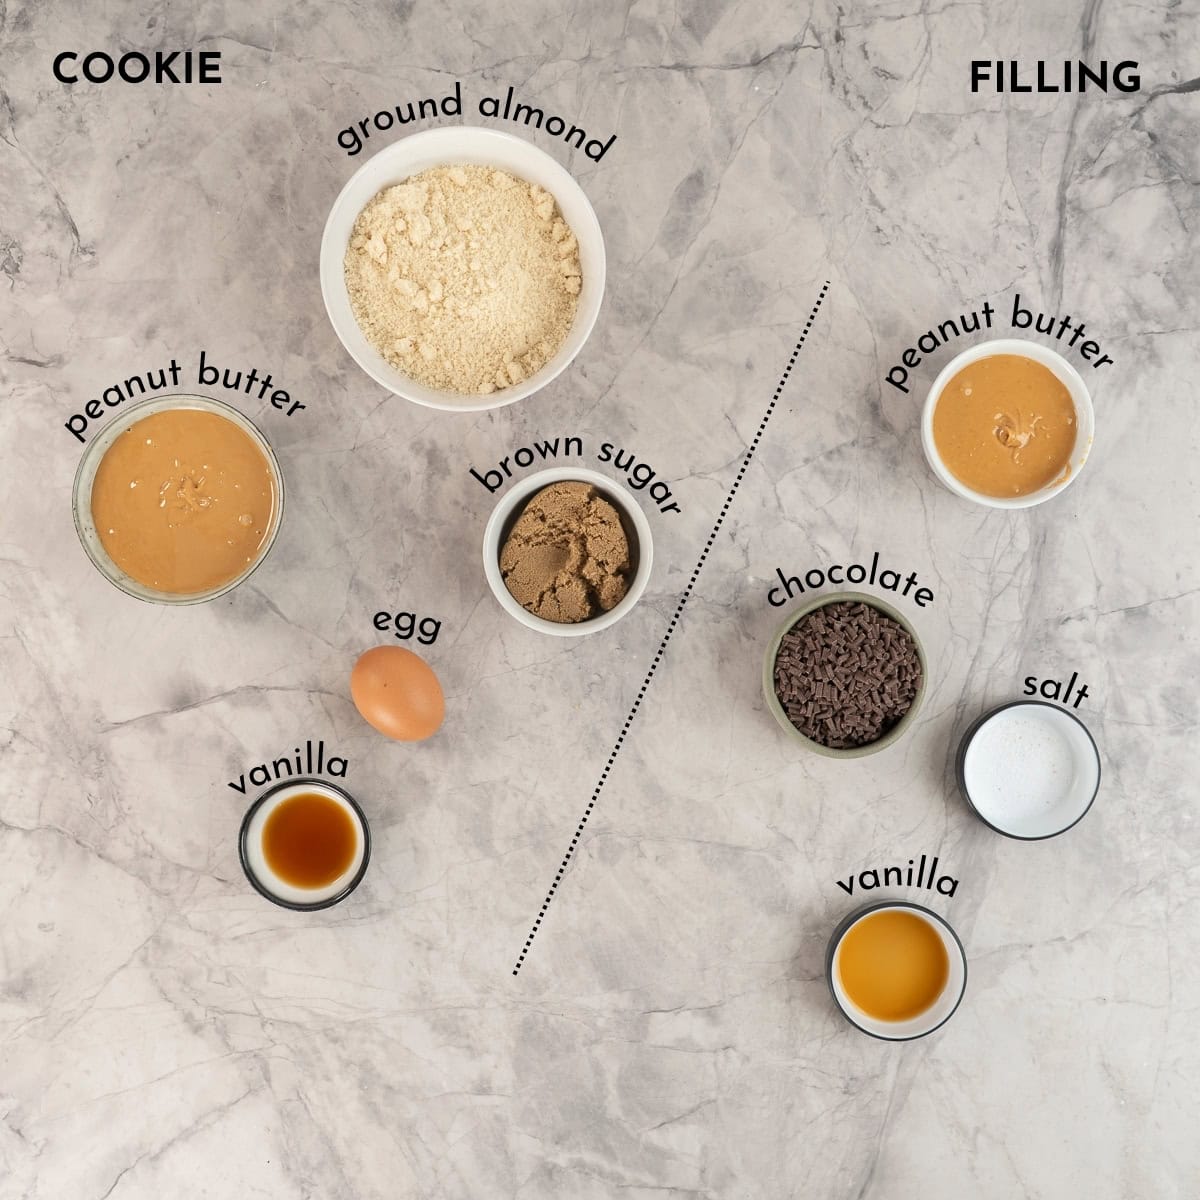
Ingredient Notes, Substitutes, & Allergy Swaps
- Almond meal – Also known as ground almonds. You can use store-bought or grind your own blanched almonds. If you're after a nut-free version, try desiccated coconut instead—see my Easy 4 Ingredient Peanut Butter Cookies for how this works beautifully.
- Brown sugar – Adds sweetness and moisture. You can swap it for coconut sugar if you're after a less refined alternative.
- Peanut butter – Smooth, natural peanut butter works best (just peanuts and salt, no added oils). For a nut-free alternative, use sunflower seed butter—I have a great homemade version here: Sunflower Seed Butter.
- Dark chocolate – Use a 70% (or higher) dark chocolate for a rich, dairy-free filling that sets firm. You can substitute with milk or white chocolate if dairy isn't a concern.
Peanut Butter Sandwich Cookies Illustrated Step By Step Guide
Below are illustrated step-by-step instructions to make my Gluten Free Peanut Butter Sandwich Cookie recipe, if you prefer just the written instructions then head straight to the printable recipe card below.
Step one: Mix up the dough
Grab a large bowl and a sturdy spatula—nothing fancy needed. Toss in the almond meal, brown sugar, peanut butter, vanilla, and your egg. Give it a good mix until everything comes together into a thick, slightly sticky dough.
Tip: If it looks a bit crumbly at first, just keep stirring—it will come together!

Step two: Roll and press
Scoop out small bits of dough and roll them into little balls—aim for around a teaspoon each. Place them on a lined baking tray and press them down gently with your palm so they flatten slightly.
No need to be perfect—wonky cookies still taste delicious!

Step three: Make them pretty (optional!)
If you're after perfectly round cookies, now’s the time to shape them. Press a small circular cookie cutter or glass over each cookie to tidy up the edges. But honestly—they’re just as good a little rough around the edges.

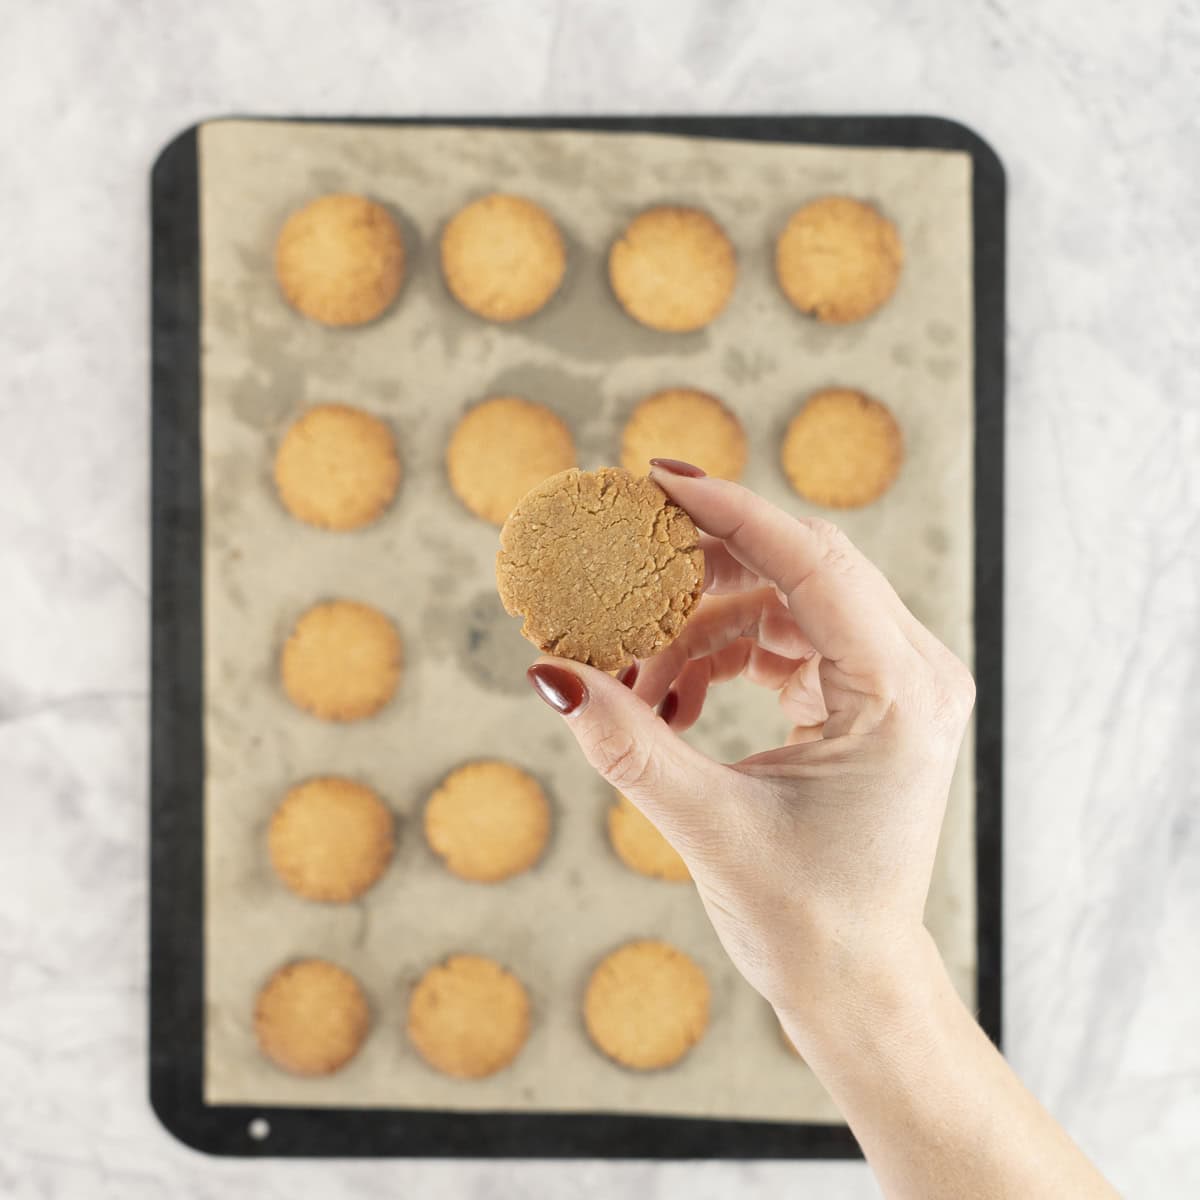
Step four: Bake and cool
Pop the tray into a preheated oven at 180°C (360°F) for about 12–15 minutes. You’re looking for lightly golden edges and a set surface. Let them cool on the tray for a few minutes before moving to a wire rack.
Tip: The cookies will firm up as they cool—don’t worry if they feel soft at first.
Step five: Make the filling
While the cookies cool, it’s time to whip up that dreamy filling. Melt your dark chocolate (either in a bowl over simmering water or in short microwave bursts). Then stir in the peanut butter while the chocolate is still warm and glossy. It’ll turn into a smooth, spreadable mixture.
Optional extras: A splash of vanilla or pinch of salt adds a little extra yum.

Step six: Dollop the filling
Once the cookies are fully cool, grab one and dollop a little chocolate peanut butter filling on the flat side. You only need about a teaspoon—it spreads out when you sandwich.

Step seven: Sandwich time
Top with a second cookie and gently press down to spread the filling. That’s it! You’ve made peanut butter sandwich cookies—congrats!
Let them sit at room temp to set, or pop them in the fridge to firm up quicker (especially helpful in warm weather).

Save This Recipe!

Top Tips
Here is how you can make these Gluten Free Peanut Butter Sandwich Cookies perfectly every time!
- Let the cookies cool fully before adding the filling to prevent melting.
- Use quality dark chocolate for the best setting power and flavor.
- If your peanut butter is runny, stir in 1–2 teaspoons of oat flour into the filling for structure.
- Don’t skip the rest time for the filling—it thickens beautifully and helps the sandwiches stay neat.
- Once assembled, store cookies in an airtight container at room temperature for up to 5 days.
- These cookies can also be frozen (assembled or unassembled) for up to 4 months.


Gluten Free Peanut Butter Sandwich Cookies
RATE THIS RECIPE
Save This Recipe!
Ingredients
Cookies
- 1.33 cups almond meal one and one third cups (ground almond)
- 0.33 cup brown sugar one third cup
- 1 cup smooth peanut butter
- 1 teaspoon vanilla extract
- 1 large eggs
Filling
- ½ cup peanut butter
- 0.33 cup dark chocolate one third cup 100 grams
- ½ teaspoon vanilla extract (optional)
- 1 pinch salt (optional)
Instructions
Make the Cookies
- Preheat your oven to 180 degrees Celsius (360 F)
- Combine almond meal, brown sugar, peanut butter, vanilla, and egg to form a dough.
- Roll into balls, press gently, and cut into ~30 uniform rounds using a circular cutter.
- Bake for 12 - 15 minutes, and allow to cool fully
Make the filling
- Melt dark chocolate gently in a heat-safe bowl over a pot of simmering water (or microwave in 20-second bursts, stirring often)
- Once melted and slightly cooled (but still pourable), stir into the peanut butter until smooth and glossy. Stir in vanilla or salt if using.
Assemble the sandwich cookies
- Add ~1 teaspoon of filling to the flat side of one cookie.
- Top with another cookie and press gently to spread the filling evenly.
- Let set at room temperature or refrigerate briefly to speed up firming.
Notes
- Let the cookies cool fully before adding the filling to prevent melting.
- Use quality dark chocolate for the best setting power and flavor.
- If your peanut butter is runny, stir in 1–2 teaspoons of oat flour into the filling for structure.
- Don’t skip the rest time for the filling—it thickens beautifully and helps the sandwiches stay neat.
- Once assembled, store cookies in an airtight container at room temperature for up to 5 days.
- These cookies can also be frozen (assembled or unassembled) for up to 4 months.
- Almond meal – Also known as ground almonds. You can use store-bought or grind your own blanched almonds. If you're after a nut-free version, try desiccated coconut instead—see my Easy 4 Ingredient Peanut Butter Cookies for how this works beautifully.
- Brown sugar – Adds sweetness and moisture. You can swap it for coconut sugar if you're after a less refined alternative.
- Peanut butter – Smooth, natural peanut butter works best (just peanuts and salt, no added oils). For a nut-free alternative, use sunflower seed butter—I have a great homemade version here: Sunflower Seed Butter.
- Dark chocolate – Use a 70% (or higher) dark chocolate for a rich, dairy-free filling that sets firm. You can substitute with milk or white chocolate if dairy isn't a concern.
Nutrition

Quick Start Guide To BLW
Baby led weaning doesn’t need to be complicated, grab my quick start guide to begin your little ones food journey.
Hi what brand of peanut butter do you use? Thanks 🙂
I'm a big fan of pics peanut butter as it has a really roasty flavour, you can get it without added salt, but even the added slat version is low compared to most. And the ingredients is just peanuts!