Plain Cake Recipe
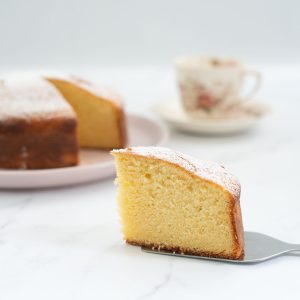
I know this post doesn't have a very exciting title, but sometimes you just need a really good plain cake recipe. This cake is one my grandma taught me, it's what I use if I need a buttery vanilla cake, and what I use if I'm going to make a decorated birthday cake.
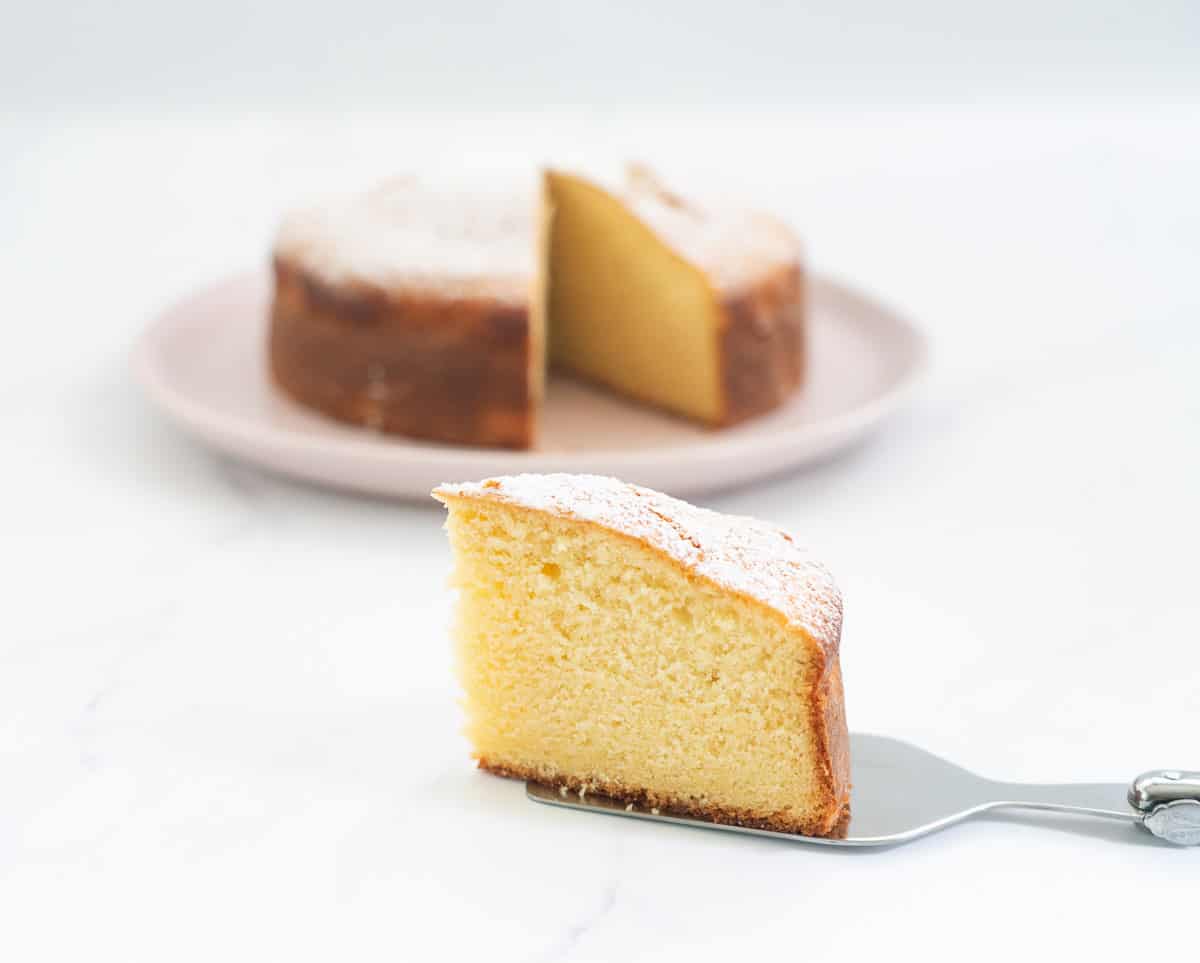
Why This Recipe Works
- You only need 6 basic pantry ingredients!
- Tastes delicious as just a plain buttery vanilla cake
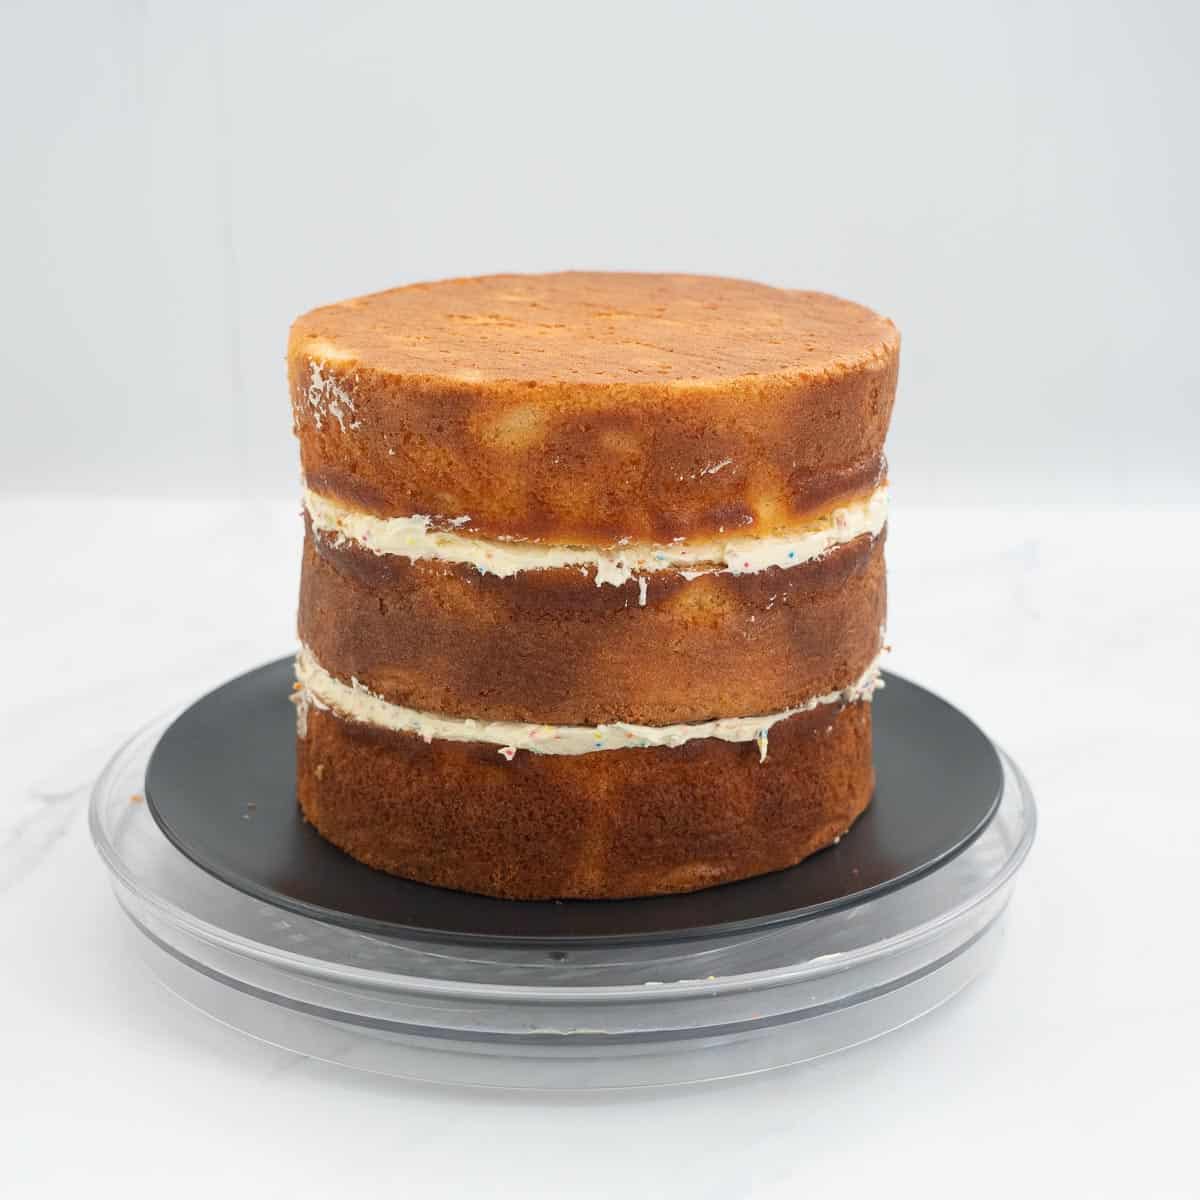
- It has a great texture and holds together well so it's perfect for stacking and decorating
The ingredients you will need
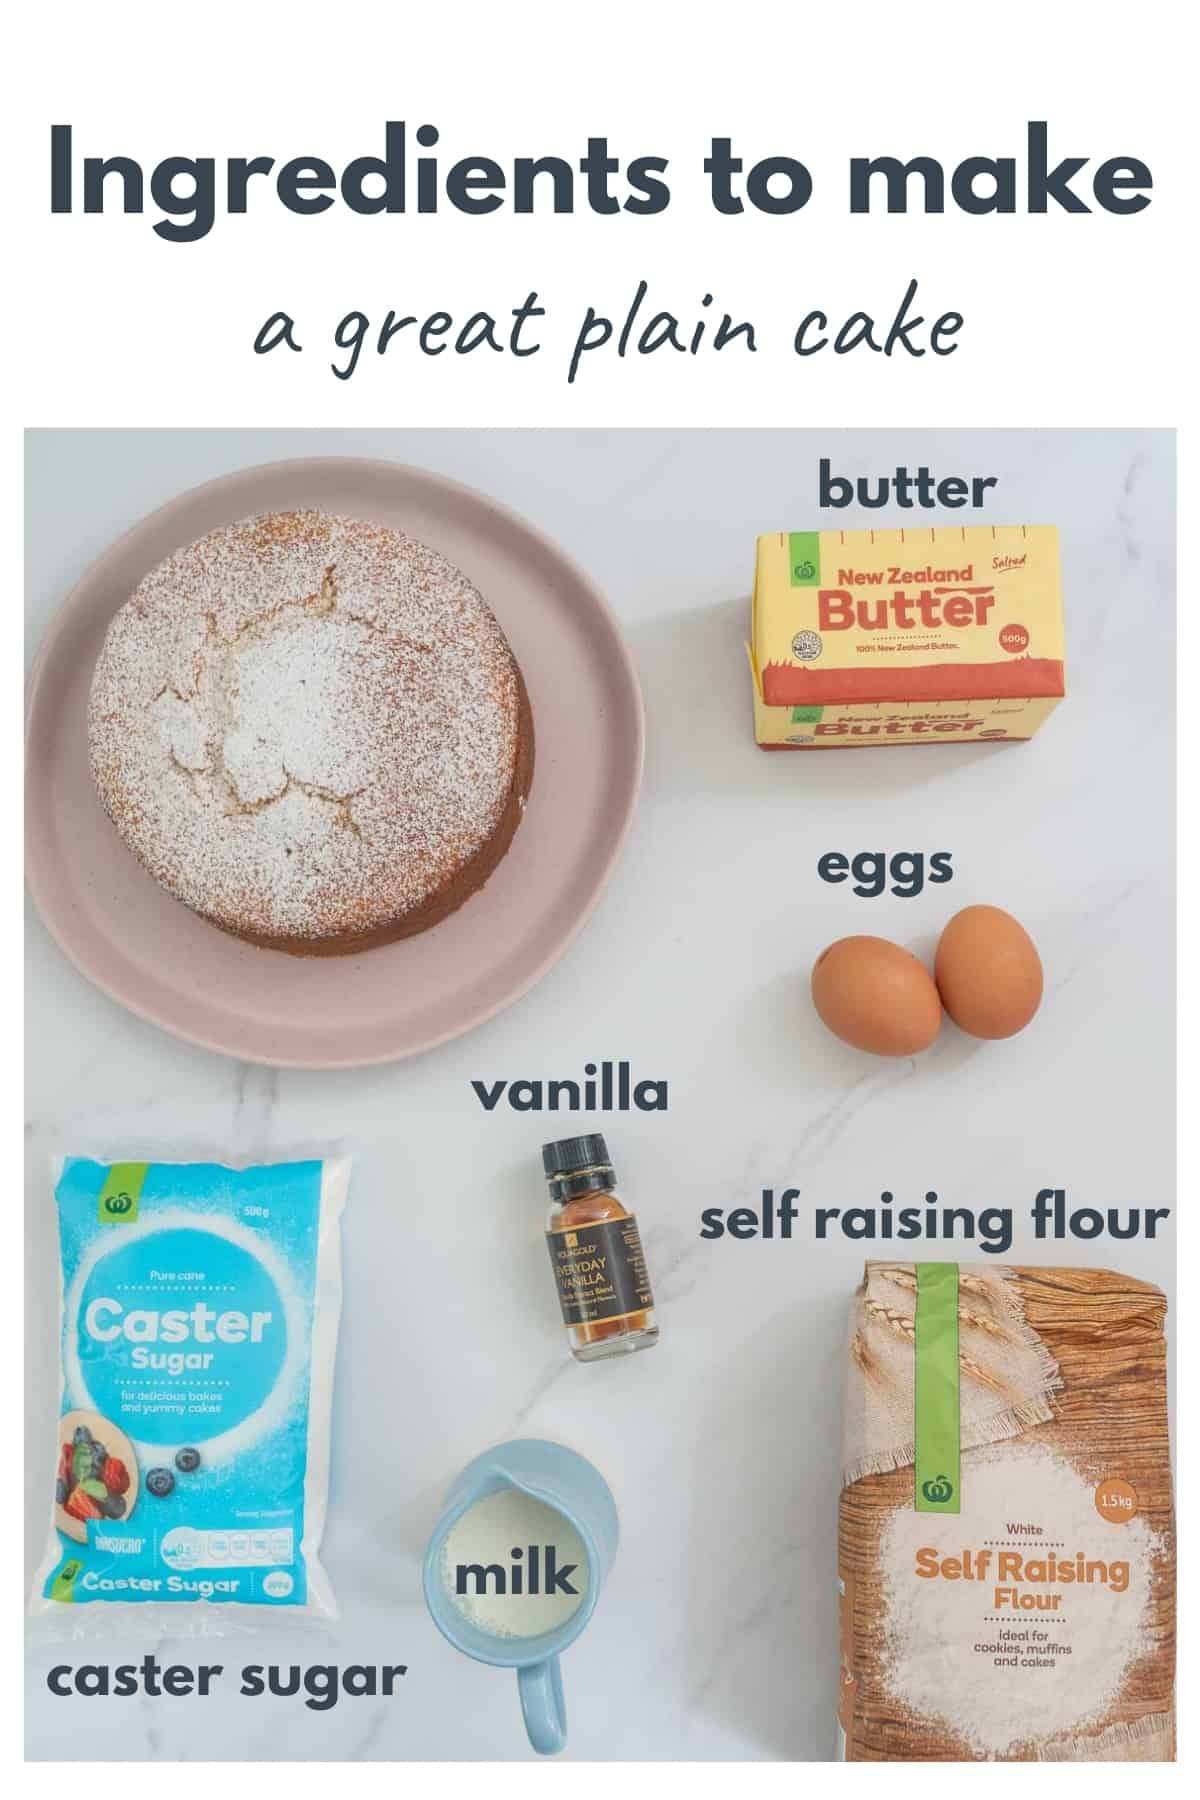
To make my plain cake recipe you will need just 6 ingredients: Butter, Sugar, Eggs, Vanilla, Milk and Self Raising Flour
Ingredient Substiutions
This is one recipe where I haven't tried substituting the milk, butter, or wheat flour for other allergy-friendly alternatives. If you are looking for an allergy-friendly vanilla cake, my dairy free cupcakes recipe may be perfect, you can make it as one large cake and it is gluten, dairy, and egg-free.
- Caster Sugar: If you don't have caster sugar you can substitute regular granulated sugar in this recipe. I find the texture is a little better with caster sugar, but it is still fine with regular sugar.
- Self-raising flour: If you don't have self-raising flour you can substitute for plain four plus 3 teaspoons of baking powder.
Lining a round straight-sided cake tin
For this cake I use a 17 cm straight sided cake tin. I find using a straight-sided cake tin is the best sort to use if you are planning on stacking these cakes into a tower (which I often do when making a birthday cake)
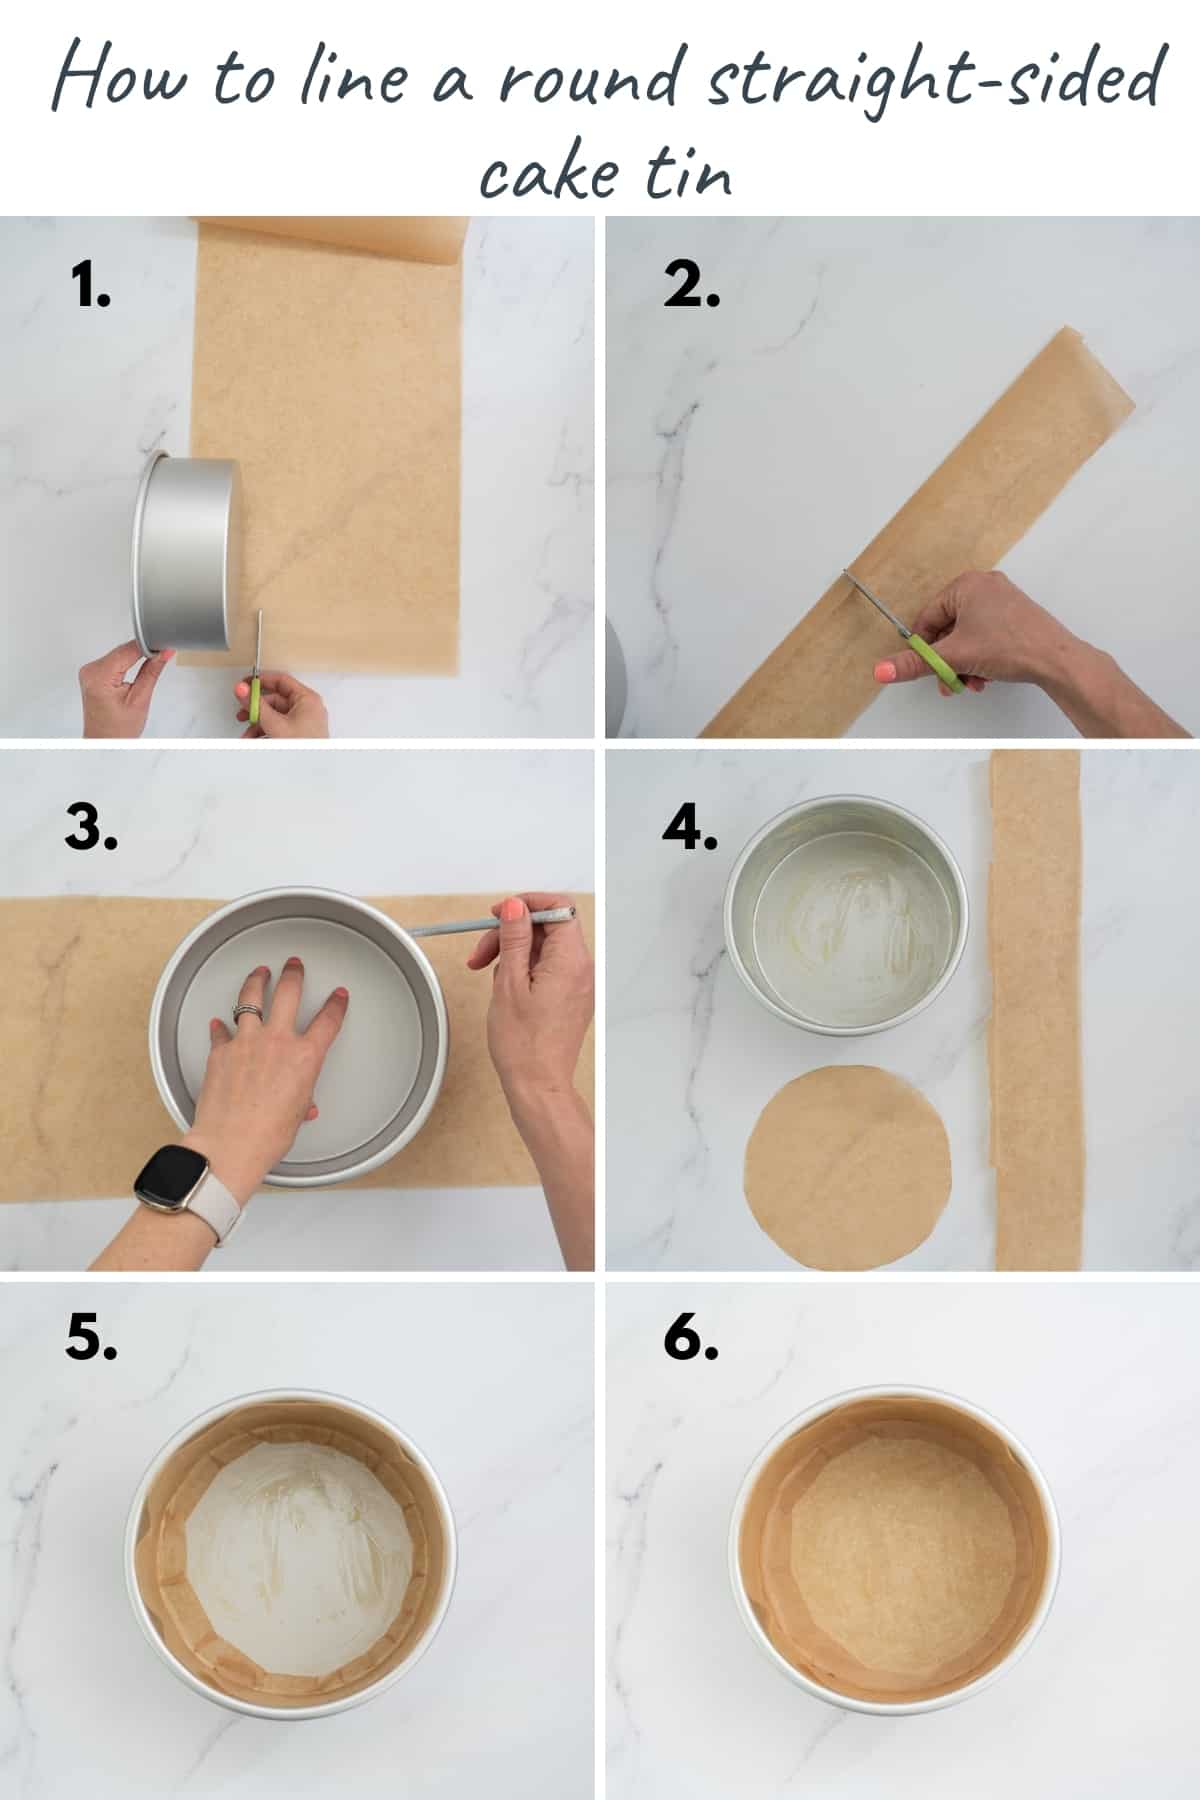
- Cut a long strip of baking paper that is as wide as your cake tin is deep (photo 1).
- Make a 1 cm fold along one edge of the baking paper strip, use scissors to make cuts every 2-3 cm up to the fold line along the strip of the baking paper (photo 2).
- Draw a circle around your cake tin (photo 3).
- Grease the tin with a little butter or oil (you don't have to do this step, but I find it helps hold the lining in place until you pour in the batter (photo 4).
- Arrange the long strip to cover the inside sides of the cake tin, the folded edge will sit on the base of the tin (photo 5).
- Finish the lining off by placing the circular piece on the base of the cake tin (photo 6).
Step by step instructions
- You will need: 1 large mixing bowl, an electric beater stand mixer a 17-20 cm lined cake tin, a set of kitchen scales (optional, but I find it easier to weight the ingredients for this recipe)
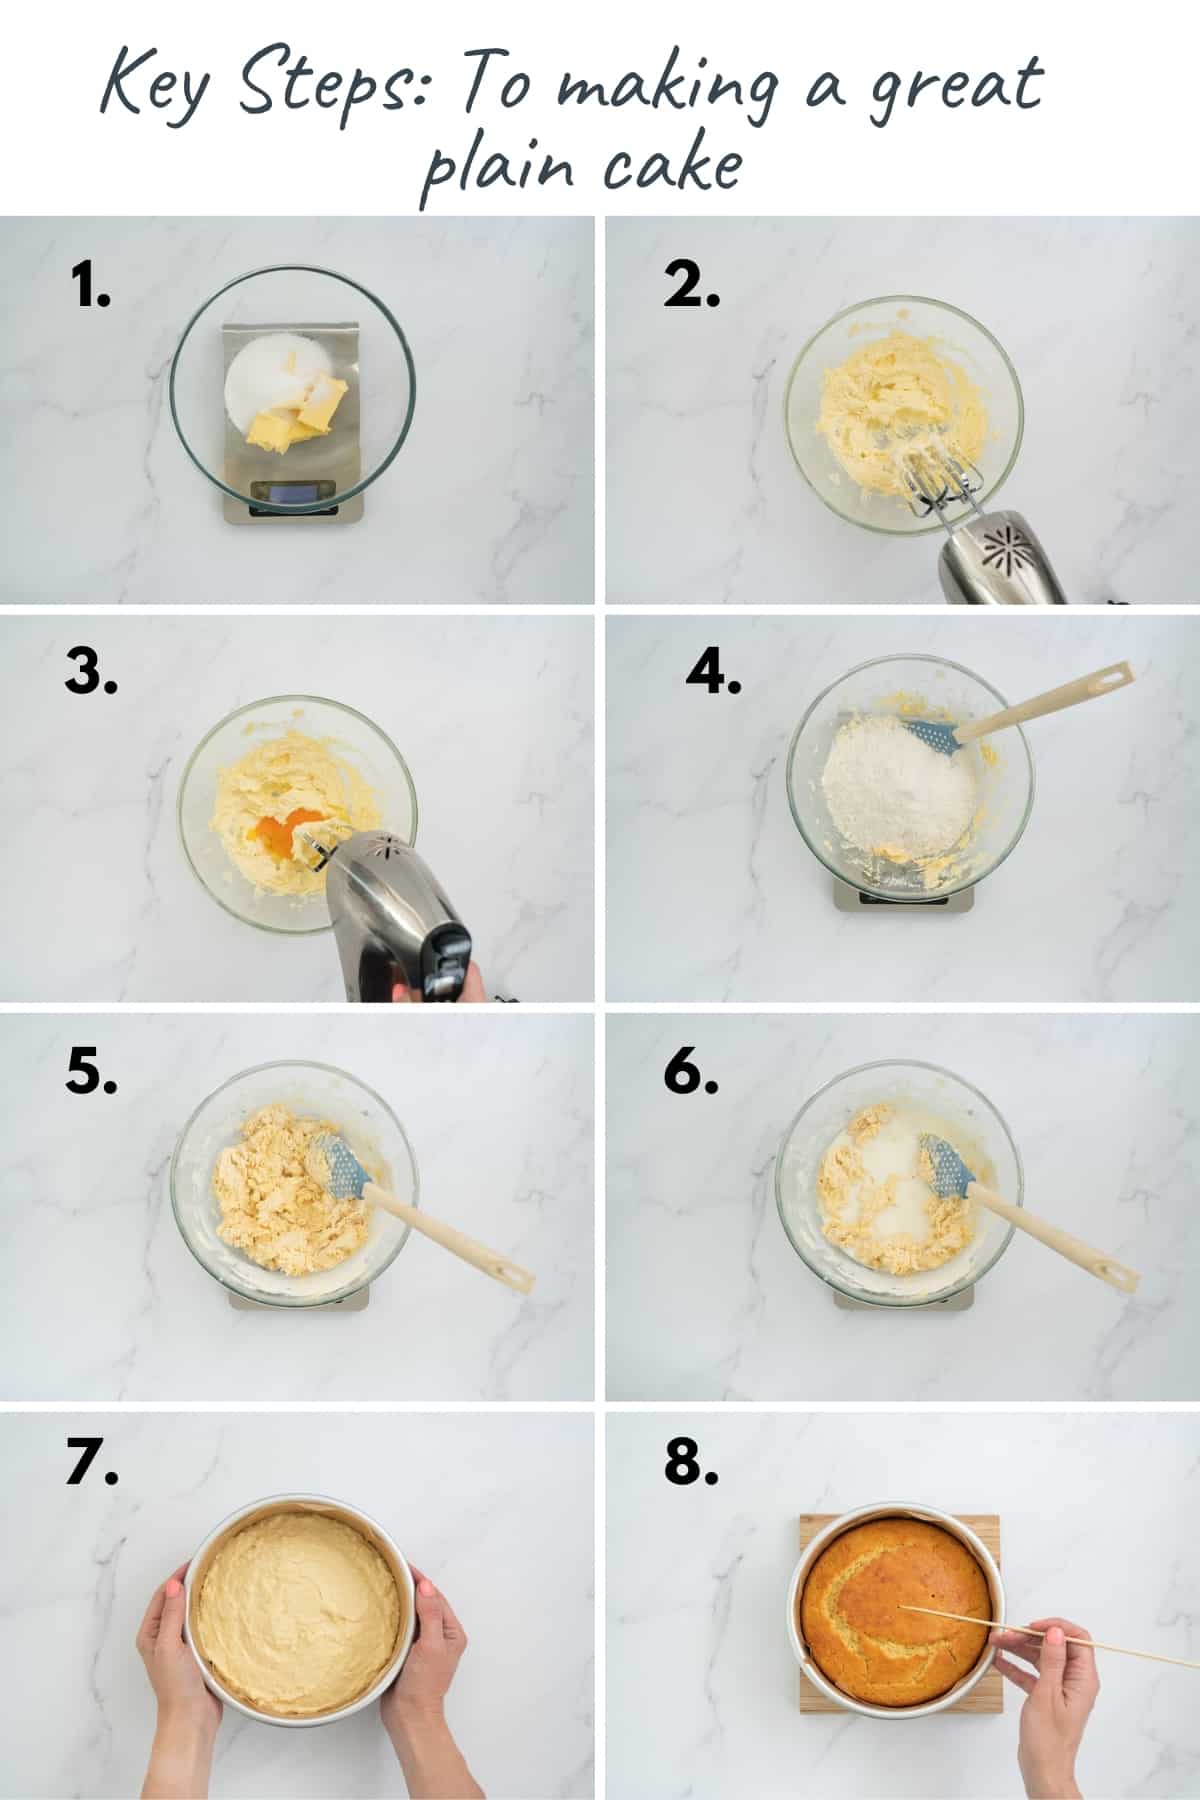
- Weigh or measure out the softened room temperature butter and the sugar, and add the vanilla (photo 1).
- Beat the butter and sugar until well creamed, the mix will get fluffy and will start the colour will change from yellow to closer to white. (photo 2).
- Beat in the eggs, it is best to do this one at a time, otherwise, the creamed mixture can split (photo 3).
- Fold in the flour, I use a wooden spoon or spatula for this step. I tend to weigh this straight into the bowl you can see the scales in the photo (photo 4-5).
- Fold in the milk, again I tend to weigh this in as it saves me dishes and was how my grandma taught me), but you can use cups to measure if you prefer. (photo 6).
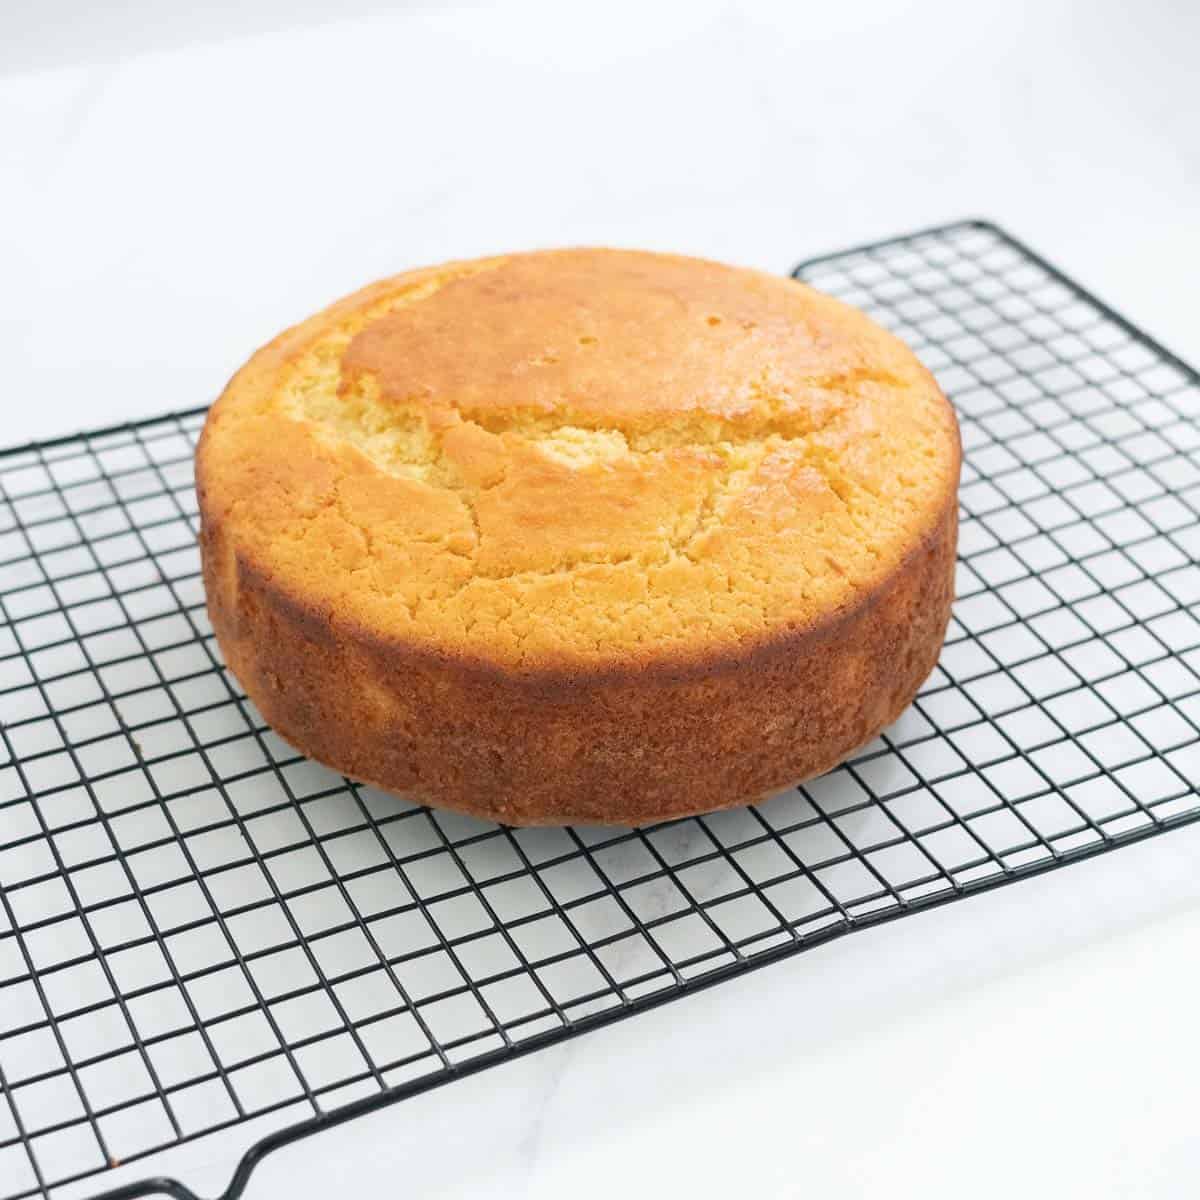
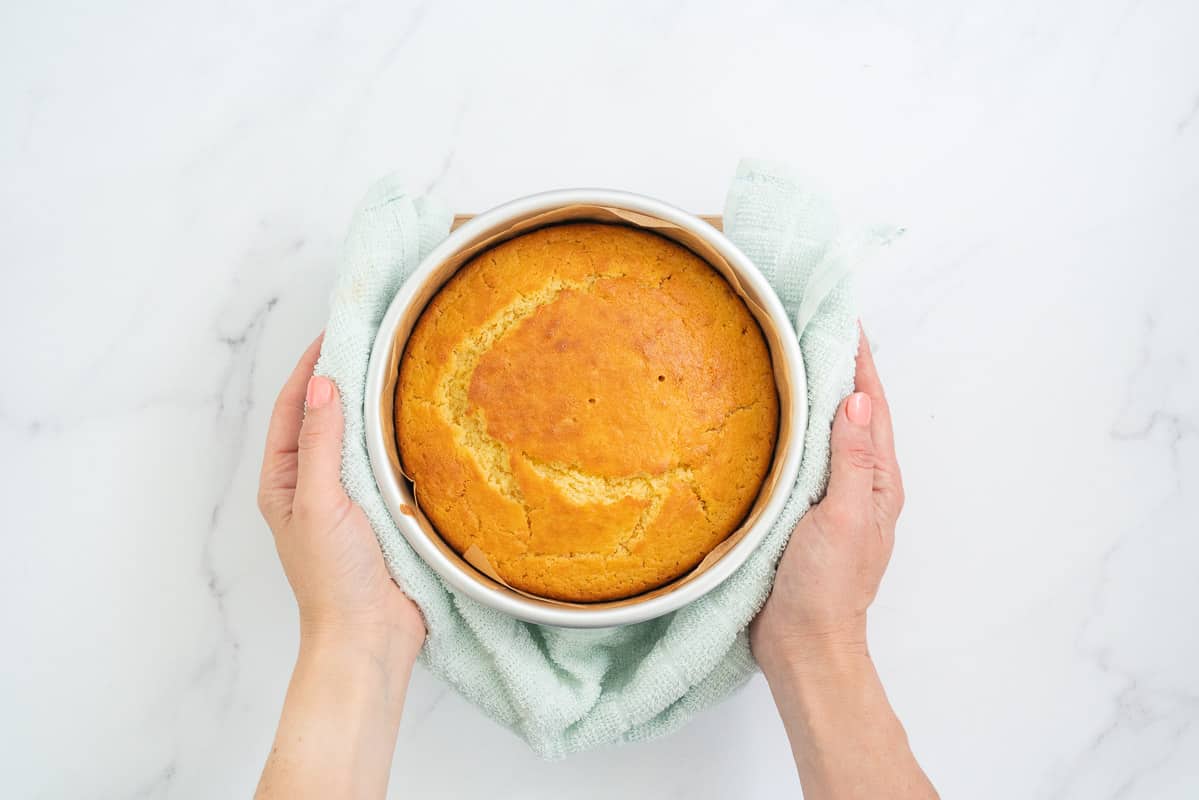
- Pour into your lined cake tin and bake at 180 degrees Celsius (360 F) for 40 mins or until when pierced with a skewer in the centre the skewer comes out clean. The cake should be golden in colour (photo 7-8).
- Cool in the tin for around 10 minutes before turning out on to a cake rack.
Save This Recipe!
Top Tips
Here is how you can make this recipe perfectly every time!
- This recipe works best if you use kitchen scales, I weigh the ingredients straight into the bowl, so it's fewer dishes and more accurate.
- Make sure your self-raising flour is not old. The raising agents in self-raising flour can go out of date and not work properly. The same can be said for baking powder. If your baking isn't rising properly check this!
- Take the time to really cream the butter and sugar, keep going until the butter has lost most of its yellow colour, your cake will be better for it.
FAQs
Once cooled store in an airtight container for up to 5 days. If you want the cake to last longer it can be frozen.
Absolutely this plain cake recipe freezes well. If wrapped tightly so that it is air tight the cake will last in the freezer up to 3 months
Birthday cakes to make with this recipe
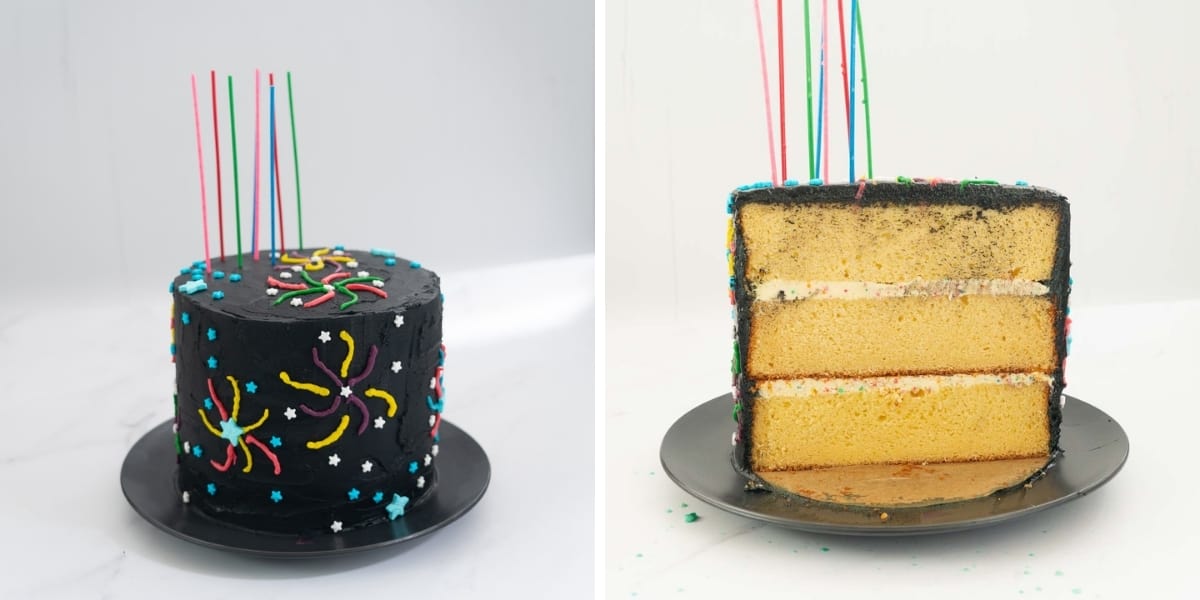
You can turn this cake into so many cool cakes with a bit of buttercream and decorations
Plain Cake Recipe
RATE THIS RECIPE
Save This Recipe!
Equipment
- 17cm cake tin
- Electric beater or stand mixer
- Kitchen scales
Ingredients
- 125 g butter 0.5 Cup | 4.4oz | I use salted butter, if you are using unsalted I would add a pinch of salt to the flour
- 125 g caster sugar 0.5 Cup | 4.4oz | You can substitute with granuated sugar, although the cake texture is a little better with the finer caster sugar
- 2 teaspoon vanilla essence You can reduce to 1 teaspoon if you don't want too much vanilla flavour
- 2 eggs I use size 6 eggs which are medium sized eggs
- 250 g self rasing flour
- 250 g milk 1 Cup | 8.5 floz | I use full fat milk
Instructions
- Line the sides and base of your cake tin (I use a 17cm cake tin) You will find instructions for how I line my cake tins in the recipe infomration above.
- Preheat oven to 180 degrees celsius or approx 360 F
- Weigh or measure out the softened room temperature butter and the sugar, and add the vanilla.
- .Beat the butter and sugar until well creamed, the mix will get fluffy and will start the colour will change from yellow to closer to white.
- .Beat in the eggs, it is best to do this one at a time, otherwise, the creamed mixture can split.
- Fold in the flour, I use a wooden spoon or spatula for this step. I tend to weigh this straight into the bowl you can see the scales in the photo.
- Fold in the milk, again I tend to weigh this in as it saves me dishes and was how my grandma taught me), but you can use cups to measure if you prefer.
- .Pour into your lined cake tin and bake at 180 degrees Celsius (360 F) for 40 mins or until when pierced with a skewer in the centre the skewer comes out clean. The cake should be golden in colour.
- Cool in the tin for around 10 minutes before turning out on to a cake rack.
- It can be nice to dust the cool cake with a little icing sugar before serving
Notes
- This cake will store in an airtight container for up to 5 days
- This cake freezes very well, wrap tightly in plastic wrap and freeze for up to 3 months
Nutrition
Quick Start Guide To BLW
Baby led weaning doesn’t need to be complicated, grab my quick start guide to begin your little ones food journey.
AMAZING!!!!!!!!!!!!!!!!!!!!!!!!!!!!!!!!!!!!!!!!!!!!!!!!!!!!!!!!!!!!!!!!!!!!!!!!!!!!!!!!!!!!!!!!!!!!!!!!!!!!!!!!!!!!!!!!!!!!!!!!!!!!!!!!!!!!!!!!!!!!!!!!!!!!!!!!!!!!!!!!!!!!!!!!!!!!!!!!!!!!!!!!!!!!!!!!!!!!!!!!!!!!!!!!!!!!!!!!!!!!!!!!!!!!!!!!!!!!!!!!!!!!!!!!!!!!!!!!!!!!!!!!!!!!!!!!!!!!!!!!!!!!!!!!!!!!!!!!!!!!!!!!!!!!!!!!!!!!!!!!!!!!!!!!!!!!!!!!!!!!!!!!!!!!!!!!!!!!!!!!!!!!!!!!!!!!!!!!!!!!!!!!!!!!!!!!!!!!!!!!!!!!!!!!!!!!!!!!!!!!!!!!!!!!!!!!!!!!!!!!!!!!!!!!!!!!!!!!!!!!!!!!!!!!!!!!!!!!!!!!!!!!!!!!!!!!!!!!!!!!!!!!!!!!!!!!!!!!!!!!!!!!!!!!!!!!!!!!!!!!!!!!!!!!!!!!!!!!!!!!!!!!!!!!!!!!!!!!!!!!!!!!!!!!!!!!!!!!!!!!!!!!!!!!!!!!!!!!!!!!!!!!!!!!!!!!!!!!!!!!!!!!!!!!!!!!!!!!!!!!!!!!!!!!!!!!!!!!!!!!!!!!!!!!!!!!!!!!!!!!!!!!!!!!!!!!!!!!!!!!!!!!!!!!!!!!!!!!!!!!!!!!!!!!!!!!!!!!!!!!!!!!!!!!!!!!!!!!!!!!!!!!!!!!!!!!!!!!!!!!!!!!!!!!!!!!!!!!!!!!!!!!!!!!!!!!!!!!!!!!!!!!!!!!!!!!!!!!!!!!!!!!!!!!!!!!!!!!!!!!!!!!!!!!!!!!!!!!!!!!!!!!!!!!!!!!!!!!!!!!!!!!!!!!!!!!!!!!!!!!!!!!!!!!!!!!!!!!!!!!!!!!!!!!!!!!!!!!!!!!!!!!!!!!!!!!!!!!!!!!!!!!!!!!!!!!!!!!!!!!!!!!!!!!!!!!!!!!!!!!!!!!!!!!!!!!!!!!!!!!!!!!!!!!!!!!!!!!!!!!!!!!!!!!!!!!!!!!!!!!!!!!!!!!!!!!!!!!!!!!!!!!!!!!!!!!!!!!!!!!!!!!!!!!!!!!!!!!!!!!!!!!!!!!!!!!!!!!!!!!!!!!!!!!!!!!!!!!!!!!!!!!!!!!!!!!!!!!!!!!!!!!!!!!!!!!!!!!!!!!!!!!!!!!!!!!!!!!!!!!!!!!!!!!!!!!!!!!!!!!!!!!!!!!!!!!!!!!!!!!!!!!!!!!!!!!!!!!!!!!!!!!!!!!!!!!!!!!!!!!!!!!!!!!!!!!!!!!!!!!!!!!!!!!!!!!!!!!!!!!!!!!!!!!!!!!!!!!!!!!!!!!!!!!!!!!!!!!!!!!!!!!!!!!!!!!!!!!!!!!!!!!!!!!!!!!!!!!!!!!!!!!!!!!!!!!!!
I hated it. There was so much words about your life and not enough words about the ingredients. I spent more time trying to find the recipe and the ingredients than actually making the cake!
I have a jump to recipe button at the top of al my posts which takes you directly to a basic recipe card with ingredients and instructions and no other prose. I think this button will suit you well. like I say its at the top of every post so you can skip everything 🙂
For those that do like the prose it allows me to make ad income which means I can provide these recipes free of charge 🙂
Love this cake recipe! Could I use it for a sheet cake? Thanks!
Yep it works fine but the cook time will be quicker so be sure to check it often
Looks amazing and I love how easy the recipe is! Have you ever made it with coconut sugar? I'm assuming the colour will change, but I wonder about texture and flavour.
Hi Sonja, I haven't tested this recipe with coconut sugar. Based on my experience I think it should be fine, the colour will be darker and the flavour profile will change a little but usually coconut sugar behaves the same as granulated sugar from a texture perspective.
Exactly what I was looking for. Easy to follow. Thank you
The cake came up amazing!! This recipe is a keeper!! Everyone loved it!!
This cake is amazing!! This recipe is a keeper!! Everyone loved it!!
This is a hit everytime with the kids and adults! I am wanting to try to make this a chocolate cake next time. Do you have any suggestions? On quantities to use?
Where do you find the mesurements for the ingredents???
Thanks a million!
The ingredient volumes are in the recipe card at the bottom of the post. hit the jump to recipe button and it will take you straight there.
Perfection and simple! Thank you much we all loved it especially birthday girl 5!
easiest recipe ever. thank you