Gluten Free Lolly Cake
Lolly cake is a beloved New Zealand classic—if you grew up in NZ, chances are you’ve had a slice (or five!) at a birthday party or bake sale. Traditionally made with malt biscuits and fruit puff lollies, it’s a nostalgic favourite with its chewy, buttery texture and bursts of colourful sweetness.
This Gluten-Free Lolly Cake keeps all the flavours and fun of the original while being coeliac-friendly. After plenty of testing (and enthusiastic taste-testing from my son!), I’ve found the perfect biscuit combination to recreate that classic taste and texture. Whether you're making it for a special occasion or just because, this easy no-bake treat is sure to bring a little Kiwi nostalgia to your kitchen!
Ingredients you will need
Ingredient Notes, Substitutes, & Alternatives
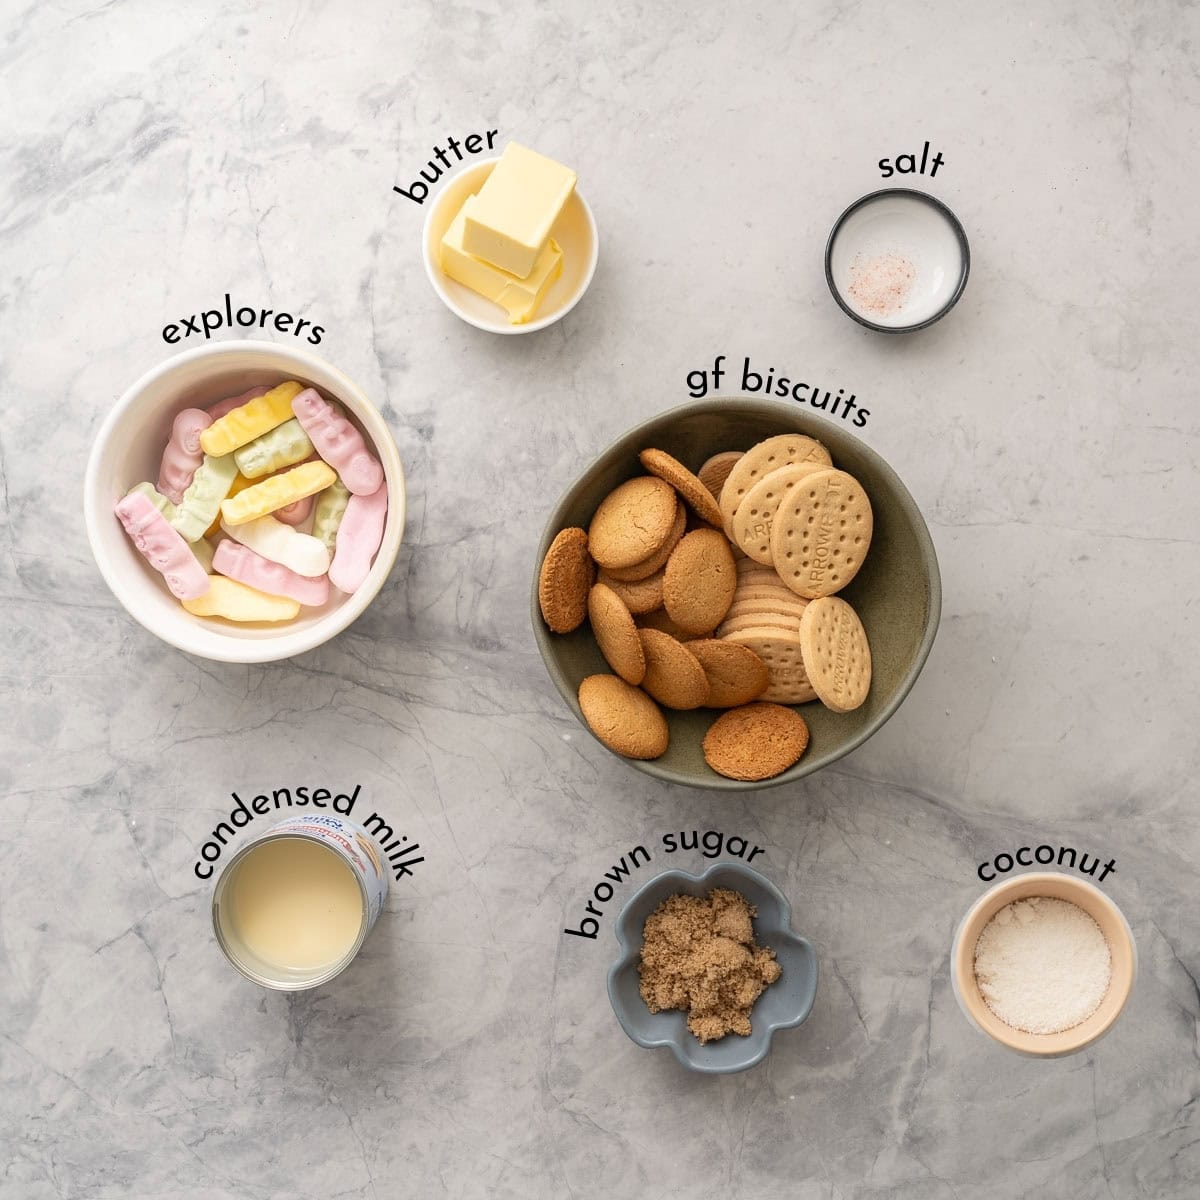
- Gluten-Free Biscuits - For the best texture and flavor, I like using a mix of GF arrowroot biscuits and GF gingernuts in this recipe. Traditional lolly cake is made with malt biscuits, but since malt contains gluten, there’s no true gluten-free alternative. This combination gives the closest colour and flavor to the original.
- Lollies - I use Pascall Explorers because they’re gluten-free by ingredient, making them a great option for this recipe. Some fruit puffs are also gluten-free, but always check the label to be sure before using them.
- Brown Sugar Brown sugar adds a lovely caramel flavor to the lolly cake. If you’d rather skip caramelizing it with the condensed milk, you can swap the condensed milk for caramel condensed milk instead.
- Salt - After lots of testing (and plenty of taste-testing with my son!), we found that just a pinch of salt makes this recipe even better. But if you prefer, you can leave it out.
Step-by-step instructions
Below are illustrated step-by-step instructions to make my Gluten Free Lolly Cake recipe, if you prefer just the written instructions then head straight to the printable recipe card below.
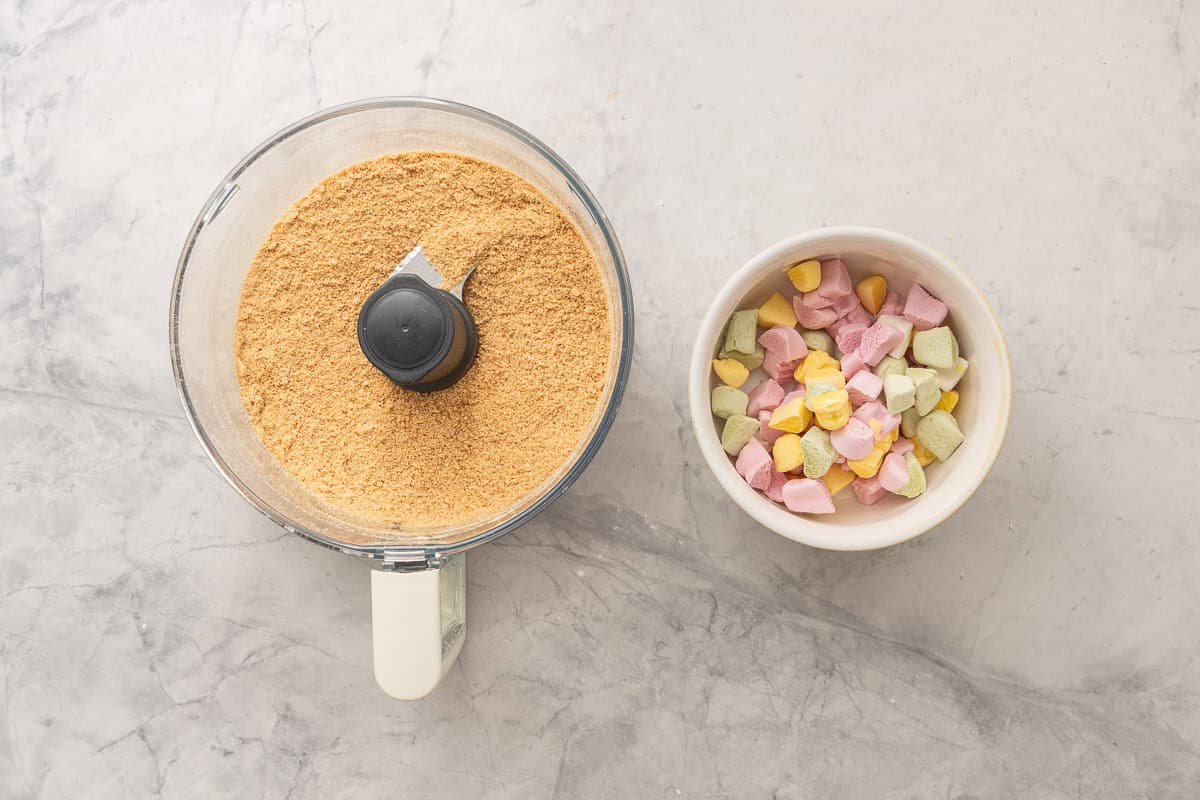
Step one: Crush the biscuits to a fine crumb. I do this in a food processor. If you don't have a food processor you can also place the bags bisuits in a clean bag and use a rolling pin to crush them.
Chop the explorer lollies into one centimetre pieces.
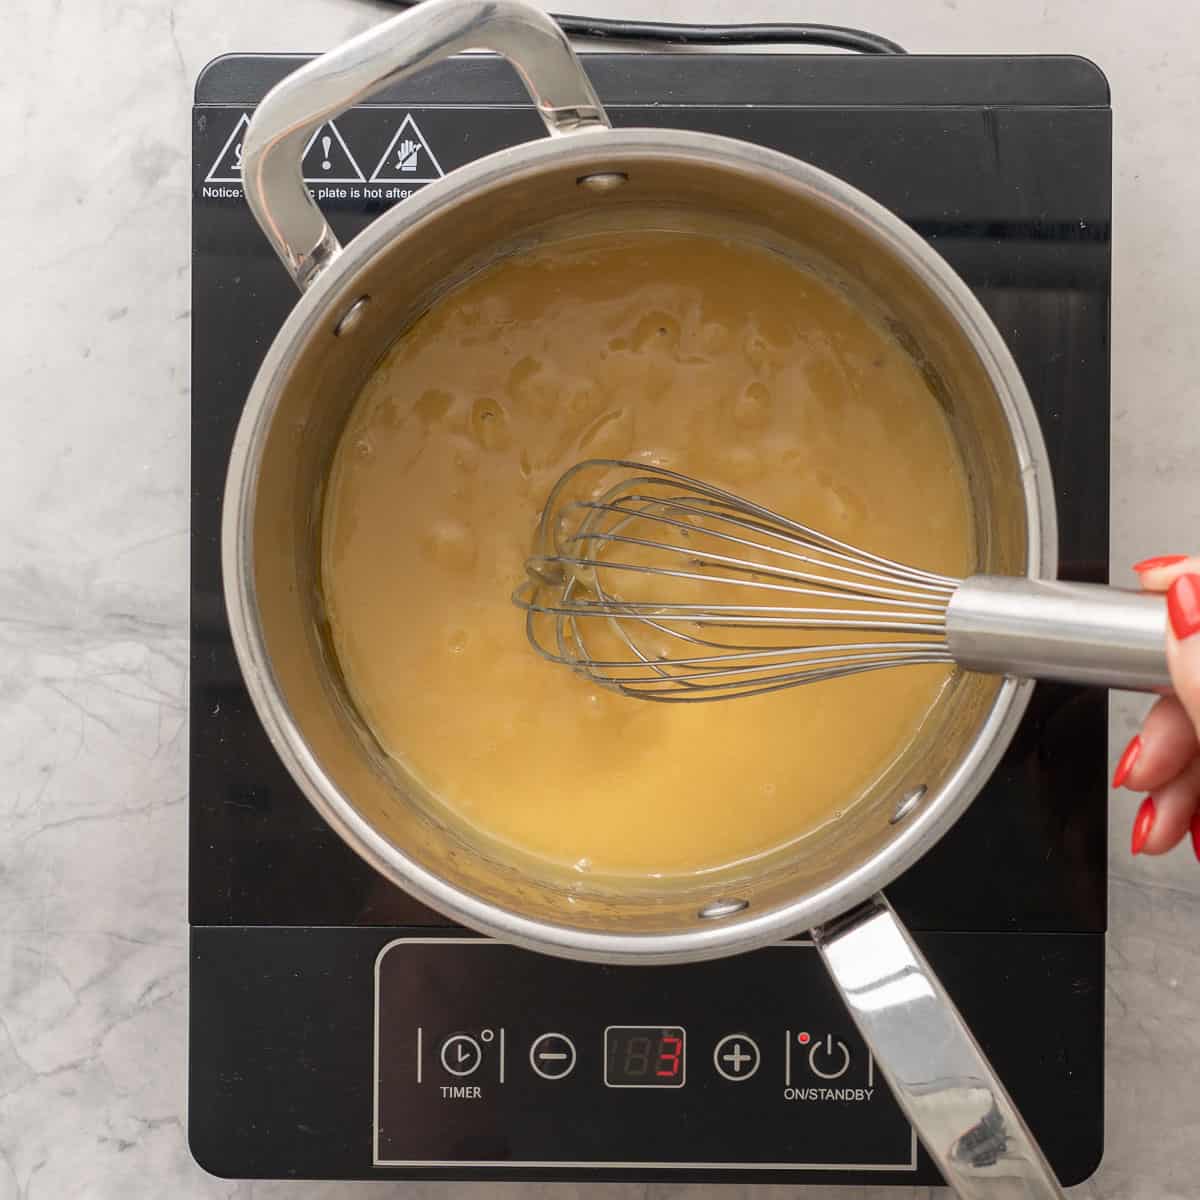
Step two: Place the butter and brown sugar in a large saucepan (a pot large enough to hod all of the lolly cake ingredients). Heat the butter and brown sugar over a medium heat until the butter and sugar are melted.
Add the condensed milk to the melted butter and sugar mixture, continue to heat the mixture while stirring in the condensed milk, until you get a thick caramel.
Step three: Remove from the heat, stir through the salt, biscuit crumbs and chopped explorer sweets. I leave then leave mix to cool down for a few minutes
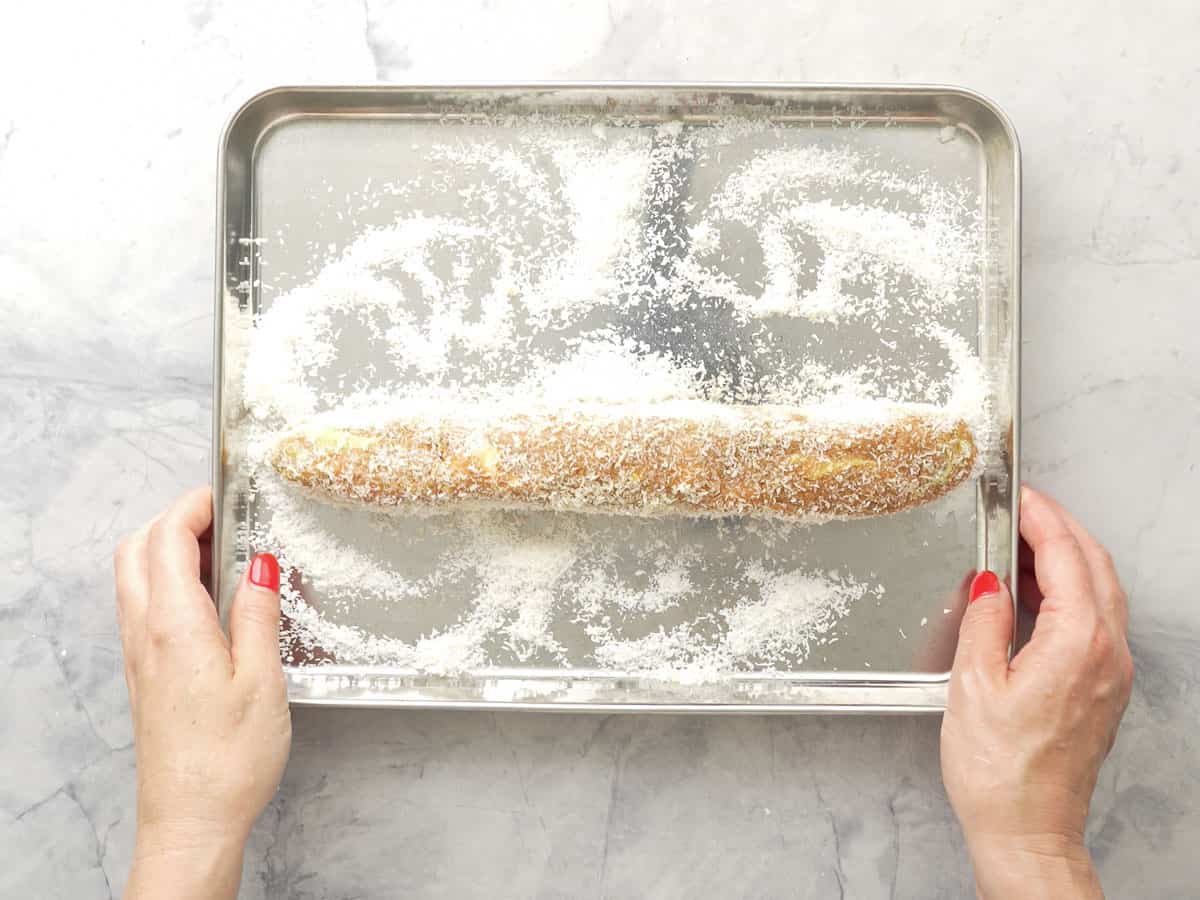
Split the lolly cake mixture into two equal portions, roll into two logs.

Step four: Roll these two logs in desiccated coconut, then wrap tightly in cling film (glad wrap).
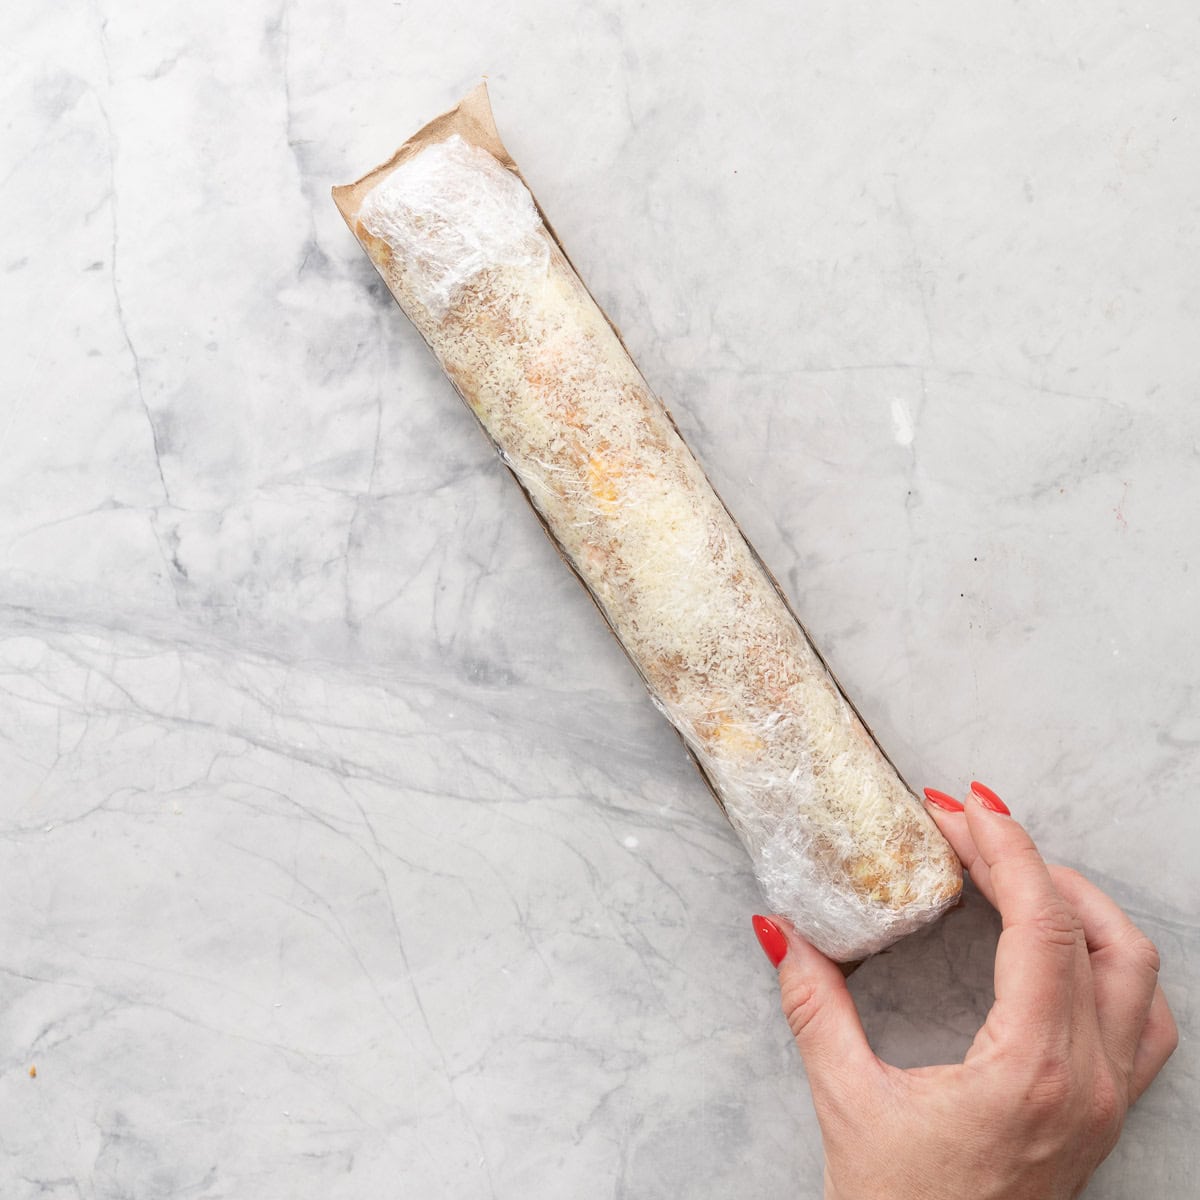
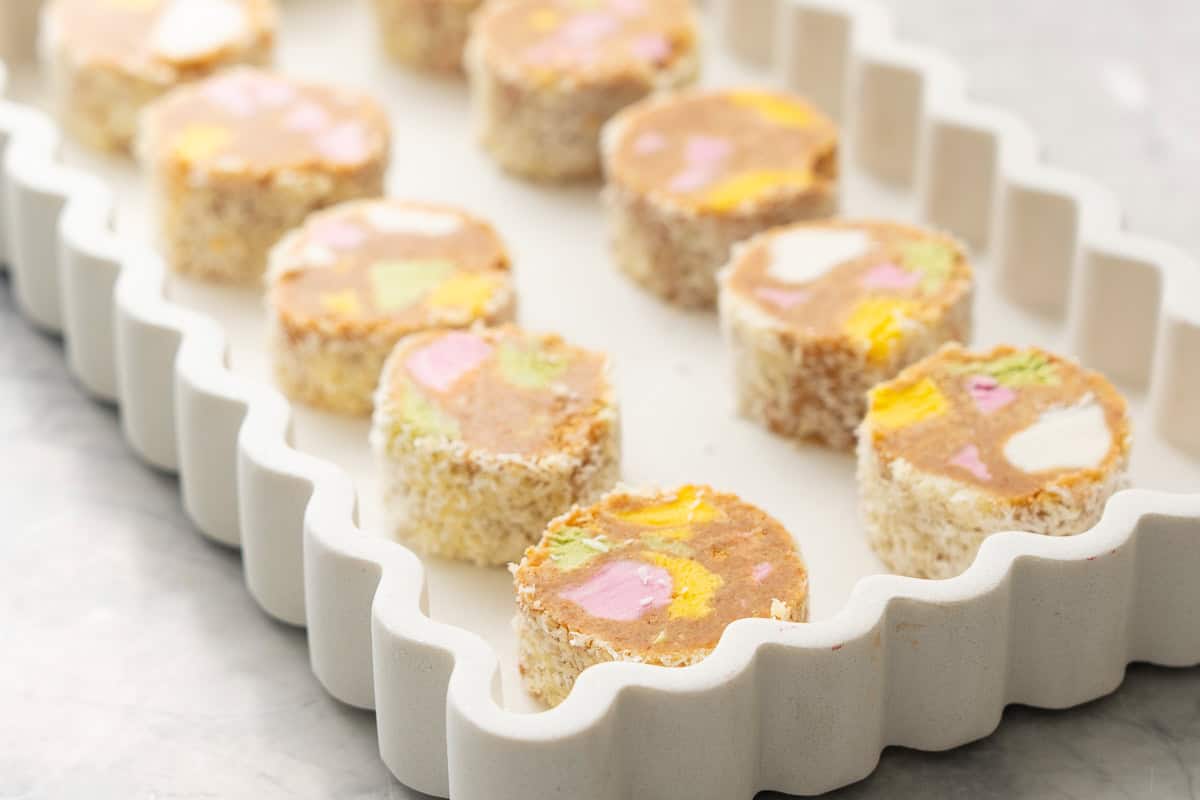
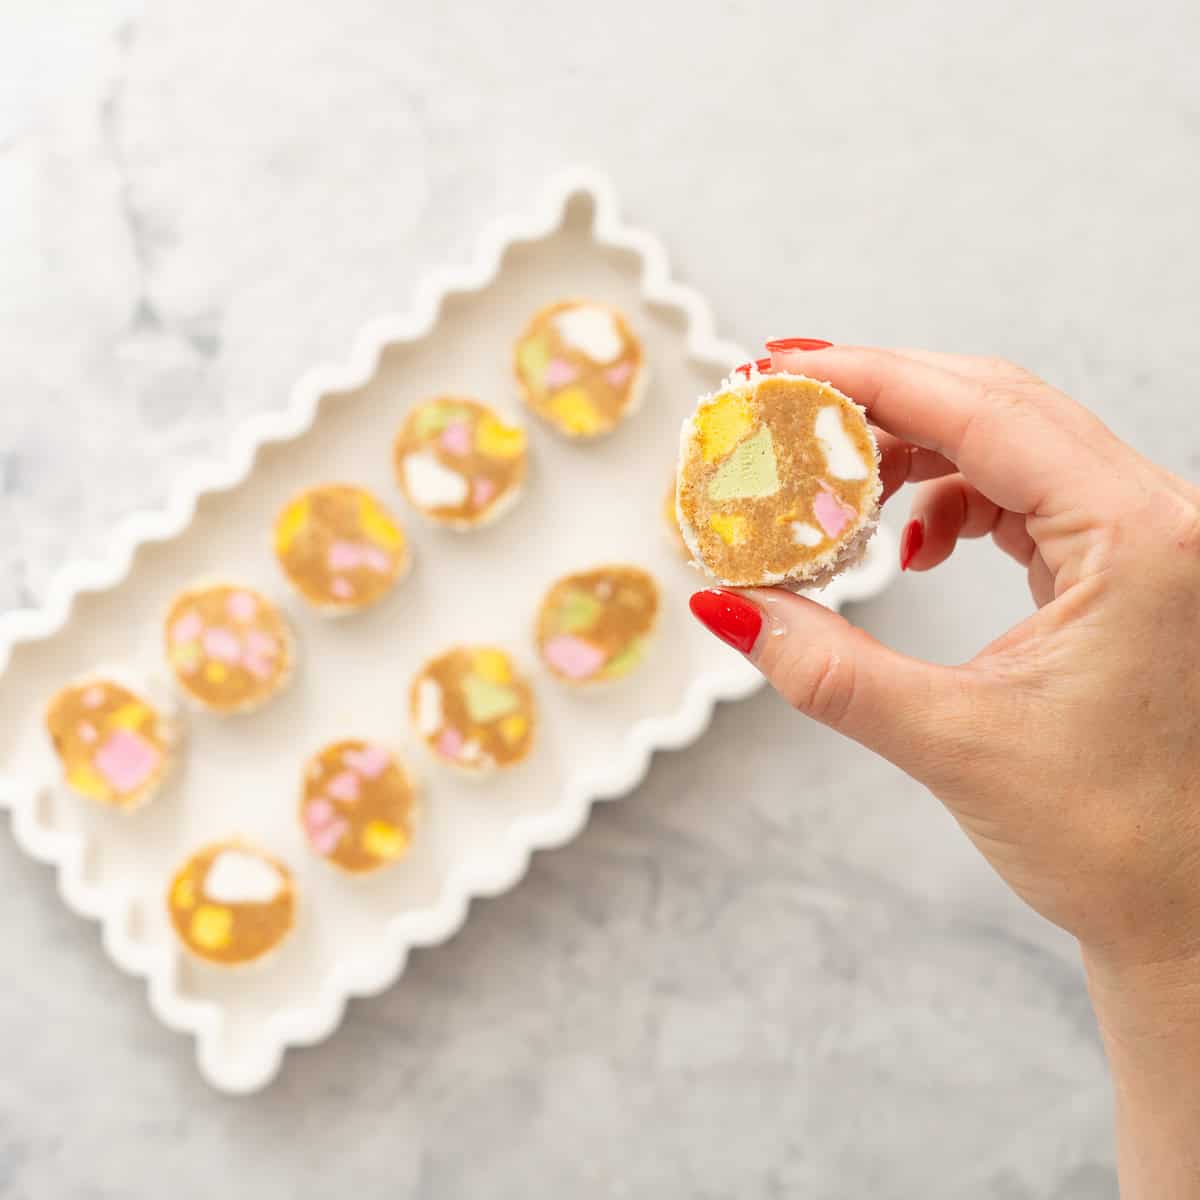
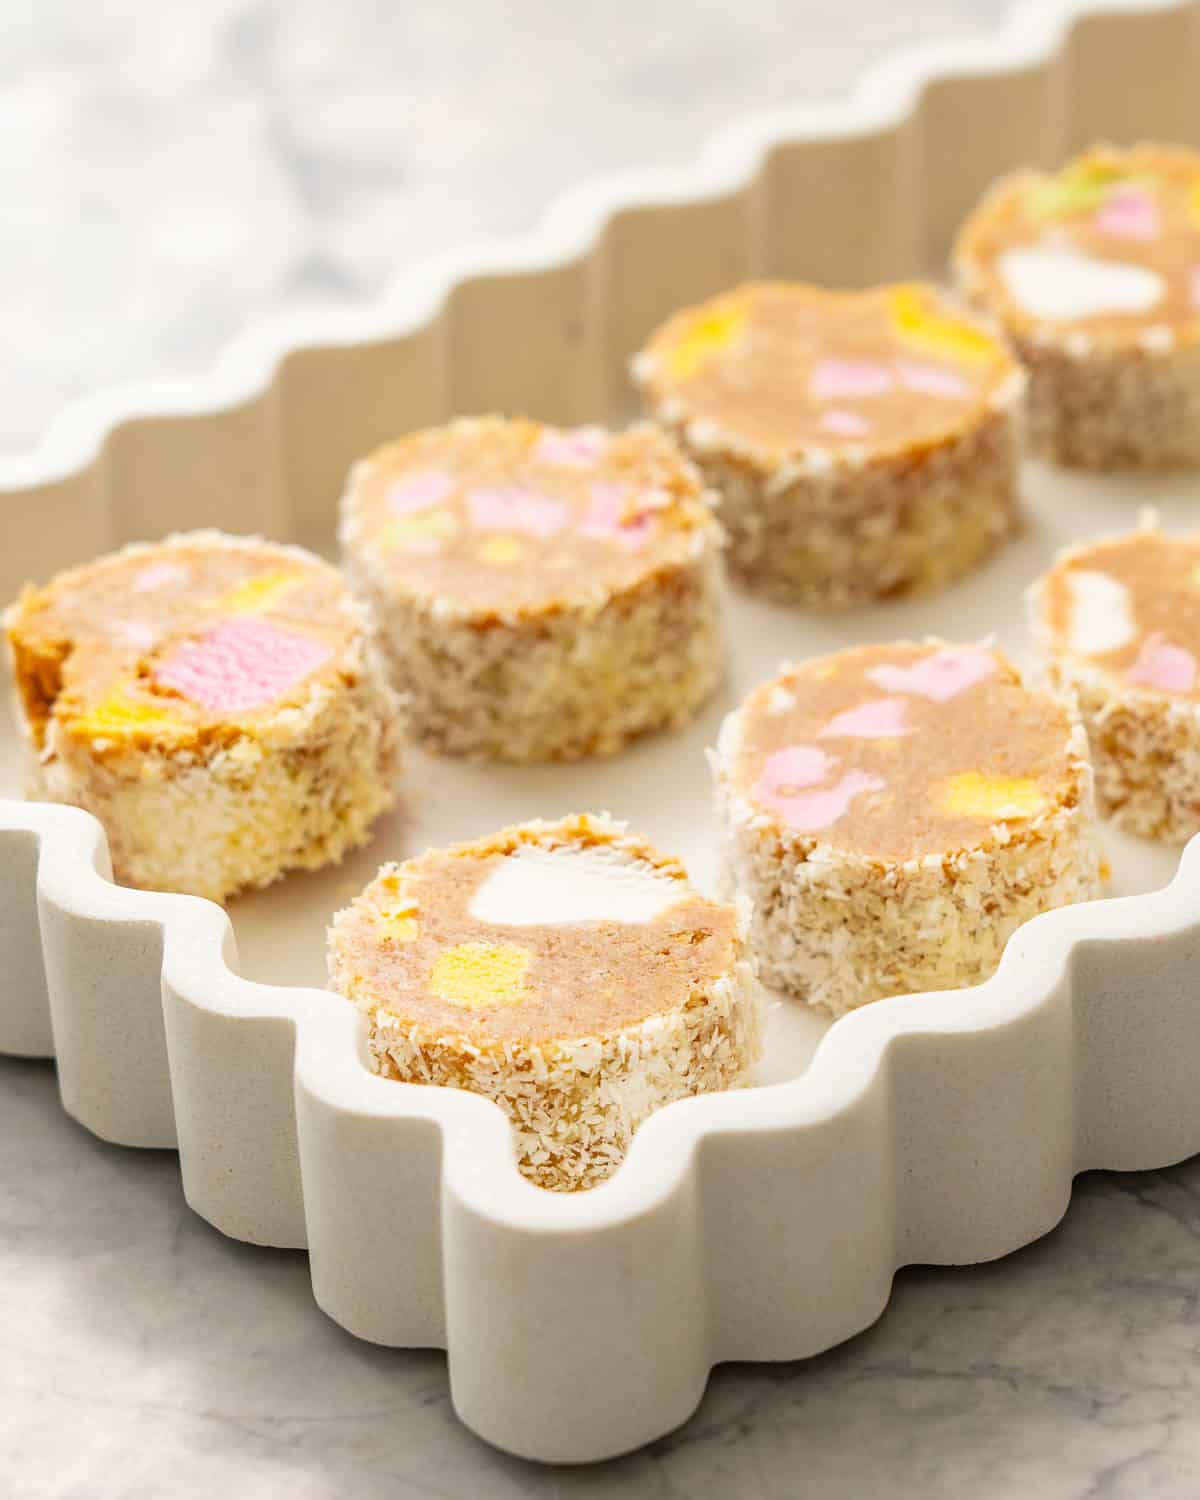
Step five: Chill in the fridge until firm (at least 2 hours), then slice into 2 centimetre slices.
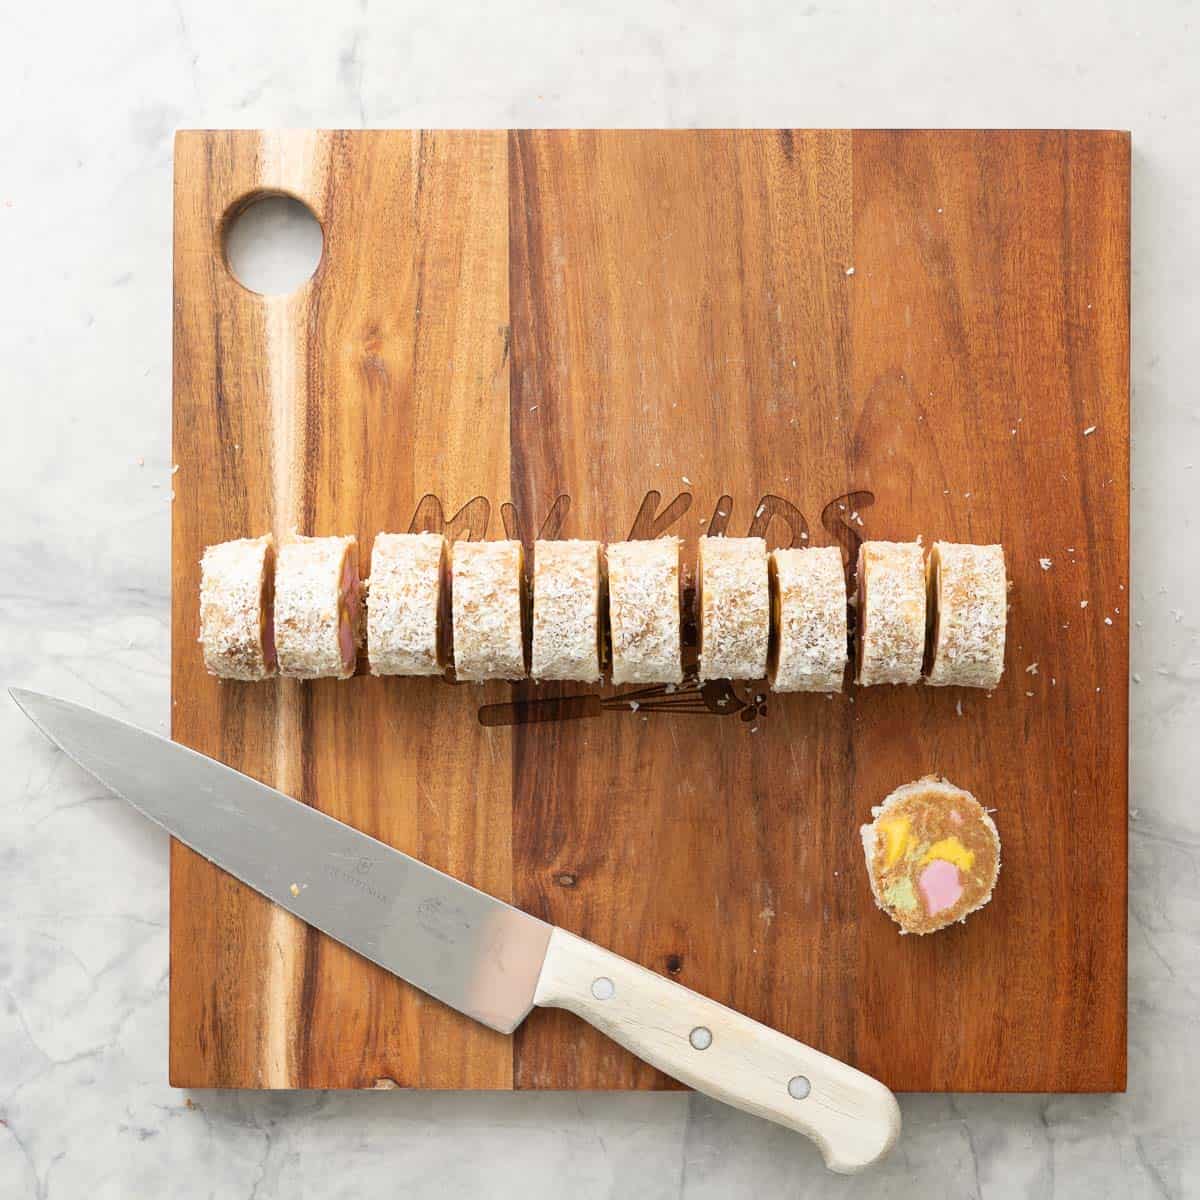
Enjoy!
Save This Recipe!
Top Tips
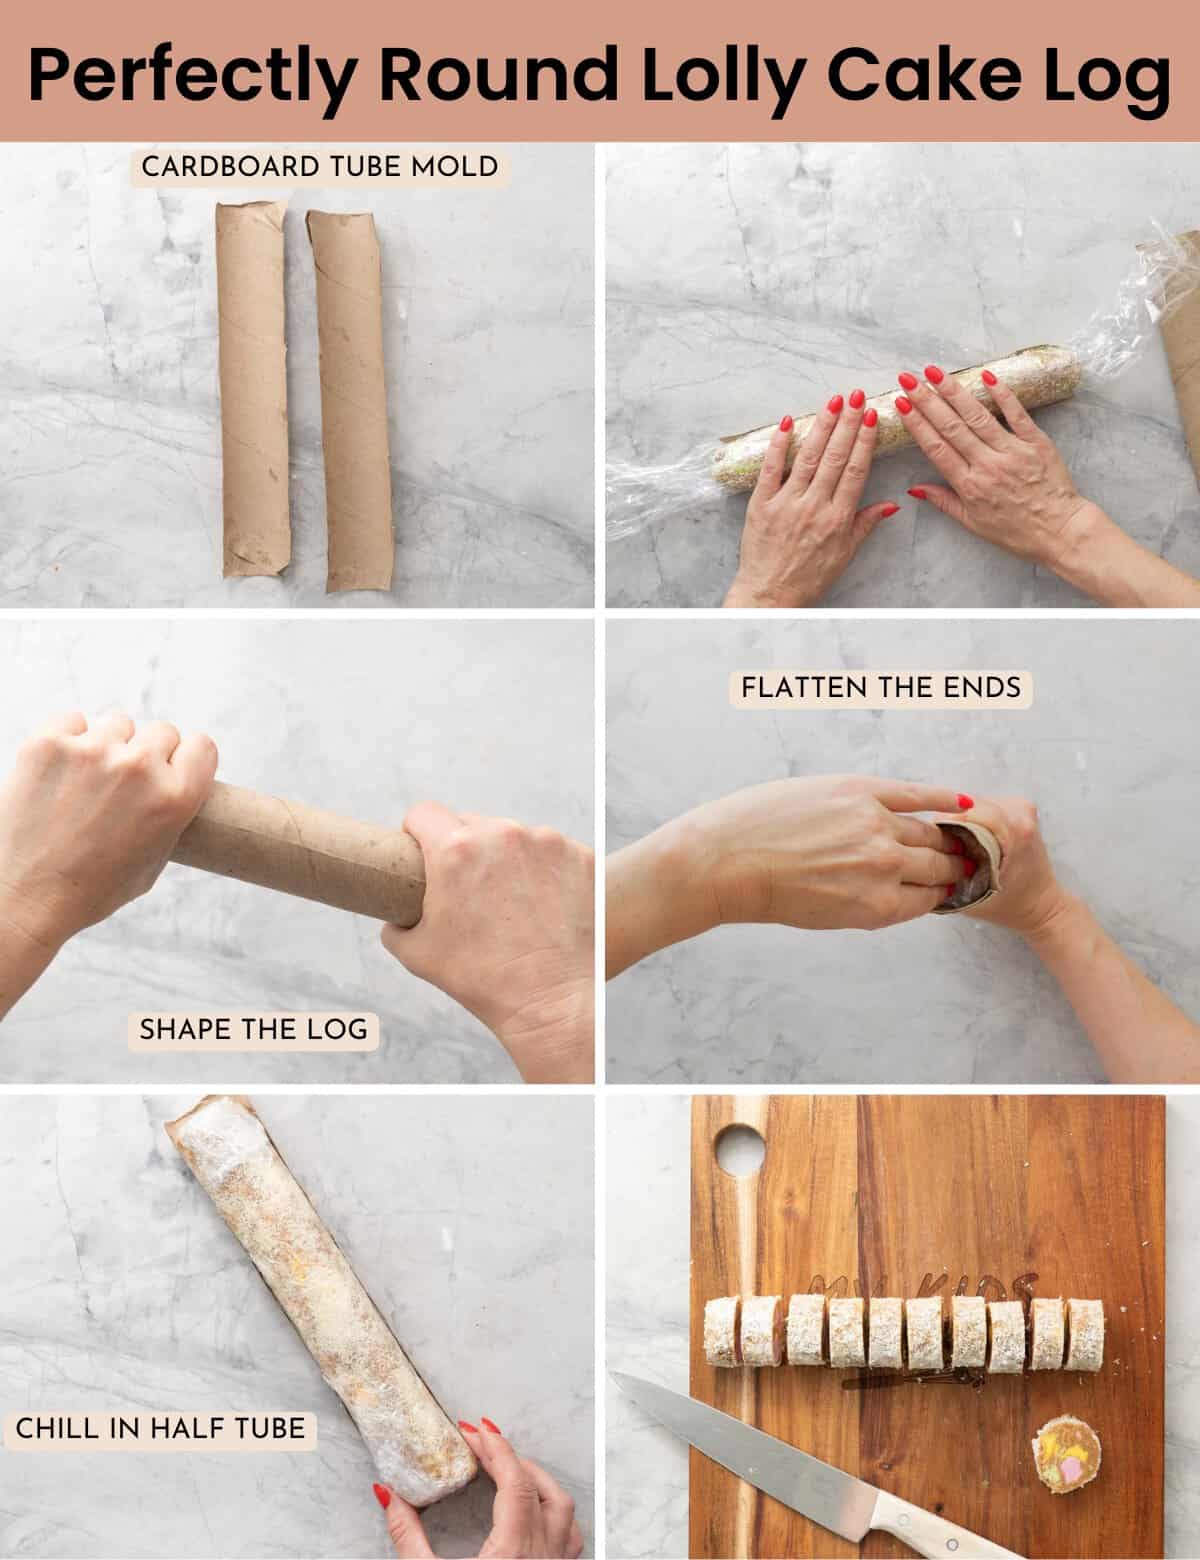
Want a perfectly round lolly cake log? Here’s a simple hack (you may have seen it in my Christmas Sprinkle Cookies) that makes shaping and chilling easy.
Prepare the mold: Take a sturdy cardboard tube (like from a paper towel roll) and cut it lengthwise so you have two halves.
Shape the log: Wrap your lolly cake log tightly in cling film, then place it inside one half of the tube. Squeeze the two halves of the tube together around the log—this will help it maintain a perfectly round shape.
Flatten the ends: Stand the tube upright on your counter and use your fingers to press the end of the lolly cake log down firmly. This helps compress and round out the shape.
Repeat for the second log.
Chill the logs: To keep them round while chilling, place each log in one half of the cardboard tube and transfer them to the fridge.
If you tried this Gluten Free Lolly Cake recipe please leave a star rating and let me know how you go in the comments below. I love hearing from you!

Gluten Free Lolly Cake
RATE THIS RECIPE
Save This Recipe!
Ingredients
- 125 grams GF arrowroot biscuits
- 125 grams GF ginger biscuits
- 150 grams Explorer lollies or Fruit Puffs
- 100 grams butter
- 2 Tablespoons brown sugar
- ½ cup sweetened condensed milk
- ¼ teaspoon salt
- ½ cup desiccated coconut
Instructions
- Crush the biscuits to a fine crumb.I do this in a food processor. If you don't have a food processor you can also place the bags bisuits in a clean bag and use a rolling pin to crush them.Chop the explorer lollies into one centimetre pieces.
- Place the butter and brown sugar in a large saucepan (a pot large enough to hod all of the lolly cake ingredients). Heat the butter and brown sugar over a medium heat until the butter and sugar are melted.
- Add the condensed milk to the melted butter and sugar mixture, continue to heat the mixture while stirring in the condensed milk, until you get a thick caramel.
- Remove from the heat, stir through the salt, biscuit crumbs and chopped explorer sweets. I leave then leave mix to cool down for a few minutes
- Split the lolly cake mixture into two equal portions, roll into two logs.
- Roll these two logs in desiccated coconut, then wrap tightly in cling film (glad wrap).
- Chill in the fridge until firm (at least 2 hours), then slice into 2 centimetre slices.
- Enjoy!
Notes
- Store your lolly cake in an airtight container the fridge.
- Gluten-Free Biscuits - For the best texture and flavor, I like using a mix of GF arrowroot biscuits and GF gingernuts in this recipe. Traditional lolly cake is made with malt biscuits, but since malt contains gluten, there’s no true gluten-free alternative. This combination gives the closest colour and flavor to the original.
- Lollies - I use Pascall Explorers because they’re gluten-free by ingredient, making them a great option for this recipe. Some fruit puffs are also gluten-free, but always check the label to be sure before using them.
- Brown Sugar Brown sugar adds a lovely caramel flavor to the lolly cake. If you’d rather skip caramelizing it with the condensed milk, you can swap the condensed milk for caramel condensed milk instead.
- Salt - After lots of testing (and plenty of taste-testing with my son!), we found that just a pinch of salt makes this recipe even better. But if you prefer, you can leave it out.
How to make perfectly round lolly cake logs
- Prepare the mold: Take a sturdy cardboard tube (like from a paper towel roll) and cut it lengthwise so you have two halves.
- Shape the log: Wrap your lolly cake log tightly in cling film, then place it inside one half of the tube. Squeeze the two halves of the tube together around the log—this will help it maintain a perfectly round shape.
- Flatten the ends: Stand the tube upright on your counter and use your fingers to press the end of the lolly cake log down firmly. This helps compress and round out the shape.
- Repeat for the second log.
- Chill the logs: To keep them round while chilling, place each log in one half of the cardboard tube and transfer them to the fridge.
Quick Start Guide To BLW
Baby led weaning doesn’t need to be complicated, grab my quick start guide to begin your little ones food journey.