Mint Melt Aways

Mint melt aways are the sweetest little melt-in-your-mouth cookies — soft, delicate, and naturally gluten free thanks to their simple cornflour (cornstarch) base. They’re lightly sweet, easy to make, and feel festive with a peppermint glaze… but truly, they’re lovely any time of the year.
Switch the peppermint for vanilla and you’ve got a soft, light, everyday melt-away biscuit perfect for kids, lunchboxes, or a quick homemade treat.

Why This Recipe
- Naturally gluten free – made with cornflour/cornstarch, no specialty flours or blends needed.
- Melt-in-your-mouth texture – delicate, soft, and light.
- Festive or everyday-friendly – peppermint for Christmas, vanilla for year-round.
- Kid-friendly to make and eat – no mixer needed and very simple dough.
- Quick to bake – only a few pantry staples and 15 minutes in the oven.
Ingredients You Will Need
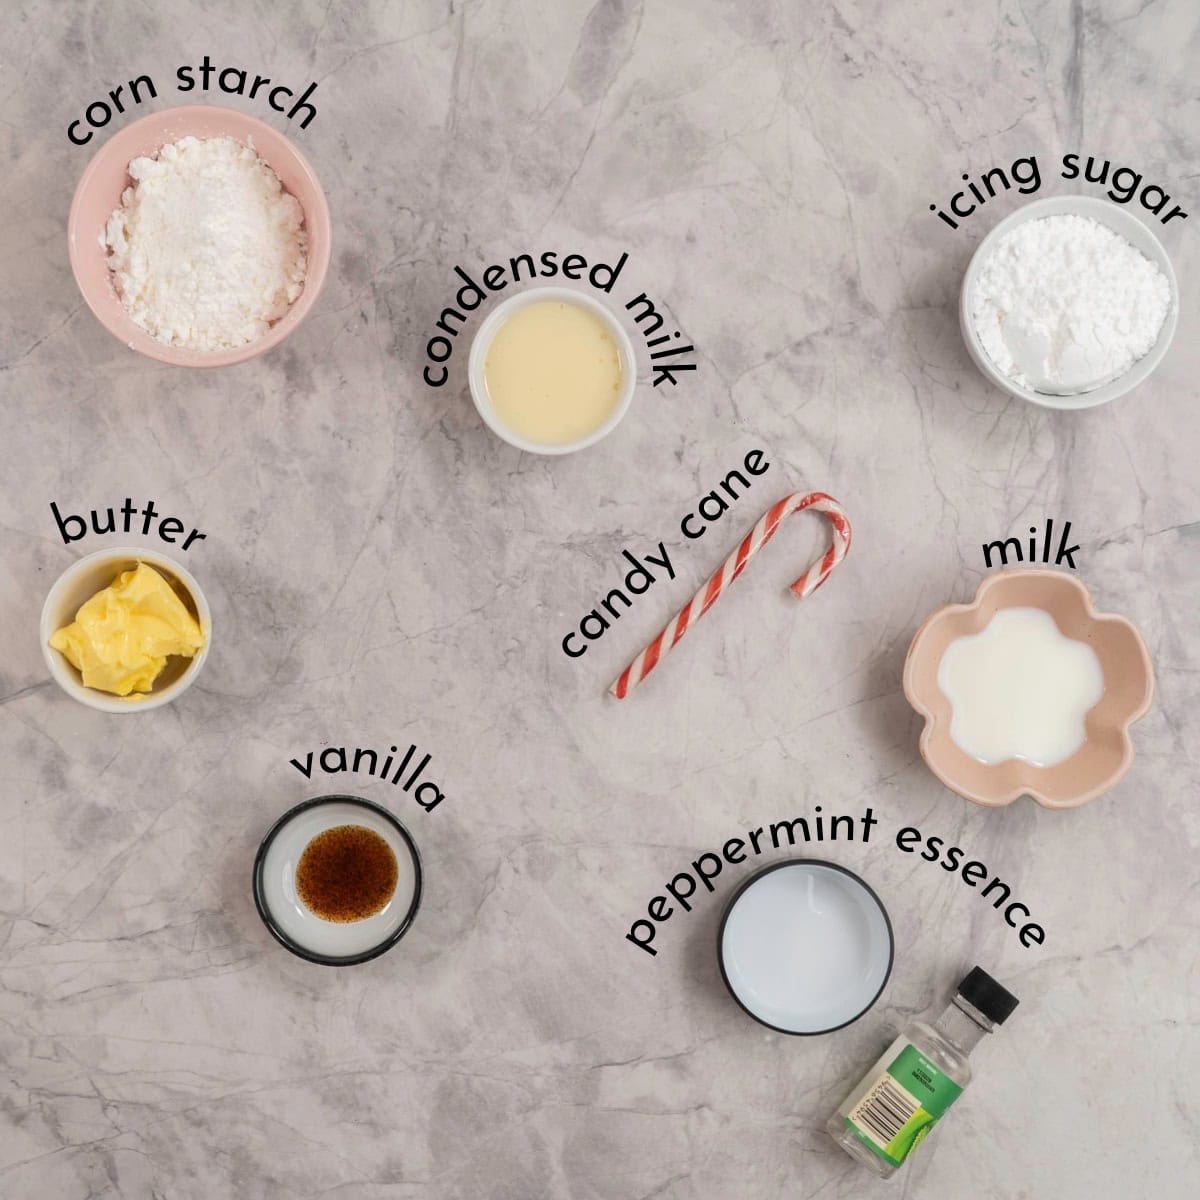
Ingredient Notes, Substitutes, & Allergy Swaps
- Cornflour / Cornstarch: This is the base of the cookie and what makes mint melt aways naturally gluten free (always check the cornflour you are using is labeled gluten free).
- NZ/Australia: labelled cornflour
- USA: labelled cornstarch
- No wheat-based ingredients are used in the cookie itself, which keeps the texture beautifully soft.
- Butter: Softened butter works best and helps give that smooth melt-away crumb. A fun fat margarine can be used.
- Sweetened Condensed milk: Adds gentle sweetness and keeps the dough tender. Coconut sweetened condensed milk is a dairy free alternative.
- Peppermint or vanilla extract: Use peppermint for the Christmas version, or vanilla for a lovely anytime cookie..
- Powdered sugar: Used for the glaze. It may also be labelled icing sugar (NZ/UK/Aus) or confectioners’ sugar (USA). All work exactly the same here.
- You can swap the milk in the glaze for a dairy-free alternative if needed.
- Candy cane: Optional, but very festive! Leave it off for younger toddlers or if you prefer a softer cookie without crunchy pieces.
Mint Melt Aways an Illustrated Step By Step Guide
Below are illustrated step-by-step instructions to make my mint melt away cookie recipe, if you prefer just the written instructions then head straight to the printable recipe card below.
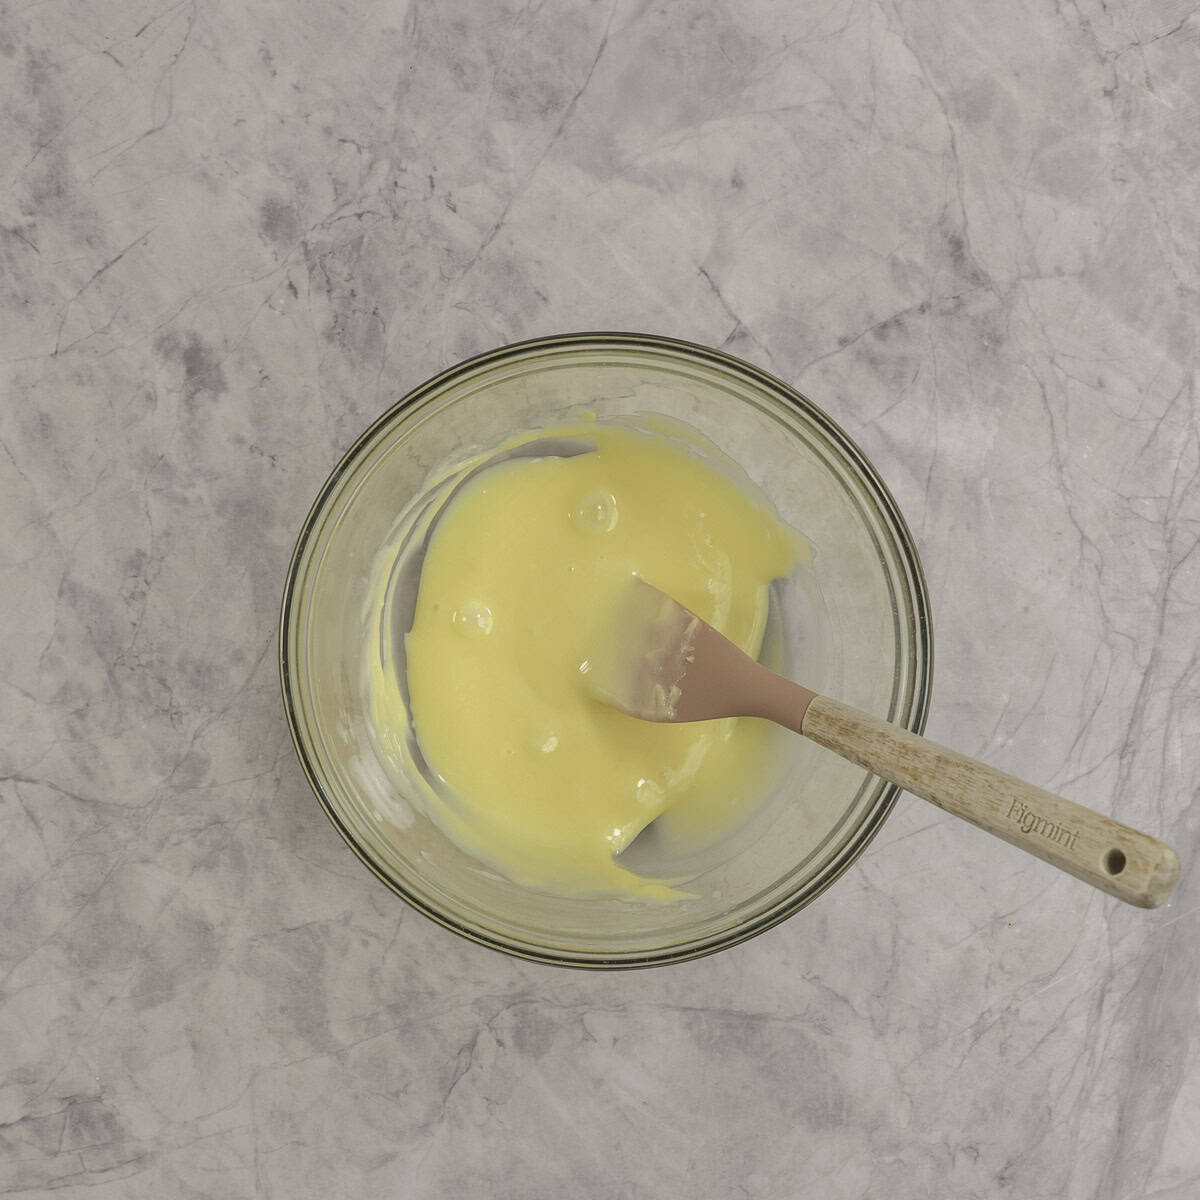
Step one: Start by adding your softened butter and condensed milk to a mixing bowl. Stir until the mixture is completely smooth and creamy — this is the base of our melt-away texture. Add your vanilla or peppermint extract now, depending on whether you’re making the Christmas version or the lovely all-year-round version.
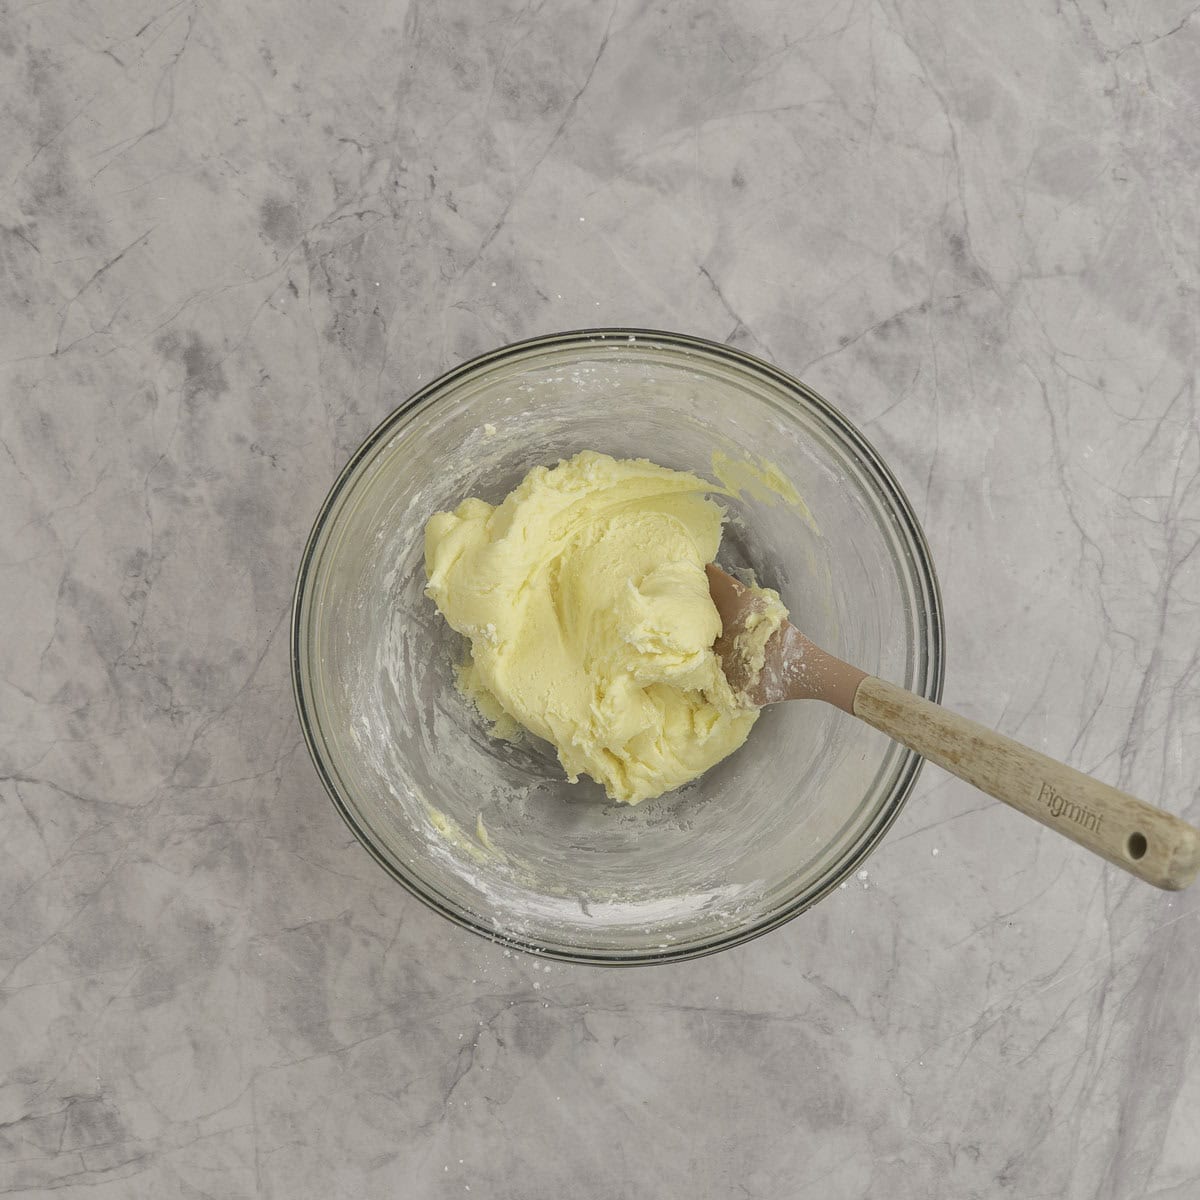
Step two: Tip in the cornflour and gently mix with a spatula. The dough should come together easily and feel soft and pillowy.
If it feels a little sticky, add just a touch more cornflour (1 tablespoon at a time). Too much will make the cookies dry, so go slowly.
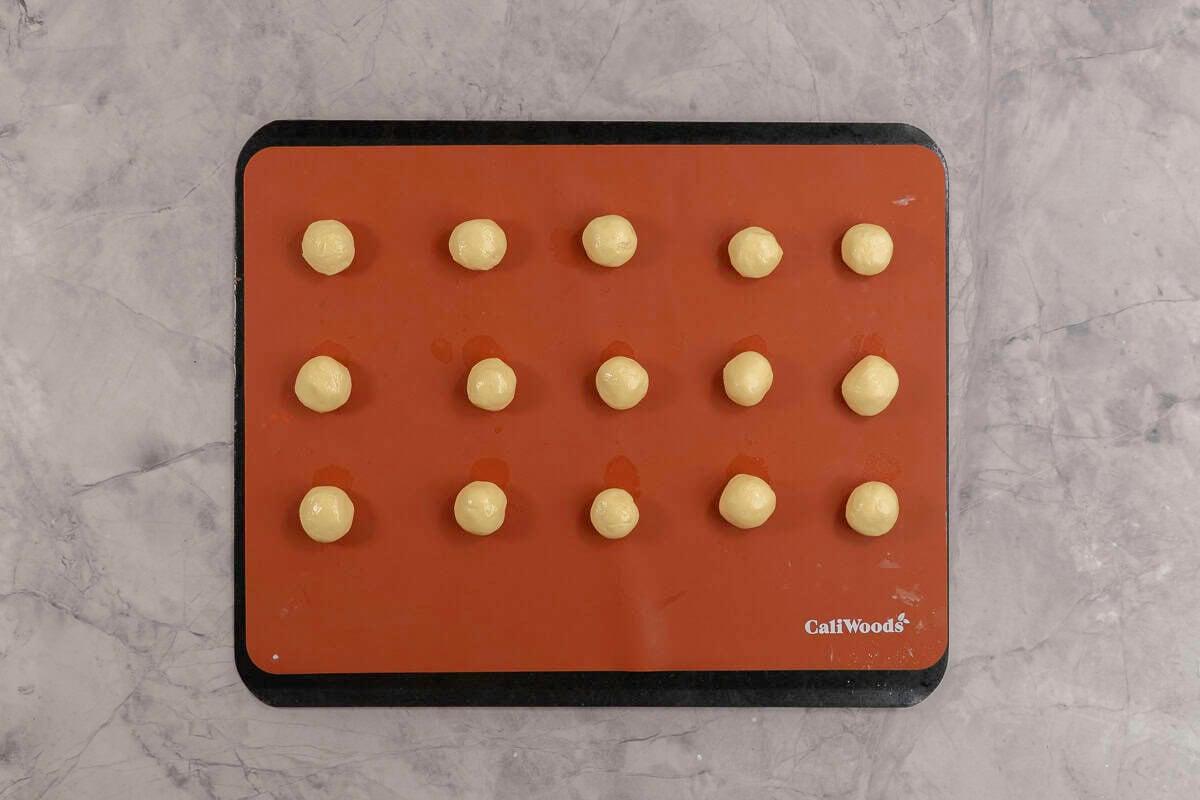
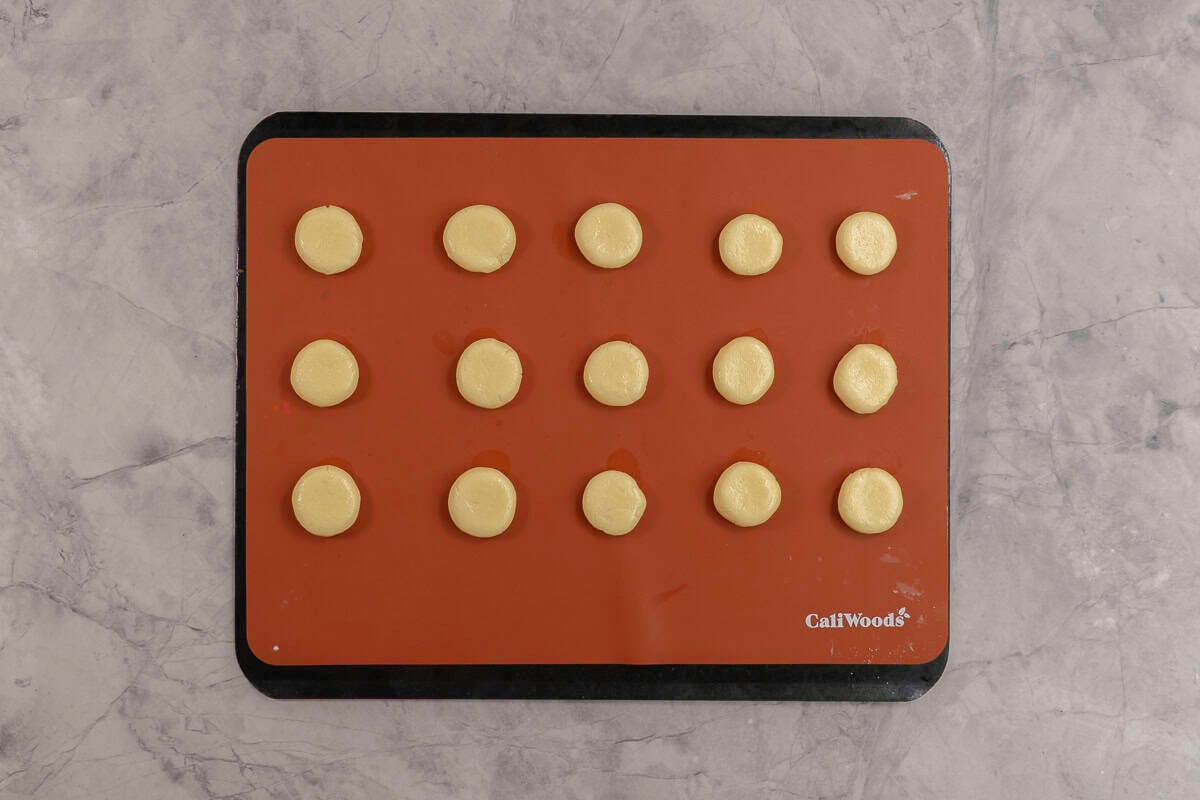
Step three: Scoop out small portions of dough — about ½ tablespoon each — and roll them into smooth little balls.
Place them on your lined baking tray, leaving a bit of space between each one. They won’t spread much, but they do puff slightly as they bake.
Step four: Press each dough ball very gently with the heel of your hand to make a thick little disc.
This shape is what gives mint melt aways their classic “soft bite” — they should stay quite chunky, not thin. Pale edges and a tender crumb are exactly what we want.
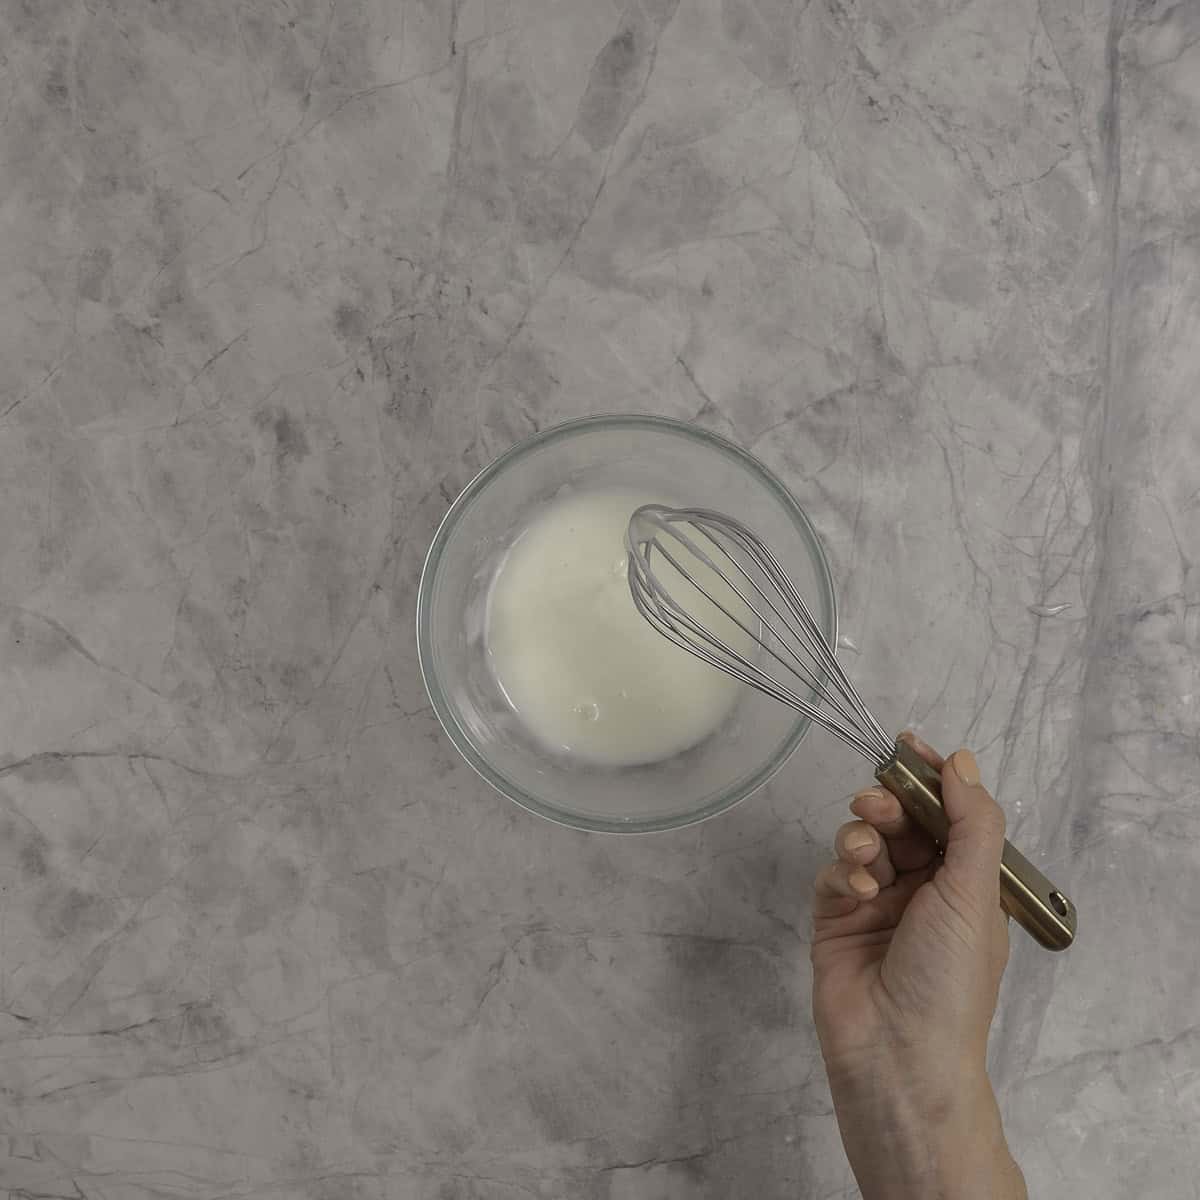
Step five: While the cookies cool, whisk together powdered sugar (also called icing sugar or confectioners’ sugar), milk, and peppermint extract.
You’re aiming for a smooth glaze that drips slowly from the whisk. Add tiny drops of milk until it’s just right
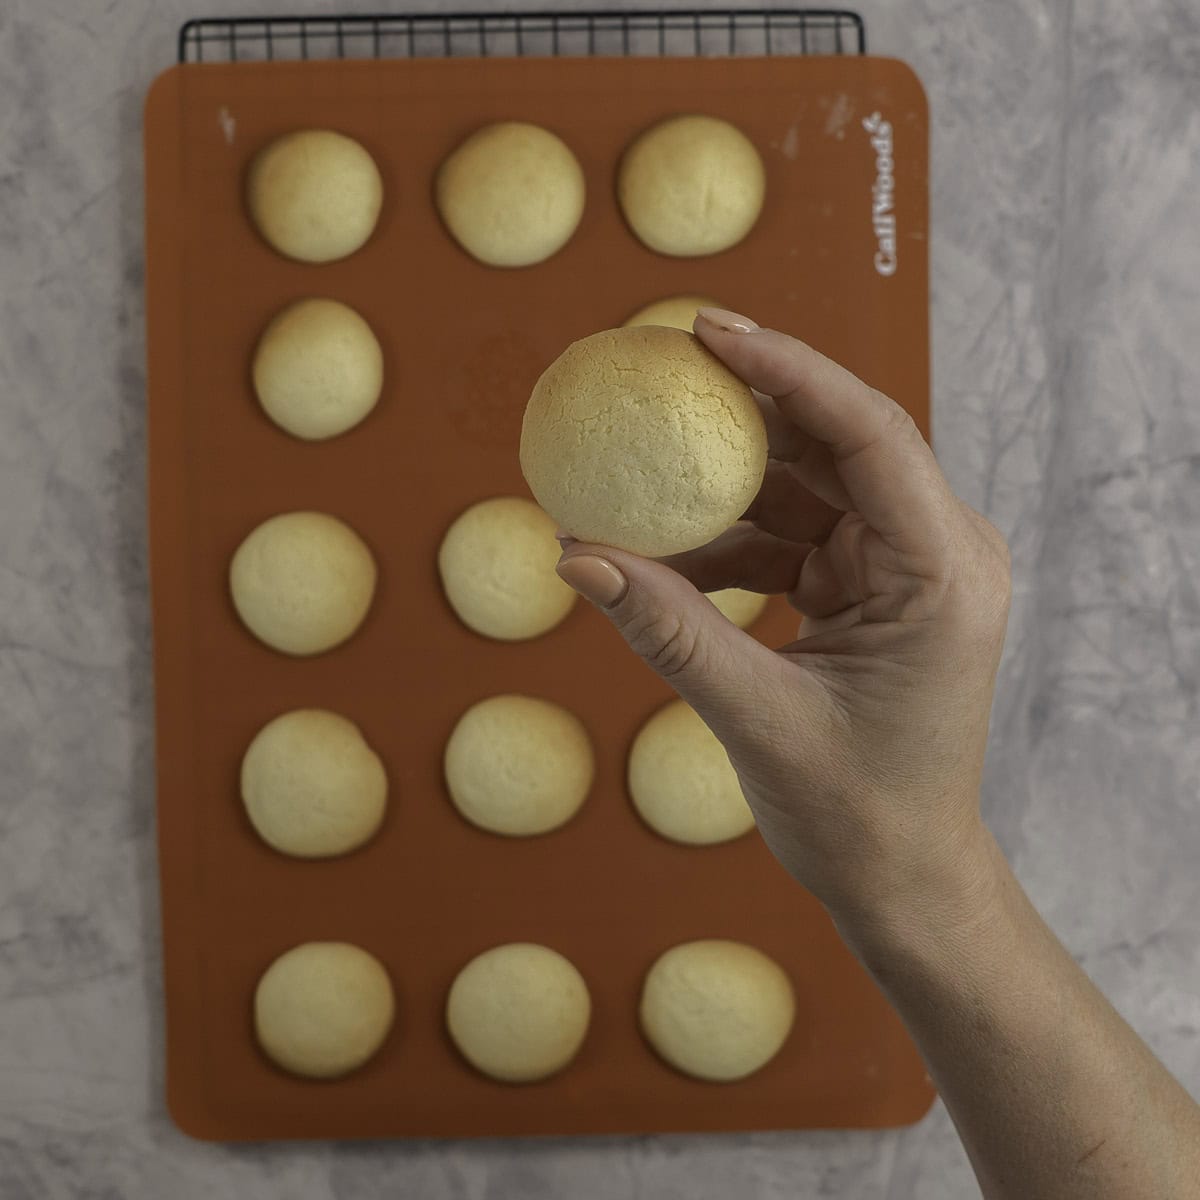
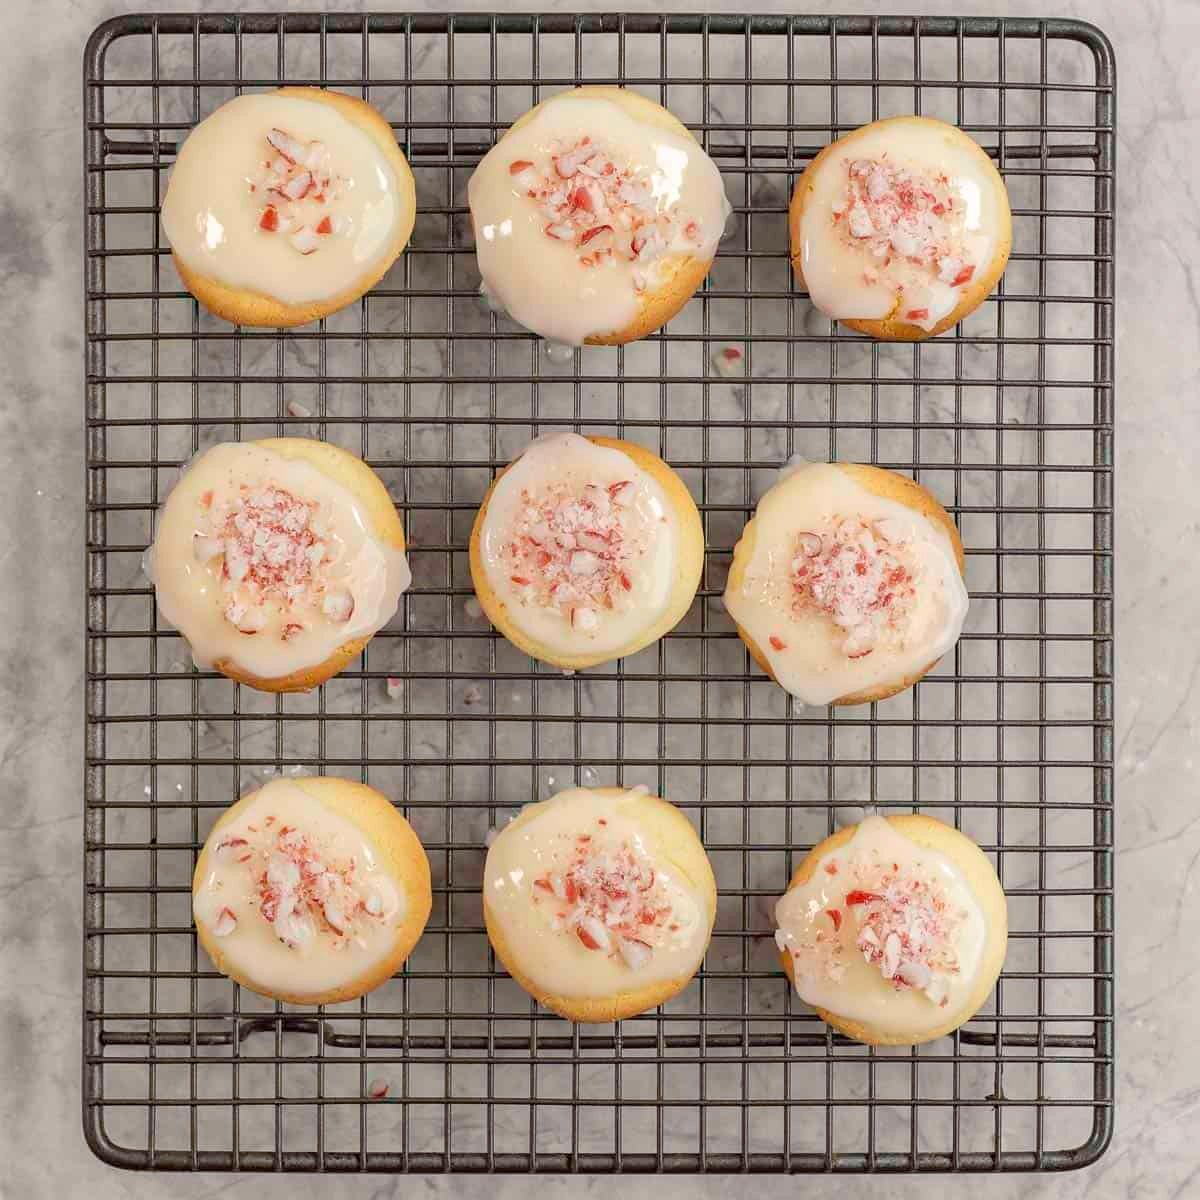
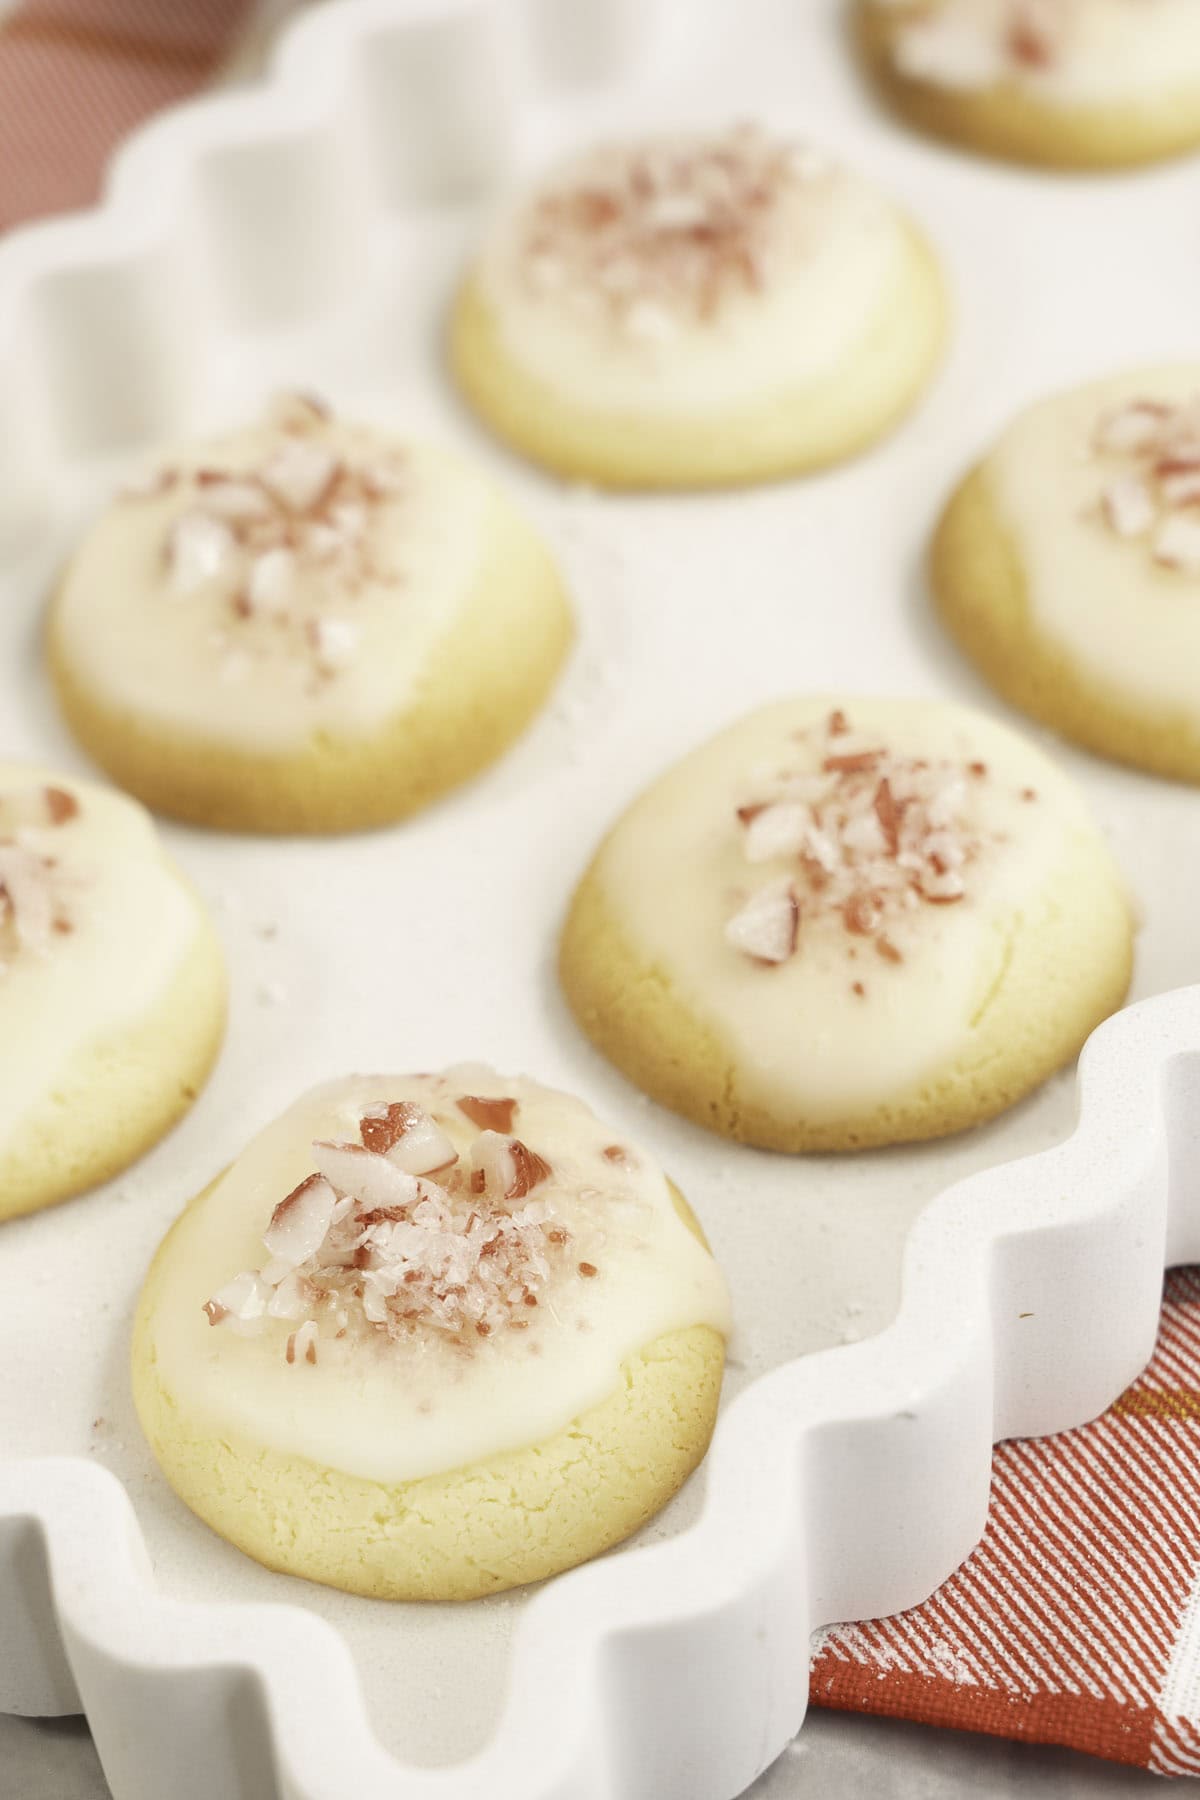
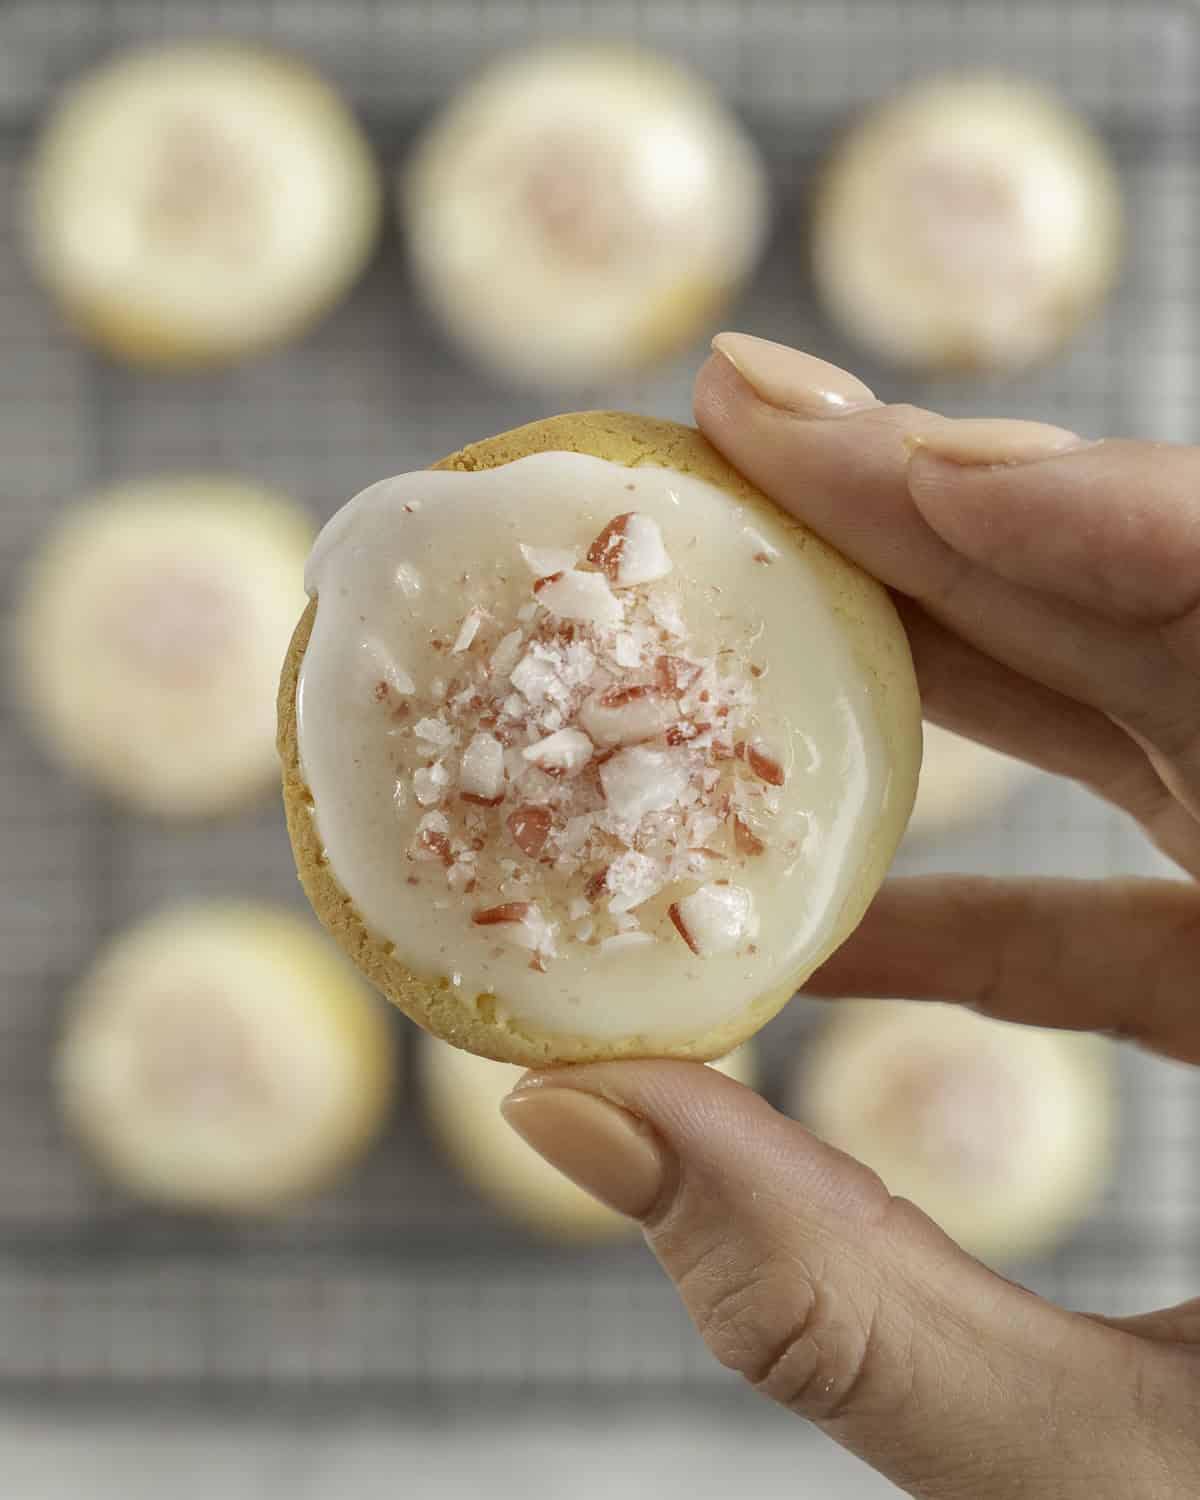
Step six: Once the cookies are completely cool, dip just the tops into the glaze and let the extra drip off.
Place them on a cooling rack and immediately sprinkle with crushed candy cane before the icing sets.
Let them dry for a few minutes, then they’re ready to enjoy — soft, delicate, and naturally gluten free.
Save This Recipe!
Step six: Once the cookies are completely cool, dip just the tops into the glaze and let the extra drip off.
Place them on a cooling rack and immediately sprinkle with crushed candy cane before the icing sets.
Let them dry for a few minutes, then they’re ready to enjoy — soft, delicate, and naturally gluten free.
Top Tips
Here is how you can make these mint melt aways perfectly every time!
- These are naturally gluten free — no need for special blends.
- If the dough feels sticky, add cornflour slowly to avoid creating a powdery texture.
- They should stay pale — they’ll dry out if you wait for browning.
- For an all-year version, use vanilla instead of peppermint and skip the candy cane.
- Cool fully before glazing — warm cookies will melt the glaze.
How to Make This Recipe Suitable For Baby Led Weaning
- The cookies are naturally soft and crumble easily.
- For babies and younger toddlers, skip the candy cane — hard, crunchy pieces can pose a choking risk.
- Offer the vanilla version without glaze for the softest texture.
- As always, they’re an occasional sweet treat in a broader family food pattern. I would not offer them to young children as a regular snack.

Mint Melt Aways
RATE THIS RECIPE
Save This Recipe!
Ingredients
Melt Away Cookies
- 3 Tablespoons butter
- 3 Tablspeoons condensed milk
- 0.67 cup corn starch two thirds cup corn flour
- ½ teaspoon vanilla extract
Mint Melt Aways
- ½ teaspoon peppermint extract
- ½ cup powdered sugar
- 2-3 teaspoon milk
- 1 candy cane
Instructions
Melt Away Cookies
- Preheat the oven to 350°F (177°C). Line a large baking tray with baking paper or a silicone mat.
- In a medium bowl, stir together the softened butter and condensed milk until the mixture is completely smooth. Add vanilla if using.
- Mix in the cornflour until a soft dough forms.If the dough feels sticky, add 1 tablespoon of extra cornflour at a time until it’s soft but not sticky.Avoid adding too much or your cookies may taste powdery.
- Scoop about ½ tablespoon of dough, roll into a small ball, and place on the prepared tray. Repeat with remaining dough, leaving at least 1 inch between cookies.
- Press each dough ball very lightly with your palm so it forms a thick little disc—about 7/16 inch thick. They will spread slightly while baking.
- Bake for 12–15 minutes, or until the edges are just lightly golden.
- Allow the cookies to cool on the tray. Dust with icing sugar if you like.
Mint Melt Aways
- Bake as per the instructions above, replacing the ½ teaspoon vanilla extract with ½ teaspoon peppermint extract.
- Glaze the cooled cookies
- In a small bowl, whisk together powdered sugar, milk, and peppermint extract until smooth.Add a tiny splash more milk if the glaze is too thick.
- Hold each cooled cookie upside down and dip the top into the glaze.Lift and let the excess drip off.Place cookies on a cooling rack so the bottoms stay dry.Immediately sprinkle with crushed candy cane.Let the glaze set before serving.
Notes
- These are naturally gluten free — no need for special blends.
- If the dough feels sticky, add cornflour slowly to avoid creating a powdery texture.
- They should stay pale — they’ll dry out if you wait for browning.
- For an all-year version, use vanilla instead of peppermint and skip the candy cane.
- Cool fully before glazing — warm cookies will melt the glaze.
- Cornflour / Cornstarch: This is the base of the cookie and what makes mint melt aways naturally gluten free (always check the cornflour you are using is labeled gluten free).
- NZ/Australia: labelled cornflour
- USA: labelled cornstarch
- No wheat-based ingredients are used in the cookie itself, which keeps the texture beautifully soft.
- Butter: Softened butter works best and helps give that smooth melt-away crumb. A fun fat margarine can be used.
- Sweetened Condensed milk: Adds gentle sweetness and keeps the dough tender. Coconut sweetened condensed milk is a dairy free alternative.
- Peppermint or vanilla extract: Use peppermint for the Christmas version, or vanilla for a lovely anytime cookie..
- Powdered sugar: Used for the glaze. It may also be labelled icing sugar (NZ/UK/Aus) or confectioners’ sugar (USA). All work exactly the same here.
- You can swap the milk in the glaze for a dairy-free alternative if needed.
- Candy cane: Optional, but very festive! Leave it off for younger toddlers or if you prefer a softer cookie without crunchy pieces.
Quick Start Guide To BLW
Baby led weaning doesn’t need to be complicated, grab my quick start guide to begin your little ones food journey.